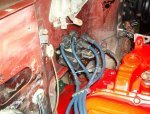
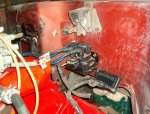
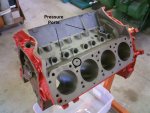
Limited disassembly of a 1980 IC 196

Assuming the break in oil is high zddp, add one qt of your favorite zddp bearing off the shelf oil to the other 5 and break her in...

I know you didn't ask but read on if you would like.
I would run the break in oil for 100 miles and change it out but swap in a new filter like a mobil one after 10 miles of firm driving.....
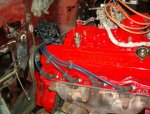
 
I did plan on a drain/fill after driving it a bit, so that's a plan. What I really thought of doing was after the twenty-minute break-in, or a bit after, pull the valve cover and verify that the pushrods are rotating to confirm cam lobe action. I know they can spin relatively fast, judging from short vids others have posted, but what amount of rotation would be minimally acceptable if they all didn't spin at the same rate? Any rotation at all?

I've already verified that my t-stat will open before a boil. I won't repeat that Mistake with a fresh engine.
 
New stock-ish exhaust system is installed. I was able to salvage the original 2 1/4" head pipe and plumbed the rest for 2 1/4" (and muffler), and a replacement walker tailpipe. Still available, huh. Man, those things have a lot of wrinkles in the bends! This system will serve for the initial fire up and break in. Then off it comes and plumb in the turbo piping. I digress. The point of this addition is that before I go further I needed to install the edis ignition coil pack and ignition driver. (look, ma, no distributor!!!) these items bolted nicely to the lip above the tunnel. Their location will make for easy wiring, access for servicing, and a relatively cool spot while running. I've done this before from the cut off weather pack plugs I salvaged. The longest wire to #1 spark plug is barely long enough, so I'll either have some custom wires made or head to pnp to grab one from a edis v8 donor, which uses very long wires. These secondary wires will be safely behind the original heat shield pads pictured earlier. Some wires from the ignition driver will feed into the interior where the megajolt will reside. I need to plumb a 1/8" nylon tube (like feeds those aftermarket oil gauges) from the manifold to the megajolt as this will need a map signal to account for running negative/positive manifold pressures.

Side note: this weekend I had my laptop stolen. On it was the megajolt program, as well as my only copies of ignition maps I used for my corvair corsa, which were very close to the baseline needed to construct an ignition map for the Scout. An unnecessary pain to reconstruct!
 

Attachments

  • IM002160.jpg
    IM002160.jpg
    94.7 KB · Views: 454
  • IM002161.jpg
    IM002161.jpg
    99.4 KB · Views: 432
  • IM002162.jpg
    IM002162.jpg
    98.3 KB · Views: 454
I'm now this close To the initial fire up! I'm trying to pre-oil it to the point where oil comes from the rocker shaft. I started at tcd #1, spun the oil pump 5-10 seconds, then moved another 5 degrees or so, went around twice. No evidence of oil coming onto the rear most boat rockers. I'm going to go round again. Surely that cam journal lined up enough - twice - to pass oil upwards. I am building great oil pressure, btw.

Anyone notice about what crank position lines up the oil passages for this?
 
Can't comment on crank/cam position to line up the holes, but there is probably only one port on the 196 that supplies oil pressure to the rockers. The pic shows what an sv8 would do, and since the heads will fit either side, it stands to reason your head would do this too.

If you have oil to the shaft, all of the rockers should be leaking during pre-oil procedures. If one or more seems dry, then it might be time to pull the rocker assembly and see how much oil is really coming up the port. If the cam is lined up right, you should see 50 psi or so blowing through there (use a rag!). During pre assembly, did you run a welding rod or coat hangar down that port to verify the cam bearing holes were lined up? Its not unheard of to have to run a long aircraft drill bit down the port to bring the cam hole up to spec. Mayben has pics of that procedure on here somewhere (sonja motor?).

Anyway, it might have been just a case of the cam being just barely lined up right. Some oil but not enough for a given angle. Have a friend run the drill while you slowly wrench the crank bolt until you see the fountain that should be there.

You might also check the rocker shaft itself to make sure the holes to offending rockers aren't plugged (you did pop the shaft plugs and brush out the crud, right?).

Let us know what you find!
 

Attachments

  • Oil pressure feeds.jpg
    Oil pressure feeds.jpg
    66.2 KB · Views: 511
I kept at it and finally got oil! From #1 tdc, position is roughly one complete revolution, then go an additional 180 to 200 degrees. It comes on after that point. Now I have a terrible mess as it appears I had sprung a leak in the oil filter adapter base gasket while spinning it up. Lost about a quart of oil all over the floor.
 
Nice! Good it was something simple. Also good you found your leak at the filter before you started the engine break-in. Stopping that procedure to fix an oil or coolant leak is never fun...
 
Well, if it was only that simple. I've confirmed that the leak is due to a casting defect in the block. Someone had "fixed" it with liquid metal or braze or something. Could have happened at the factory, even. The area bridges the lowest part of the adapter where the casting must apply sufficient pressure to prevent leakage. Being slightly recessed, that can't happen and oil now squirts out between the gasket and block. I never noticed this before as when I had the block tanked, some of the old gasket stubbornly remained and covered this up. I never noticed it when I scraped and cleaned it prior to reinstalling the adapter. Oh well. Try to build it up with jb weld and level it out.
 
well, if it was only that simple. I've confirmed that the leak is due to a casting defect in the block. Someone had "fixed" it with liquid metal or braze or something. Could have happened at the factory, even. The area bridges the lowest part of the adapter where the casting must apply sufficient pressure to prevent leakage. Being slightly recessed, that can't happen and oil now squirts out between the gasket and block. I never noticed this before as when I had the block tanked, some of the old gasket stubbornly remained and covered this up. I never noticed it when I scraped and cleaned it prior to reinstalling the adapter. Oh well. Try to build it up with jb weld and level it out.

Mark I have had to resort to casting repairs myself a time or two... I go after it one of two ways...
1) spot mig wend material back and file/grind flat...
2) brazing or silver solder a length of sold copper wire in place and file/grind flat...

Mig is safer and adds the least amount of total heat to get it done... My 409 had water pump flang corrosion on the block that left a v grove across the gasket surface and I used the small mig to build it back up... Couldn't even see it after dressing it out.

I know people who have tig brazed brass in the same circumstances with great sucess.
 
Robert,
I'll puzzle it out tomorrow. I'd need to remove whatever it is that's in there now. Looks like a light colored metal. Anyway, when I filled the engine with oil, put in six quarts and the dry oil filter. After spinning things up was slightly over filled (of course now I'm down about a quart!). Do I run this now with filter primed and oil level to normal line, or do I add an extra quart? I know there've been postings on the desirability of running an extra quart.

Now hoping to get this thing running by next weekend. I'm going to record some of that on my iphone. Isn't technology wonderful?
 
Circumstances being what they are, welding is out of the question, at least for now. I used jb weld and built up the depression (about 3/16" square area about 0.015" depressed, I guess. Enough for a leak), and filed it down flush. Filed flush the adaptor itself, it had slight warpage (duh). Yesterday bolted it all up and spun up the pump again. It had some seepage. So I wiped it all off. Tonight I spun it up again, and no seepage. Wonder if the high tack just needed to set and the gasket settle a bit.

Anyway, I now won't have an opportunity to fire this up until the first weekend next year. :icon_mrgreen:
 
Maybe today will be the day. But it's 25 degrees outside and my garage isn't heated. It's about as ready as it can be, I suppose. I have a small propane burner going under the large oil sump to warm it up, and hopefully the block, too.

Maybe in the next couple of hours I can get it fired.
 
Success!!!!!!!! :dita::dita::dita::dita::dita::dita:

it's alive! Pre-warmed the engine with a propane burner for about an hour. Had a few hiccups along the way. I pre-filled the carb, but the fuel pump wasn't "picking up", so I had three mis-fires, so to speak, where it ran for maybe 5-10 seconds, then died. Finally got it running, and never let the rpms get below 2,000, probably no less than 2,500, really. Or more. Revved it up and down, kept doing this for twenty minutes. Now I'm deaf. Burned off all the oil on the manifolding and stunk up the garage big time. My wife was watching but that just drove her out into the yard. The oil filter adapter began weeping but not enough to shut it down at that point! Deal with that later. Engine temps finally came up (this is a 3-row hd radiator and fan setup), oil pressure stayed past the half-way Mark on the gauge.

Now it settles down to a good idle, good response, and seems smooth. No backfiring or odd behavior. Tomorrow will warm it up again, put on the cut-out valve cover to verify the push rods are spinning, then button it up and do some tuning.
I took some video on my iphone, but don't know how to upload it so you can see it in action.
 
Robert,
warmed up the engine today, and then put the cut-out valve cover on it. While idling, I observed the pushrods. Put a black dot on them so I could tell if (and how fast) they are turning. Most turn slowly, but there's one that turns very, very slowly, but it is at least turning.

How slow is too slow? Thoughts on this?
 
So long as they turn all is well. Bad when they stop. Might take a look after a few hundred miles and see if they are still rotating.
 
Just need to hook up the rear driveshaft and I can actually drive this thing out of my garage, where it's been on jack stands for what - the better part of two years???? I know, you can't rush these things! ;) most of the front clip is still off, but everything's accessible till I work out the bugs.

So will the lobes "improve" with mileage or is whatever surface they have be what it is and provide (hopefully) the life I need from them? I know at idle that one turns extremely slowly, but I couldn't rev it up and look to see how much faster it would spin without having oil fly all over the place. I'll modify that cover again so I can zero in on what I need to see, and see how it goes with higher speeds.

Engine is actually real quiet, for an IH, that is. You have to put your head to the engine to actually hear any valve train sounds. No knocks from the lower end.
 
As the lobes break in and polish, the forces that induce the rotation will change. We all hope for the better but as things in life go, that is not always the case. Just verify that the rotation continues or gets faster after some miles.
I could tell on my 152 that when I initially ran the engine they rotated by the circular witness marks but later on they seemed to have stalled by the rather uniform witness Mark superimposed on the circular one. Think you can find my post from way back called odd lifter wear of something like that.
 
Still working on getting my iphone .mov clip in a form that is uploadable. It's 58 sec and I just discovered 106 megabytes :yikes:, so I think that's contributed to my problem in getting it uploaded!

Anyway...weather's been real cold (around freezing), but I have had opportunities to go outside and crank it up and run it until it warms up - just because! When I first fired it up I was running it from a jug of fresh fuel, and then quickly switched over to the tank line and drove it up the street and back. But yesterday I tried driving it out of my driveway, but with no luck. It kept dying when I'd give it gas and let out the clutch. Although it idles pretty good and revs up without problem or backfiring, I believe the problem is that the four gallons of gas in the tank is now almost two years old and stale (I guess adding sta-bile has its limits!) it stalls just like it did before I rebuilt the engine and tried running it with rotten gas (after pulling the tank and having it boiled out and coated, even that tired engine ran normally on fresh gasoline). Good news is that the shop that did the work added a drain nipple to the tank, so it's a matter of pulling the plug and draining out the old gas.

Oh. I pulled the oil filter adaptor and used an oem gasket I got from Jeff. I lightly wiped it with "the right stuff", then bolted it back on and waited a few hours. It no longer leaks. I think that the narrowness of the gasket, coupled with the relative high pressure loading when bolting it down, did the trick. Before I had a home made gasket cut out as wide as the contours of the casting's curves. I think the overall pressure on the gasket was lessened, allowing high pressure oil to sneak through.
 
Back
Top