1964 Travelall and 1967 Travelette All Wheel Drive's

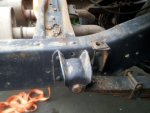
Got the new rear hub bearing races installed. Greased and installed the new roller bearings.
Hung the rear brakes along with a new spring kit.
Installed the rear drums set the bearing preload.
Bled the entire brake system.
Adjusted the brakes.
Fired it up and drove it to the local gas station and filled up one tank. I drove it around for about 15 minutes. Ran flawlessly. I'm super happy. Has fairly good power too.
I need to readjust the brakes and will probably re-bleed the brakes....
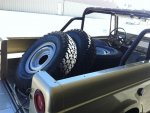
Other than installing the new correct bed and replacing the universal joints, replacing the belts and coolant and fixing a bug in the headlights it's a driver for a while.
Oh and I need a rear window, and along with that the front has a bit of fogging at the bottom so I May find a good replacement


I'll take some more Saturday when I go back to detail the job and look into the headlight deal.
Till then here is what I have..

DSCN0013 (Small).JPG

DSCN0016 (Small).JPG

DSCN0017 (Small).JPG

DSCN0019 (Small).JPG

DSCN0020 (Small).JPG

DSCN0022 (Small).JPG

DSCN0024 (Small).JPG
 
Ya, it has the optional load pack and aux. Spring.

Got the old girl out and put about 20 miles on her. Ran well. Developed an ignition miss at the end. The points look like the materhorn on one side. I knew about that when I got it so I bought a set of nos points and a nos condensor. Those go in today..
I also think I did not get all of the air otu ofthe clutch system after the drive and sitting while I greased it, the clutch would not fully disengage. Checked the master and the level had risen. I attributed that to the trapped air getting hot and expanding, pushing the fluid back to the master. I bled it a bunch more with my one man beeder and that seemed to fix that.

Chased the headlight nonop condition to the high/low beam switch. It was totally open in all positions. Took it apart and other than oxidation on the contacts it was perfect. So I cleaned it up and, walla we have headlights.

Her are a couple of photos of the beast and a couple ov videos of tooling around the airport and a drive out on the road. You can hear the thumping of the tire flat spots. Also me discovering the begining of the clutch problem. May even hear a few choice comments from the driver... :bag

1968 International travelette tooling around brackett airport

1968 travelette driving around

IMG_1090 (Medium).jpg

IMG_1091 (Medium).jpg

IMG_1092 (Medium).jpg
 
Last edited:
Installed the new points and condenser. All better! The points had been eaten up during the little I had driven it since I last looked at them. I measured the condenser and it charged very slowly and never went above 2 meg ohms on my dvom. That's a bad condenser. You should be able to view the charge time in a 20meg + range. Takes about 1-2 seconds then the meter should show ol or the same as if you had the test leads apart.
 
I have found the condensers are made in china and I have had a 50% failure rate. If the points seem to burn quickly, measure the voltage to the coil when the engine is running. Should not be 12 volts. More like 6.6ish?
 
I've found the same thing with the china condersers. I bought a nos standard ih121 and IH whatever set of points. The ignition voltage dropping wire/device is working well and delivering 7.5 v with the coil loading it (points closed). The original condenser was also a standard produced ih121 but it was failing and not charging properly.
 
Started the process of straightening the front bumper. Uuuhhhhggggg.
Now the only question is to chrome or not to chrome.
 
Last edited:
Robert, great t-ette. I picked up a 63 several months ago and put a decent amount of hours into it. It needed a fuel tank, fuel lines, fuel pump, rebuilt the carb, rebuilt radiator, water pump, brakes, new points and condenser. Also replaced the bed and had the seats reupholstered. It runs really well but it does not want to idle when warmed up. Still trying to figure that out plus a number of other things. I appreciate all the knowledge you share.
 
Thanks rob,
I think I got lucky with this one.. I have not had to many issues really. The brakes were the biggest fix so far.

I need to go pick up my new bed which is an 8 footer.

If we can help with your non hot idle situation let us know.. :yesnod:
 
So I had 2 vacuum advance issues on the t-ette. 1) the diaphragm was leaking. Easy enough to fix by ordering one from IHPA done! 2) the port on the metering block supplied no vacuum and with a mighty vac on it would hold vacuum forever. It appeared to have a blockage in the carburetor passages.

My plan on Saturday was to go fix the advance blockage issue. I get in the t-ette to swap it around ( back it in), start it and the clutch would not release. Fooky!! It never worked perfectly even after bleeding it to death but it worked.. So I roll under the trans and remove the inspection cover on the bottom of the bell housing and see the problem immediately. Some how the through out bearing collar had rotated and the actuator fork was out of it's grooves. After much fretting over the fix I figured that some one had disassembled the slave linkage and allowed the fork to swing back far enough for the collar to disengage. It must have turned and they put the slave back in. Amazing it worked at all. My fear initially was that the collar May have come out of place some time when the transmission was pulled and it would have to come out again..:mad5: luckily that was not the case. I was able to remove the slave cylinder and swing the fork back and re-engage the fork and collar... I installed a new slave, because I had it, bled it, and now it is perfect.. :winky:

on to the carb. It turns out the throttle body was not drilled just above the butterfly as it should be with a timed spark advance system. Got lucky again. I took the other 2300 apart, removing the throttle body from it that was drilled and swapped it on to the 2300 I had just removed. Should be ok now. Will need to wait until the new advance actuator comes in.. More fun for a post turkey day weekend

Sunday was not over yet. I have the new points and condenser for the t-all. Figured I would install them and see if it could run any better... The old girl lit right off and after a couple of minutes of high idle from some choke it idled right down smooth as glass... No ticking that I could hear above the exhaust leak. No smoke or blow by. It has a fuel leak at the inlet fitting. The bowl is stripped so it won't tighten. I was able to run it for 10 minutes or so until the leak became a liability not worth the fun I was having.. :slap it had a fair amount of heat in it by that time and I saw no coolant leaking. The coolant was still super clean and green.

So it looks like I have two running round body IH's now. I'll need to fix the brakes on the t-all to back her off of my trailer. Run up to Lancaster to pickup my new bed.. That should be very cool to get the right bed on the t-ette.
Stay tuned.
 
So had 1 hour on Thursday to install the new advance and test run the t-ette. Ran fine.
Put a timing light on it and slow idle the timing was at 8 degrees. Instant advance the moment you open the throttle. Looks like that is fixed..

Now to change the drive line oils and add more knuckle grease..
For those who have the closed knuckle axles you need nlgi 00 grease. I tracked down a relatively inexpensive source...
Many lawn and garden equipment gear boxes use the same grease and I tracked down a high quality repackaged 76 product.

It is sold under the stens name and recommended for snapper commercial mowers. It is a fully qualified ep nlgi 00 grease.
 
Drained and refilled the transmission. Removed 6 quarts and put six back in. Filled to the fill plug level.
Added 16 oz of the 00 grease to the knuckles. Drove around in all wheel drive with the hubs unlocked to distribute the grease to the ball and king pin bearings.
Set the idle and mixture. Rechecked the timing.
Ready for the Travelall to get on the road. Pulled
the carb to rebuild it. It's ugly but fixable. Then on to the brakes. I want it off my trailer and then it's going up for sale. I just don't need two round body IH trucks.
 
Needed to rearrange the crap in the hanger to make the t-all redo a bit easier.
The t-ette is now my tow rig so I thought these photos were appropriate. Kinda a familly reunion of sorts.
I drove the package around a bit and I'll say the low 1st gear is nice on the t34.

DSCN0051 (Medium).jpg

DSCN0052 (Medium).jpg
 
Re: 1964 Travel all and 1967 Travelette All Wheel Drive's

My new (to me) bed for my 1200c travelette was delivered last weekend. Now to recreate the mounting locations.
The middle front and middle rear appear to be where they should be. The front is a bit confusing. I measured some hole locations and the front bed pad needs to go almost exactly where the rear cab mount is..

The rear two (rear most not in photo) sit on the frame rail while the front two sit on brackets that sit just outboard of the frame rails.

I would like to see if any members with a travelette bonus load bed truck could take a few good pictures of the front bed/frame mounts. Only a 2 wheel drive could be bought with the long bed while the 4x4 was only available with the short bed. I presume the front short bed mount would be the same as the long bed so any photos would be appreciated.

A long bed standard cab would be good too from a mount location stand point.

Here is a photo or two of my bed. It's an 8 footer not 8 1/2. Mount width measurments added for ease of explaining the whole scoop. Also it's sitting front end down. Picture = 1000 words.

http://i1122.photobucket.com/albums/l536/ihhotrodnut/photo1dimensioned_zps3b96fe92.jpg
 

Attachments

  • photo 1 Dimensioned (Medium).JPG
    photo 1 Dimensioned (Medium).JPG
    53.1 KB · Views: 1,013
Last edited:
Re: 1964 Travel all and 1967 Travelette All Wheel Drive's

. . .
I would like to see if any members with a travelette bonus load bed truck could take a few good pictures of the front bed/frame mounts. Only a 2 wheel drive could be bought with the long bed while the 4x4 was only available with the short bed. I presume the front short bed mount would be the same as the long bed so any photos would be appreciated.

A long bed standard cab would be good too from a mount location stand point.
. . .
[/quote ]

would pictures of the bed mountings of a 62 travelette short bed be of any help ? if so, I could post a few pictures of the way my bed is attached . location measurements will be different, but the construction of the mounting brackets look the same on your bed and mine .
steve
 
Last edited:
Thanks guys for your help.

I have been given the photos that I needed.

I need the frame frame brackets. One in each side just behind the rear cab mount. Anf body have a pair or have a set they are willing to remove? I'll pay a reasonable price for a clean set.
 
Sounds like you have pictures but here is another. If you can't find them they are very easy to make out of angle iron and some plate:icon_up: I have a pair on my travelette chassis if you can't find any. Ryan
 

Attachments

  • 20130426_163138 (Small).jpg
    20130426_163138 (Small).jpg
    88.5 KB · Views: 890
Last edited:
Yeah making them did cross my mind but having the IH pieces would make me feel better about the deal.

Pm coming your way..
 
About 3 weeks ago I decided to recycle the original split rims. Just didn't want to spend the extra money buying new wheels.
Had the old tires removed, had the wheels sandblasted, primed them and shot them with paint. Black on the back, silver on the faces.
This weekend I went over to tucker tire and had new tires mounted. They use a remote service for the split rims. 100% hand deal.
Then balanced them. The tires are 255-85-16lt d load range.. 33.2 diameter.. Fit ok on the 5.5" rims..

Wow does the travelette drive nice now. I'm actually impressed by it's highway manors. 65 mph is 2600 70 is 2800. Good enough for me.
Found a nice set of oem hub caps which are on the way.
 

Attachments

  • photo 1 (Medium).JPG
    photo 1 (Medium).JPG
    73.2 KB · Views: 951
Back
Top