Torqueflite 727 Guapo

Thanks, I think I can handle the pressure tests and I have a couple of pressure gauges in the tool box. I will let you know what I find.
 
Ok I am back on this thread, I am still having transmission problems. I pulled my transfercase and tail shaft case off again and once again found a shaving of metal in the governor. This is the second piece I have found in the governor. There are no other pieces in the tail shaft case or in the fluid. The piece looks like aluminum foil. It is like something is getting sheered off. I see no signs of where in the governor asembly or on the governor valves. There is not any abnormal noise coming from the transmission. The piece I found is about the size the end of a pencil and is magnetic. Everything I have found in the tail shaft is aluminum so I must be coming from farther up in the transmission. I am in the process of pulling the transmission but am looking for possible ideas of what May be happening. As I said before the transmission has sat for a while but was rebuild only about 10,000 miles ago. Also while I have the transmission out is there anything that should be done? I was going to replace the rear main seal, is there any mods that should be done to the transmission?
 
The most common points for metallic "sluff" to come from is the planetary shell (steel) and the front and rear planetary carriers (aluminum).

Without a complete teardown and intimate inspection of all parts, including checking various endplay specs before tearing into each sub-assembly, it's impossible to determine where the debris is coming from. But my best guess is...the critical thrust/endplays are not setup correctly.

And before removing the pump assembly and going into the case, ya need to measure and record the input shaft endplay. All endplays must be noted and recorded.

Attached here is .pdf of a worksheet I developed years ago for use in building 727n trannys and documenting the process for customer reference. This worksheet has callouts for all critical inspection points and is used during the teardown phase to record data, and then referred to as the tranny goes back together so that proper endplays May be set using selective washers and rings where needed.

Over the long labor day weekend, scoutboy74 will be making a pilgrimage to binder u. Here for a 727 training session. We are going to bust six different 727 trannys (three variations) into small pieces to create a core parts supply for transmissions to be custom-built for ihon customer spec.

This process will be fully documented as to the teardown and inspection phases. Also tools needed for doing this type work will be described, along with a how-to for refreshing the various sub-assemblies.

We'll be using both the IH service references and the munroe book which I consider an essential tool for working on these slushboxes, much more so than the IH reference.

Our plan is to post the process as we go so that any issues we discover will be fresh and we'll do our best to simulate having all our members right here with us but staying clean.

There are many options to consider regarding "parts". However, any "master" kit which includes seals/gaskets/rings/etc. Will work just fine. Some of the seals in a typical 727 kit will not work in IH apps, in that case we'll describe the correct additional parts needed depending upon version.

The best modification that can be made for any version of the 727 is the installation of a transgo tf-2 shift reprogramming kit. That process I've described in another thread here in this sub-forum.
 

Attachments

  • TF 727 Worksheet, Sample.pdf
    27.9 KB · Views: 1,098
Last edited:
Thanks for the info and the work sheet both will come in handy. I will keep looking for the threads after the holliday for more information. Also I have heard different numbers about end play on the imput shaft, how much play should there be for and IH Scout II with a 304?
 
thanks for the info and the work sheet both will come in handy. I will keep looking for the threads after the holliday for more information. Also I have heard different numbers about end play on the imput shaft, how much play should there be for and IH Scout II with a 304?

Before teardown (right after removing the torque converter)...measure the input shaft endplay. The specification is a range from minimum 0.036" to a maximum of 0.084". That is the base number to record and use for your reference.

Ya really don't need a dial indicator to do this...push the input shaft all the way into the case...hard! Then clamp visegrips (lightly) to the input shaft with them tight against the end of the reaction shaft spline. Then pull out on the input shaft and measure the resulting gap with a feeler gauge. Do this two/three times to get a good "feel"!
 
Ok so I got the tranny out and I definatly have a problem. I started to check the shaft for end play and inspect the unit, when I moved the shaft it in and out it moved about a .25 of and inch, that is a heck of a lot more than it should. Now I am not sure it it matters I had the tail shaft case off. If I need to put it back on to take the messurment then that is easy enough to do. Anyway I pushed the shaft all the way in and then pulled it out, and the total movement was about 1/4 of an inch. I have not pulled the transmission apart yet but I am sure I am going to find the sorce of my metal shavings.
 
Ok I have a monroe book on order for rebuilding my tf727. I am guessing I am going to have to rebuild this transmission, does IH Parts America have a rebuild kit or is there one that you suggest. I see a lot with kevlar bands, and different color clutches(red) are these upgrades that should be made or can I go with a basic kit?
Do you have a rebuild kit that you suggest?
 
Ok, so I finaly have torn into the tf727 and started searching for the problem(where I am getting the shavings found in my governor) I got a manual that gives a pretty detailed description of the tear down process and was able to pull the guts out of the transmission with nothing to scarry happening. As I said before I was not able to mesure the end play on the shaft because it was greater than a dial gauge would messure, almost a 1/4 of an inch. During the teardown I did not find and metal shavings in the case or in any of the parts. I did however find scoring on the overrunning clutch and some scoring on the low and reverse drum. I have included pictures of what I am talking about. My best guess is this means I have too much play in the system and it is causing peaces of the over run clutch to shear off and travel back to my governor plug it up. Does this sound resonable? If this is the case I would imagine the clutches and bands are still good and can be used, the transmission only has about 5000 miles on it. For good messure I would replace the seals and call it good. However I am not an expert and according to my wife I am always wrong. So what do you think?
 

Attachments

  • Low and Reverse drum Scoring.pdf
    2.4 MB · Views: 926
  • Overrun clutch Scoring.pdf
    2.8 MB · Views: 857
  • Overrunning Clutch Bearings and Springs.pdf
    2.7 MB · Views: 815
Did you count the springs and rollers to make sure all are acounted for?
I'm only seeing 9 of each in the pic.

And I wouldn't recommend the kevelar bands on a stock tranny.
Take a look at the performance build section of the munroe book.

Something I do on mine is drill the small fluid hole from the return passage to the back of the overun clutch. It is shown in the book.

Have you verified all the thrust washers were installed in the proper positions as you disassembled it?
 
Last edited:
As bill said, ya need to account for twelve springs and twelve rollers!

Oem-grade frictions are just fine for these trannys. No kevlar stuff in 'em!!

You can use red eagle/kolene stuff if ya simply wanna brag about it, but no benefit vs. Cost.

The best $$$$ to spend is for a transgo tf-2 kit.

But...we gotta fix this tranny before dealing with that.

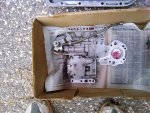
Since you have the munroe book, we're gonna use that for our primary reference. Look at page 22 and study that "repair" bearing used to salvage a damaged case. That is not the same part as a "bolt-in sprag", which is also a repair part, not really needed for a performance tranny build unless the overrunning clutch outer race spun in the case. However, if you note those threaded holes in the overrunning clutch, those tell me that race is a "bolt-in" repair part, but I don't see the ends of the bolts on the threaded holes unless you have removed them before ya took this pic. The bolts go through from the rear of the output shaft support. That indicates that a repair has been made in that area, and possibly the case was grunched at the same time but nothing was done about it.

That case should either be replaced or repaired with the aftermarket needle bearing set.

Then ya must verify all thrust washer thicknesses and that they were installed in the correct location and positions! See page 25 for information.

A quarter inch of input shaft endplay indicates catastrophic internal failure! Or...the tranny was not assembled properly with the correct thrust washers during the previous rebuild.

For reassembly, you will need a "soft parts" kit in order to obtains needed "o" rings, gaskets and some of the seals. I have no preference for those kits, I use whatever I can get from the supplier. Many of the parts in those kits will not be used in your unit, those are fitzalls that cover a wide range of trannys produced for all oem versions.

As long as the friction material is not stripped/flaking from the bands, there is no distortion or cracking of the rear band, no odor of "burnt" fluid on the frictions, no visible heat damage to the friction plates, then none of that stuff needs to be replaced.

However, now is the time to relocate the transmission and tailhousing vents if you anticipate using this rig in deeper water/mud, and snow/slush conditions.

And, ya definitely need top replace the pair of seals between the output shaft bearing and the output (bull) gear!!! Those seals are identical, thus two are required. And those will never be found in any tranny overhaul kit, those are specific to only the IH/Scout II married d20 application...same for the output shaft bearing, it's a "special" and the correct replacement bearing is available only from ihon.

So, ya need to spend much time in working through the thrust washers and determining where and why the excessive endplay came from! This kind of deal is not a "normal" condition that is found during tranny overhaul, it's an anomaly caused by something. And the result is the case is scruud!

The same thing is going on regarding the scoring of the thrust face of the clutch drum.

For sticking loose bearings, lubing seal rings and soft parts, is use "transemble" but any similar product will work, that stuff is soluble quickly in atf. Do not use any type of silicone grease, vaseline, or conventional bearing grease. Additional pre-lube is done using atf in a squirt can...all new frictions are soaked in atf overnight before installing....if re-installing used frictions, simply wipe 'em with atf.
 
Last edited:
Also john...please post the IH part number that is stamped on the pan rail of your tranny case. We need to verify which unit you have in order to avoid any mixup with non-interchangeable internal parts like I ran into last month with another customer's tranny/valve body.
 
the number on my tranny rail is 424706c2. I hope that makes sense to you.

I'm not finding any reference to that particular part number transmission assembly jon! Not shown in any of the Scout II service manuals or the parts list.

My reason for asking was so that we can make certain the correct parts are installed since your unit May have been pieced together at some time in the past.

Can you post a picture of the valve body from straight down from the top and the bottom?? We need to make sure the valve body you have is correct for the rest of the tranny! I'm not saying it's incorrect, but we just need to verify everything inside since we have the opportunity now to do it right! And once we get your rig playing nice, your wife will be impressed with your new skill set!

I have three Scout II t-407/tf 727 assemblies that will be taken down this weekend (two of 'em are virgins), they are all lined up in the shop now. Each will have it's assembly p/n recorded and all parts for each will be maintained separately until we've completely analyzed any differences, major or minor.
 
Yeah upon further inspection and using a few more brain cells I discovered I looked at the wrong number, the number we are looking for is 45187k3 m4423 0626. I hope this one makes more sence.
 
yeah upon further inspection and using a few more brain cells I discovered I looked at the wrong number, the number we are looking for is 45187k3 m4423 0626. I hope this one makes more sence.

Try one more time!

The number we need is stamped in the pan rail, just below the shift controls and the neutral safety switch.

The entire part number will consist of 6 numeric digits, then a letter designator, followed by 2 more numeric digits.

The p/n for this Scout II trans in the pic is seen as: 423979c91.

For the "early" Scout II units there are eight possible part numbers used. For the "late" "mid-'77>'80", there are nine possibilities.

The part number for a "service part" transmission shown in any parts list is just that...for a "service part" unit that was replaced in it's entirety at some point. The oem transmission part numbers are completely different as compared to the service part units as far as "numbers" go. There are many reasons for that, but none of the reasons are really important here so let's not get into those worthless details!

This same scenario holds true for pickalls

when using the IH oem service manual as a guide to these transmissions, ya must know the part number for the unit stamped on the rail. Then that leads you to the correct portion of the service manual in either the cts-2304 Scout II manual, or the later-published cts-2313.

The munroe book does discuss the variations in these units for all oem apps, but does not go into detail for the specific IH stuff. You simply have to "know" the differences and nuances and that only comes from many years of experience in dealing with these boxes and studying the many service references for each variation and using the correct parts list. This is not a quick and dirty/simple deal to work out and if the incorrect parts, specs, assembly sequences are used, the results are very irritating!!
 

Attachments

  • 727 Part Number Location 003.jpg
    727 Part Number Location 003.jpg
    87.6 KB · Views: 1,937
Ok strike three on the number, I took pictures but the numbers did not show up so I will have to resend them some other time. In the mean time here are the pics of the valve body. Thanks for the help.
 

Attachments

  • Jons Valve body.jpg
    Jons Valve body.jpg
    88.2 KB · Views: 1,599
  • Jons Valve body 2.jpg
    Jons Valve body 2.jpg
    126.9 KB · Views: 1,588
Re: Speedi Sleeve for output bearing spacer?

I've got an output bearing spacer (Scout II 4x4 727) that has some grooving where the twin opposing lip seals ride. Is there a speedi/reddi sleeve for this app?

And should one apply some type of sealer to the inner bore of the spacer to prevent atf *creep* along the output shaft?
 
Back
Top