The Sonjamotor Lives!

We can see the finish line.

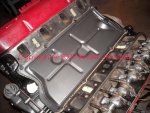
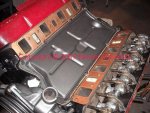
Here the lifter cover has been installed.

The gasket is stuck down with black 3m trim cement on both sides of the rubber/cork composite gasket.

3m was also used on the bolt threads. Even if the gasket actually seals on the really shitty machined block surfaces, oil will migrate past the bolt threads if they are not sealed.
 

Attachments

  • Lifter Cover Installed.jpg
    Lifter Cover Installed.jpg
    96.7 KB · Views: 941
Last edited:
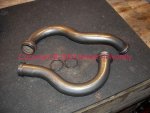
The water tubes have been sterilized inside and out.

The replacement "o" rings are included in a complete gasket set.

The seats for the water tubes in both the water pump housing and in the heads must be carefully cleaned and the sealing surfaces burnished to bright metal. Any foreign material will prevent the "o" ring from doing it's job.

Once the "o" rings are installed in the water tube grooves, I slather 'em with hylomar to insure positive sealing.
 

Attachments

  • Water Tubes and O Rings.jpg
    Water Tubes and O Rings.jpg
    93.6 KB · Views: 936
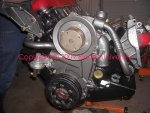
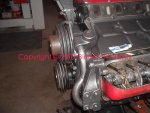
The water pump housing, water tubes, alternator/ac compressor mount, and the ps pump mount have been installed.

The paint work will be touched up once the engine is hung.
 

Attachments

  • Tubes and Mounts.jpg
    Tubes and Mounts.jpg
    98.8 KB · Views: 960
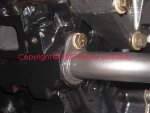
Don't forget to install and tighten the water tube retainers on each head (or in the block if your motor is an "improved cooling" unit).
 

Attachments

  • Water Tube Retainer.jpg
    Water Tube Retainer.jpg
    67.8 KB · Views: 948
Many of these engines will have an a.I.r. Pump mount incorporated into the ps pump mount. That means...in order to r&r a valve cover, ya gotta remove the ps pump and the entire mount. That suks!

So...if the a.I.r. Pump on yore motor somehow turned up mia, then whack tha dam ear of the mount with a sawzall. Then neatly grind it so it looks factory. Or better yet...call up Jeff and order a rpt power steering pump mount that makes valve cover work ez:

rpt power steering pump bracket for IH v8 w/o smog pump - International Scout parts
 

Attachments

  • AIR Pump Mount Cut Down.jpg
    AIR Pump Mount Cut Down.jpg
    85.6 KB · Views: 946
Last edited:
The shim-type intake manifold gaskets should be treated to three tacky coats of a "coppercoat" type gasket adhesive...either the spray version or the dauber-inna-can version.

After spraying the last coat (fifteen minutes flash time between coats), carefully position each gasket in place paying close attention to the callout stamped on each regarding which side goes toward the manifold.
 

Attachments

  • Intake Gaskets Coated.jpg
    Intake Gaskets Coated.jpg
    61.2 KB · Views: 940
Last edited:
Here's the intake gaskets in proper position.

These gaskets are the oem type for gasoline-fuel engines. The "lpg" (propane) fuel versions have the heat riser segments blocked. I prefer to use those intake gaskets in work I do on my own stuff.

The most recent release of the fel-pro full engine gasket sets (not conversion sets) have all gaskets included (except head gaskets) for both 266/304 and 345 engines. Make sure that you use the correct intake gaskets, valley cover gasket, etc. If building a 266/304. This little detail would really scruu with sailor jerry's haid.
 

Attachments

  • Intake Gaskets In Place.jpg
    Intake Gaskets In Place.jpg
    116.5 KB · Views: 941
Forgot to take a shot of the intake maneefol installed...trust me, that fookin' 58lb. Chunka iron is mounted.

And...for insurance, ya seal all the threads on the intake bolts with hylomar since some of the holes penetrate the intake port.
 
Folks are always wantin' ta know how to determine which sv engine they got.

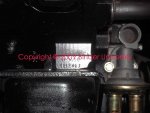
Here's a shot of the boss located just above the passenger side front engine support, and under the exhaust manifold.

This one shows 345e and then followed by the sequential engine serial number (not a vin!!!).
 

Attachments

  • Engine I.D. Boss.jpg
    Engine I.D. Boss.jpg
    71.8 KB · Views: 945
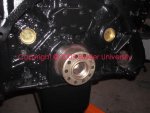
After drivin' in the rear core plugs, and then finalizing the position of the rear crank seal, it's time to mount the flex plate for the tf 727 slushbox.

First to go on is the clean hub spacer. It includes a large spring pin that engages a particular hole in the crank hub. This flex place/crank/harmonic balancer/internal reciprocating engine parts were balanced as a unit when the engine went down the transfer line at the factory. So the flex plate must be re-installed in the same orientation it was mounted when the engine was balanced.

An sv engine set up with a flywheel for a manual transmission does not use this crank spacer or the flex plate.
 

Attachments

  • Flex Plate Spacer.jpg
    Flex Plate Spacer.jpg
    71 KB · Views: 933
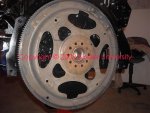
The flex plate is then mounted over the crank spacer, a slightly "offset" hole is provided in the flex plate hub that indexes with the spring pin to locate it in the proper position for balance. There is only one way all this can go together unless sailor jerry previously scruud the motor over by mounting the flex plate with a splittin' maul.

After the flex plate is carefully seated against the spacer, then the large retainer washer is slid into position.
 

Attachments

  • Flex Plate.jpg
    Flex Plate.jpg
    79 KB · Views: 1,034
Here's an often overlooked point...

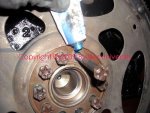
The threads on the flex plate (or flywheel) retaining bolts must be sealed with some sort of adhesive product (not loctite). The area behind the crankshaft hub is open to the crankcase. If the retaining bolt threads are not sealed, oil will pour out of the rear portion of the crankshaft just like ya left the crank seal out of the boss!

I use hylomar for this also.
 

Attachments

  • Sealing Flex Plate Bolts.jpg
    Sealing Flex Plate Bolts.jpg
    77.1 KB · Views: 1,043
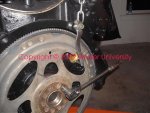
To torque the flex plate bolts, ya gotta lock down the crankshaft so it won't rotate. Here's one method. That is a shift lever from a vintage yamaha race scooter left over in my scooter trash pile.

Stick one end through the flex plate slot, then push a bolt (metric of course!) through the shifter boss and into a bellhousing bolt hole and torque away.

Leave that tool in place and go arount to the front end and complete the torque on the crankshaft bolt before ya forgit it!
 

Attachments

  • Flex Plate Holder.jpg
    Flex Plate Holder.jpg
    85.6 KB · Views: 1,010
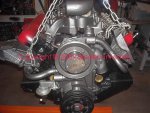
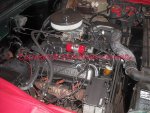
Here's the final product...hung beef. Including a fresh pcv and connecting hose.

All the touchup on the paint work has been completed.

Tomorrow we'll install the starter (and paint), alternator, and stab the distributor. Then mount the carb and fuel pump plumbing. Once the motor is stuck in the hole and running, we'll verify oiling again and then install the fresh valve covers.

Hopefully tha bitch will be a driver tomorrow nite!
 

Attachments

  • Hung Beef.jpg
    Hung Beef.jpg
    97 KB · Views: 998
You think jerry ain't got feelers? The sumbitch knows when hez bein' talked down at! Nice work on that albatross, yawl. I rekon once that beast maintains combustion an' ya verify that all the slipry stuff iz goin' awhere its supposed tuh go in the proper volume, there'll be sum hi-steppin' and skallywaggin' agoin' on in that shop! Bust out the blowin' jugs, washboard, clackity spoons, and the git-fiddle cuz it's time fer a hoe-down, binder university style!:thumbsup:
 
you think jerry ain't got feelers? The sumbitch knows when hez bein' talked down at! Nice work on that albatross, yawl. I rekon once that beast maintains combustion an' ya verify that all the slipry stuff iz goin' awhere its supposed tuh go in the proper volume, there'll be sum hi-steppin' and skallywaggin' agoin' on in that shop! Bust out the blowin' jugs, washboard, clackity spoons, and the git-fiddle cuz it's time fer a hoe-down, binder university style!:thumbsup:

Jerry's got the heart of harry reid and the brain of john edwards...he fits right in 'cause he kin make ya feel good aboutcha self while sukkin' the life out of ya!!! But that's jerry...at least when ya git wore out from his bullshit, ya kin make him go away....not so with them scruuwads in washington.

The hoedown cranked up when we hung tha meat from the hook last nite, the pardee won't end until sonja's draggin' her azz up the hill by the barn!
 
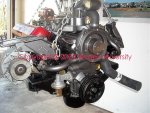
One more shot of the assembled unit in preparation for dropping in.
 

Attachments

  • Prepped for the Hole.jpg
    Prepped for the Hole.jpg
    111.2 KB · Views: 981
We're a few days behind schedule now due to other work that had to be done by both bill and I.

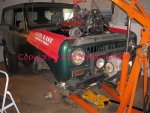
Due to the spring-over and tire size, the engine hoist is maxed out in trying to take the motor over the core support. It's way too much trouble to remove the winch and bumper assembly and core support to provide additional clearance so the oil pan does not have to be removed.

So the front wheel/tire combo came off and the ride was dropped onto the drums. That was exactly what we needed to make the drop.

Once the engine was part-way down into the bay, the wheels were re-mounted to level the rig and the jack placed under the tranny to move it up into position.
 

Attachments

  • Up and Over.jpg
    Up and Over.jpg
    94.5 KB · Views: 995
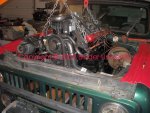
After re-mounting the front wheels, that positioned everything perfectly. Then it's a straight shot down with an added rearward tilt to the motor to mate with the trans.

Having the engine dressed as much as possible sure beats hell out of bolting on all the peripheral schnizz hanging over the fenders.

I connected most of the umbilicals last nite, reworked the carb and kickdown linkage somewhat, and buckled up the torque converter.

Work won't commence until this afternoon to complete the bitch and fire her off. But she will take bill and sonja home tonite!
 

Attachments

  • Going Down.jpg
    Going Down.jpg
    88.1 KB · Views: 969
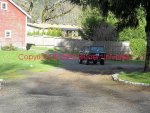
So the bitch is out on the parkin' lot and this part of the story is toast!

Sum dumazz tried to shortcut the distributor stab the other day and made a wrong decision, so when we went to lite the motor...guess what?

After fixxin' that scruup, since the lifters weren't pumped, valve timing went to hail...so gettin' her fired off took a bit of doin'. Also we ended up havin' ta rig the electric fuel pump in order to prime the mechanical fuel pump since she'd been dry for so long.

Once she lit off, thangs settled down real quick and oil pressure cold is 64 at 2000rpm. Twenty minutes at 2000 gits the lifters goin' real good, then it's back to a preliminary idle setting....with a somewhat erratic lifter clack on the driver side. Currently hot idle oil pressure is 24, with a hot pressure of 58 at 2500rpm.

Now that I got about two hours run time on the motor in the shop, the lifter noise has subsided, though I did replace two pushrods that appeared to be "short".

I'm now convinced that the lifters that were near new at the time I tore the motor down are the wrong items to have been used. Robert and I jawwed about this extensively again yesterday and we keep discovering more anomalies about this whole lifter deal.

I scruud up and neglected to visually verify the construction of each of the lifters before installing, just cleaned the peripheral and stuck in the hole...really stoopid mistake on my part.

So...once sonja gits some runtime on the motor, I'm gonna pop the lifters and install one last set of new johnson lifters with the proper base crown, I don't trust what we got right now. Here's an analysis from the wayback machine:

http://www.forums.IHPartsAmerica.com/gas-engine-tech/965-odd-lifter-wear-pattern-152-a.html

I built the carb a few days ago but found it to very over-jetted (#72h!!!!!) with a bum power valve and a accel pump cam that is way too big for this app, the jets were corrected to "normal" in prep for dial-in. Now that the rig can be driven, the whole carb/ignition dial-in will have to be done from scratch, even though the msd 6a cd box is functional, the distributor still is runnin' points and those need to go away when the price of aygs goes back up. And the 10si alternator has a bad case of extreme bearing noise so a swap is also on the list. In fact, bill is planning a total refresh of the engine-bay electrical mess.

The tranny played real nice after a long vacation, no issues there. The oem brakes are very marginal, drums combined with a pancake booster don't work worth shit with the big tires!

So this phase is a wrap...bitch needs about 500 miles drivetime and then the oil dumped for the good stuff after one more lifter replacement. Gonna be real nice to see her azzend headed up the driveway hill after four years...and not onna rollback!

 

Attachments

  • Ready To Go.jpg
    Ready To Go.jpg
    116.5 KB · Views: 943
flash/update!!!

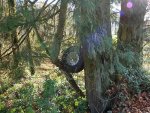
Yawl didn't know that this kinda fruit grows on cedar trees up in this kuntry huh??? But only when them cedars are raised up in tha bar ditch.
 

Attachments

  • Cedar Fruit.jpg
    Cedar Fruit.jpg
    161.2 KB · Views: 905
Back
Top