Scoutaholic

superc_1

Member
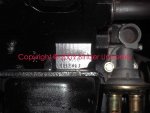
First; I'm a scoutaholic, and long time lurker til I could find myself a project. I got a 1976 terra 4x4 this weekend and it is a rust bucket:icon_sad: . Everythings there so thats good. My aunt years ago taught me how to drive on the farm in a Scout and I finally moved up the ladder and got one. Heres my first in a long line of questions to you pros. How can I figure out what motor I have besides the flat spot by the fuel pump? I've looked and cleaned and I don't see a number anywhere on that flat spot? I believe the dissy is a 1530- gold box from the pictures I've seen, and I hope maybe that might tell you pro's anything. Any help be great. Also; great site lots of info.
Thanks
cheers and later

ps is the tub different between a terra half cab and a traveller tub besides the bulkhead?

Pictures to come!!
 
What carb does it have? If 2bbl, that doesn't help the id process, but if 4bbl of any kind, it is likely a 345. There is also the slim possibility that a po could have swapped in a 392. That would be a nice Christmas present indeed, but I don't want to get your hopes up too much there. There is also a way to tell by measuring the distance from side to side beteen the cylinder heads, but I don't know what the specs are.
Terra/traveler tubs are identical.
 
Thanks Scout boy74. The terra has a/c and I was wondering if the number was behind the bracket there anywhere? It has a 2-barrell Holley carb and number on the carb is 7309a/465663-c91/3245?

Next q? Is there anydifference in the wiring of a 76 vs 79 Scout traveller when I go to swap out the tubs?
 
The only placed it's stamped that I've ever heard of is down near the fuel pump. Very difficult to see it in the vehicle. One thing that might help is to slap some silly putty against the surface to make a reverse impression that you can then easily dee-syfur. Yes, I believe there were some subtle wiring differences between those model years.
 
I just looked over on sss site and I'm thinking I'm not looking far enough down on the block for the motor size number? There picture looks a little out of porporsion. I'm looking right under the exhaust manifold were there is a flat spot? It looks like theres maybe a flat spot on down right above the motor mount area? I'll clean the grime off of that and see what I can see. Thanks for the help!
 
It is right at the "front" of the block / engine (radiator) / "below" the head / "deck height" -- "underneath" the altenator / ac compressor.

If you search / look on this site - pictures have been posted -- but, it is a lot easier to read if the altenator is not there.

And, as stated some of them are not stamped very deeply.

The serial number of the engine is also stamped on the same flat "piece" of casting.
 
This is a shot of the sv engine identification boss. On a Scout II look just above the passenger side engine mount, to the left of the fuel pump.

With the a/c compressor bracket in place, you will most likely need to use a mirror and inspection light.

Regarding the Scout II platform...after the '74 version, the wiring systems evolved in several stage to accommodate the ever-changing emissions equipment scenario. And that of course involves "49 state" vs. The "California" versions also which further confuse the issue.

There are many wire runs in any vehicle harness that are not used on a particular vehicle...that was totally dependent upon how the actual vehicle was spec'd by the dealer placing the order. IH did not build "pool" vehicles for inclusion in hundreds/thousands of "inventory" vehicles in staged distribution points around the country (or the world for that matter). Thus...they are not "all the same" as chryfordrolets, each was built to a dealer order spec...that is (and still is) typical of the truck industry and ihc was a truck production operation.

If you will spend time in both our ignition and electrical sub-forums you will find many references to wiring differences, and not limited to just the Scout II platform.
 

Attachments

  • SV Engine ID.jpg
    SV Engine ID.jpg
    71.8 KB · Views: 624
Last edited:
Mm
thanks for the picture! I can see I'm not looking far enough down. The flat spot I'm looking at must be were they machined the head were the manifold mates to the head.

Small update on project: I've changed oil but not the filter (its welded on so I need a bigger wrench), cleaned the motor bay of all the rats nest, clean interior of rats nest, sprayed alot of wd/pb blaster on everything trying not brake nobs and things, and most have read alot of ihon before I try to start the the motor for the first time in ten years of sitting. I got to pull the gas tank so I can clean it out, and need to rebuild carb. I think if its been sitting for ten years all of it is turned to varnish. ? he said it had a full tank when he parked it ten years ago and I'm wondering if this is a good thing ? thanks for all the help so far ! cheers
I know I'm:crazy:
 
Michael mayben has a writeup on bringing IH engines "back from the dead" (sat a long time like yours), but I cannot find it. I am sure he will post it.

It includes removing the distributor and using a drill to turn the oil pump to insure oil gets to the rockers on both heads before trying to start it.

I would replace the oil filter before trying to start it -- May have to clean up the surface of the oil filter adapter before putting a new one on if pieces of the old gasket is stuck to the metal.

You could use a length of rubber hose / "something a little flexible" as a "dipstick" to find out how much liquid is left in your gas tank.

When finally ready to start the engine, you could disconnect the fuel line at the fuel pump and run a hose into a 5 gal "jerry" can to avoid using the gas tank.

Yes, the carb needs to be reuilt -- maybe replaced if it has too much corrosion inside.
 
I was hoping there was a write-up some were. I did a search but had no luck. I've a temp. Gas tank I use on my International tractors I have and I'll use that. Thanks for the help and suggestions.
 
The engine I.d. Boss is on the block...below the cylinder head parting line.

Information regarding bringing one of these engines to life after an extended shutdown is here, you can download and print the document regarding how to do this:

http://www.forums.IHPartsAmerica.co...I-4-sv-engine-non-oiling-rocker-assembly.html

The "varnished" fuel system is simply one more part of this scenario. I deal with this nearly every day in some form or another while doing carburetor reconditioning. The auxiliary fuel supply system I use is probably something like you describe that you use also:

http://www.forums.IHPartsAmerica.com/tool-talk/515-deadawg-heart-lung-machine.html
 
Also, a quick way to tell is the intake manifold gaskets are stamped with the displaments they fit. I.e. 266 / 304 and 345/ 392. We know that no 266 was installed in a terra, and very few 392 two barrels are out there, plus it would have to be a swap in and I would think that would be remote. I would say with almost certianty that you have a 304. Check the intake manifold gasket directly below the carb if it's stamped 266/304 you have a 304.
 
Last edited:
Intake manifold gaskets are "steel shim" design.

152/266/304 intake gaskets are identical, along with the "lpg" variation which blocks the heat riser/crossover passage.

196/345/392 gaskets are also identical (larger intake port configuration as compared to 304), and are also available (and used oem) in the lpg variation.

You can see the gasket I.d. Stamped on a non-critical area in this pic. This shot is a comparison of the oem intake gasket for a non-ic 392 and 345 with a lpg version. The second from right and second from left gaskets are for an ic (improved cooling) 392, thus the restricted coolant port which seals the rear coolant runner on each side. The pair of takeoff gaskets shown are oem ic 392 and you can easily see that the "restriction" designed into the intake gasket by ihc did not last...it has been eaten away over time by corrosion and cavitation.

What Chad is referencing...is that "sometimes" you can barely see the gasket stamping on an oem intake gasket without removing the intake manifold.

Also for id purposes...the width of the "valley" under the intake manifold is less on a 266/304 as compared to a 345/392. A 266/304 valley cover measures a nominal 7-3/4" center-to-center across the two front retainer bolts that you can see at the front of the cover.

I don't have a 345/392 valley cover/gasket in the shop right now to obtain an exact measurement...but it is approximately 1/2" wider than the 266/304. That is due to the fact that a 345/392 block has a taller deck height (longer stroke length) as compared to the 266/304.
 

Attachments

  • Intake Gasket ID.jpg
    Intake Gasket ID.jpg
    107 KB · Views: 620
Last edited:
Man I love it here thanks everybody. I finally got the oil filter changed! I basically took it off in piece! It didn't want to let go,but in the end it had no chose. Question again? I have a tool that turns the oil pump to prime it but it's for a Chevy motor, and I'm wondering can I use it on the 304? Also; is there step-by-step on rebuilding the 2230c carb? Thanks and cheers!
 
A chev oil pump drive tool won't work for an ihc-produced I-4/sv engine pump drive. Those use a somewhat different tang and are normally used with a support bushing system. These engine don't require a support bushing for the pump drive tool, though I have a somewhat more sophisticated tool I fabbed described in this thread:

http://www.forums.IHPartsAmerica.com/tool-talk/1032-oil-pump-drive-system.html

We have a simple pump drive tool we market through our online store:

IH engine oil pump drive tool - International Scout parts

We have a vast amount of information regarding the Holley "22xx" carb series, far more information than can be found on any other technical support forum:

http://www.forums.IHPartsAmerica.com/carb-tech/511-Holley-22xx-series-carb-stuff.html

Is only one of many threads regarding these mixers and all other carbs that were used by ihc in various oem apps.

As a newcomer to the IH world, ya should spend much time reading through every thread in each of the sub-forums so you can gain some insight into "what" and "how" is available regarding technical information.
 
Mm
thanks again for the info! I've been reading everything I can in all of the tech forums about the dizzy, carb, etc. But it would take about a whole lifetime to go through it all. I was wondering about the carb because when I owned a fsj gw they had a guy do a step-by-step post on rebuilding the carb for the gw and it was really really in-depth on the process. I've been around this stuff along time and I'm trying take every precaution I can to give this Scout a good leg to stand on from the start. I believe with all of the pro's on this site I'll be able to get this thing in tip-top shape sooner than later. I've been an International fan for years and heres a picture of a couple builds I've done over the years. The truck is a 1947 thats been resto-rodded w/ 283/ 700r4/ ac/ elec. Windows/ 9" rearend/ mustang II front end/ etc. It took me about 6 years doing ot all by myself.
 

Attachments

  • PICT0254.JPG
    PICT0254.JPG
    100.7 KB · Views: 477
Ihochad
thanks, I love farmall cubs. Best small tractor/ lawn mower I've ever had. Cut my mowing time in half, and since I rebuilt motor about 3 years ago its will last about another 47 years before I have to rebuild it ago. I just love International stuff! I have a lo-boy cub for-sale that nice but needs alittle more work? I'm saling it to pay for the restoration on the Scout. I have more pictures of the cub if you want to see them? Thanks again and later.
 

Attachments

  • PICT0259.JPG
    PICT0259.JPG
    136.7 KB · Views: 683
Back
Top