Project Karma

wow looking good on redoing all those parts. I want to ask you if u need any engine parts I have a load of brand new stuff if your in need of anything and I still need to come get that old junk one from you. I am planing on going to the hollister meetup on the 24th
im not sure if your goin at all mayby we can meet up some time.

Thanks vance. I'm good right now on parts. No meet up for me. I will be working every weekend for the next month on the truck getting it running. Anytime you can pick that engine up is fine with me.
 
So I'm still waiting for my hubs and some other stuff from the powder coater so I decided to start prepping the engine bay and parts for the new engine going in next week. Sanded and painted the firewall and inner fenders with some eastwood underhood black paint that is meant to replicate oem sheen. Since I've never seen a clean Scout in person I will take their word for it. I also coated the wheel wells with some rubberized coating for some texture and then painted over that to seal out any water and or dirt that tends to get trapped. Turned out pretty nice.

Drivers inner fender

attachment.php


attachment.php


Passenger inner fender

attachment.php


Also started prepping a bunch of the bolt on engine parts in preparation for the "crate" engine that I've purchased.

Prestolite distributor w/ old cap for masking. This is coated with some vht aluminum paint and a gray engine enamel primer. I am highly impressed with the quality of this paint.

attachment.php


Also coated the timing cover and valley pan in some gloss black engine enamel that will match the engine and intake manifold.

attachment.php


attachment.php
 

Attachments

  • IMAG0379.jpg
    IMAG0379.jpg
    30.8 KB · Views: 3,098
  • IMAG0381.jpg
    IMAG0381.jpg
    29.8 KB · Views: 3,154
  • IMAG0380.jpg
    IMAG0380.jpg
    18.2 KB · Views: 3,121
  • IMAG0384.jpg
    IMAG0384.jpg
    27.5 KB · Views: 3,164
  • IMAG0385.jpg
    IMAG0385.jpg
    41 KB · Views: 3,180
  • IMAG0383.jpg
    IMAG0383.jpg
    35.3 KB · Views: 3,962
Last edited:
Took the powder coater 5 weeks to coat my hubs and numerous engine parts. Initially I was livid until he said that there was no charge.

Got the spindles, hubs, wheel bearings, new disc brakes and calipers installed today. Only thing left to button up the front axle is to get some extended brake lines installed.

Should be able to drop the engine in tomorrow.

Here's the intake manifold in gloss black. Looks brand new.

attachment.php


Here are some shots of the new brakes, calipers and warn hubs installed.

attachment.php


attachment.php


attachment.php


attachment.php
 

Attachments

  • IMAG0402.jpg
    IMAG0402.jpg
    46.4 KB · Views: 3,057
  • IMAG0401.jpg
    IMAG0401.jpg
    45.1 KB · Views: 3,169
  • IMAG0400.jpg
    IMAG0400.jpg
    46.8 KB · Views: 3,017
  • IMAG0399.jpg
    IMAG0399.jpg
    48.3 KB · Views: 3,058
  • IMAG0398.jpg
    IMAG0398.jpg
    47.5 KB · Views: 3,156
Last edited:
5 weeks? Damn. At least they didn't charge ya. Gues I'm spoiled having a good friend who works for a powder coating company with a turn around time of only a few days. And for my own parts for the cost of a 6 pack :dita:

looks good though.
 
Got the new engine dropped in on Sunday. Engine is a remanufactured 345 long block with a comp rv cam that has been balanced. Sealed it all up with new fel pro gaskets, installed the flywheel and sealed the bolts, rebuilt the oil pump to spec, and picked up all new grade 8 hardware for the install. Dropped it in by myself with the help of some guide bolts which was an idea I picked up in someones thread on this forum. Sent the valve covers off to get chromed. No issues this time bolting up the torque converter.:) dropped the engine on some of the IH only rpt motor mounts. Can't say enough about the quality of these. Absolutley spot on. Here's some pics of the process and new engine partially put together.

Action photos my wife took without me knowing. Not sure how I didn't notice the flash in the background.

attachment.php


attachment.php


Here's some reandom shots of the engine.

Passenger side

attachment.php


attachment.php


Front view

attachment.php


Top view

attachment.php


Underneath

attachment.php


Rpt motor mounts

attachment.php
 

Attachments

  • IMAG0407.jpg
    IMAG0407.jpg
    35.5 KB · Views: 3,031
  • IMAG0409.jpg
    IMAG0409.jpg
    28.5 KB · Views: 2,950
  • IMAG0408.jpg
    IMAG0408.jpg
    51.8 KB · Views: 3,083
  • IMAG0406.jpg
    IMAG0406.jpg
    54.4 KB · Views: 2,976
  • IMAG0405.jpg
    IMAG0405.jpg
    45 KB · Views: 2,978
  • IMAG0404.jpg
    IMAG0404.jpg
    35.8 KB · Views: 2,961
  • IMAG0522.jpg
    IMAG0522.jpg
    26.5 KB · Views: 2,951
  • IMAG0521.jpg
    IMAG0521.jpg
    31.6 KB · Views: 3,065
Last edited:
Only had a couple hours worth of daylight after work today but was still able to button up a couple things. I had the powder coater blast my exhaust manifolds after I had them trued at a machine shop. I mentioned to him that I was going to coat them with some vht exhaust manifold paint. He recommended using a propane torch to "cook" out all the water. It was amazing to see how much water was trapped in the metal. I was also amazed to see how fast they started to rust after being blasted.

In this picture you can see where the water is being cooked out.

attachment.php


Here's what they looked like after removing all the moisture.

attachment.php


And after removing all the surface rust.

attachment.php


attachment.php


Final paint count was 3 coats vht flat black and 3 coats vht clear. Included pic of the heat stove as well.

attachment.php


attachment.php


attachment.php


I was also able to get the new Holley 80457s carb installed. I chose this model after reading glowing reviews by mayben about how it runs 'almost perfect' right out of the box. I do have some concerns though as the fuel inlet seems to be awfully close to the water neck.

Here are some shots of the carb installed on the manifold.

attachment.php


attachment.php


In these photos you can see how close the inlet is to the water neck. It is only the width of a bic pen away.

attachment.php


attachment.php


attachment.php


attachment.php

I am assuming I can just rotate the inlet up and out of the way of the neck.
 

Attachments

  • IMAG0416.jpg
    IMAG0416.jpg
    30.5 KB · Views: 3,282
  • IMAG0415.jpg
    IMAG0415.jpg
    31 KB · Views: 3,206
  • IMAG0414.jpg
    IMAG0414.jpg
    37.1 KB · Views: 3,279
  • IMAG0413.jpg
    IMAG0413.jpg
    31.9 KB · Views: 3,336
  • IMAG0412.jpg
    IMAG0412.jpg
    29.6 KB · Views: 3,245
  • IMAG0410.jpg
    IMAG0410.jpg
    21.3 KB · Views: 3,332
  • IMAG0411.jpg
    IMAG0411.jpg
    50 KB · Views: 3,251
  • IMAG0422.jpg
    IMAG0422.jpg
    36.8 KB · Views: 3,176
  • IMAG0421.jpg
    IMAG0421.jpg
    31.5 KB · Views: 3,231
  • IMAG0420.jpg
    IMAG0420.jpg
    36 KB · Views: 3,179
  • IMAG0419.jpg
    IMAG0419.jpg
    46.9 KB · Views: 3,217
  • IMAG0418.jpg
    IMAG0418.jpg
    44.5 KB · Views: 2,455
  • IMAG0417.jpg
    IMAG0417.jpg
    48.7 KB · Views: 3,173
Last edited:
Re fuel inlet:

I do not know how the 80457 on my 392 came "out of the box" (10 years ago?).

The mechanic set it up like the stock version -- there is a straight brass fuel fitting (to metal fuel line) where the fitting / tube is on yours.

I assume you can change the fitting on your carb...

The stock 392 / 4bbl has a metal gas line -- from the carb, it makes a 180 degree turn and runs between the thermostat housing / intake / "under the carb" where it connects to the fuel filter.
 
re fuel inlet:

I do not know how the 80457 on my 392 came "out of the box" (10 years ago?).

The mechanic set it up like the stock version -- there is a straight brass fuel fitting (to metal fuel line) where the fitting / tube is on yours.

I assume you can change the fitting on your carb...

The stock 392 / 4bbl has a metal gas line -- from the carb, it makes a 180 degree turn and runs between the thermostat housing / intake / "under the carb" where it connects to the fuel filter.

Thx Robert. After checking out a couple other set ups I've noticed that all of them have a straight inlet fitting. I will most likely be going that route. The carb did come with some other fittings but I haven't checked them out yet.
 
Finally got my valve covers back from chrome. They turned out great. Wiring, hoses, power steering pump, fuel pump and smog pump to be installed this week. Here are a couple shots of the engine with most accessories installed.

attachment.php


attachment.php


attachment.php


attachment.php


attachment.php


attachment.php


attachment.php


attachment.php
 

Attachments

  • IMAG0456.jpg
    IMAG0456.jpg
    47.5 KB · Views: 3,136
  • IMAG0455.jpg
    IMAG0455.jpg
    48.4 KB · Views: 3,049
  • IMAG0454.jpg
    IMAG0454.jpg
    39.1 KB · Views: 3,225
  • IMAG0453.jpg
    IMAG0453.jpg
    42.9 KB · Views: 2,475
  • IMAG0452.jpg
    IMAG0452.jpg
    56.2 KB · Views: 3,189
  • IMAG0451.jpg
    IMAG0451.jpg
    56.3 KB · Views: 3,256
  • IMAG0450.jpg
    IMAG0450.jpg
    54.3 KB · Views: 3,131
  • IMAG0449.jpg
    IMAG0449.jpg
    32.8 KB · Views: 3,107
Last edited:
Mega props on this build man. I have the upmost respect for the work ur putting into this thing. If u need any parts let me know and I'd be happy to help
 
mega props on this build man. I have the upmost respect for the work ur putting into this thing. If u need any parts let me know and I'd be happy to help

I greatly appreciate the kind words. This is the first car/truck I've ever built to this extent. I feel that scouts deserve this kind of props cause they are f ing sweet. Just trying to put together a tasteful ride that I, and other Scout enthusiasts, will appreciate.
 
Well my grandpa ran an IH dealership. My other grandpa only bought IH products like the farmall line and combines. My father cusses them all out for being old crappy farm rigs but still runs only IH equipment. And the buzz was passed on to me. I own 3 scouts. A loadstar. 2 farmall m's. And some odd equipment. And anyone who is willing to put the work into making an old beater great is bad a** in my books. This will truly be a kickass ride when ur done. :icon_cool:
 
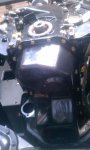
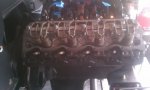
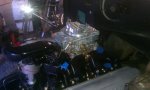
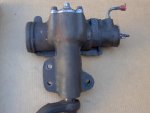
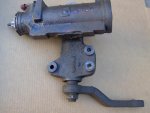
More progress on the engine:

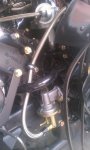
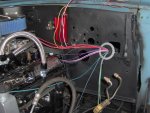
got all, except smog canister, vacuum lines installed. Used braided stainless lines with some black fragola clamps and covers. I never want to touch another stainless steel braided line again!!!!! Had to put in a new egr valve as the old diaphragm wasn't working properly. Also had to replace the high temp thermal vacuum switch because the top nipple on the original "red" one broke off. The one I picked up kicks in at 100 degrees and the original was set for 110 I believe. Can't imagine that this will cause any problems.

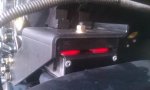
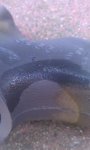
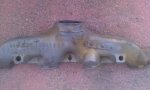
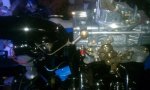
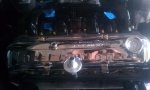
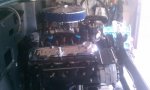
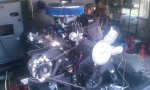
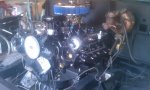
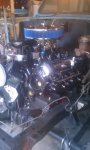
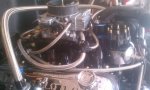
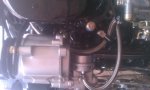
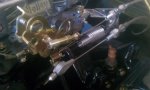
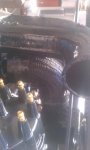
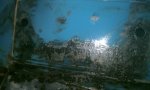
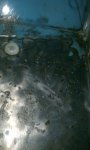
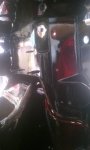
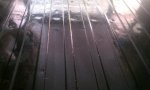
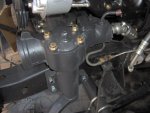
Here's a couple shots of the vacuum lines:
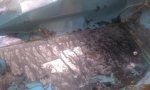
passenger side

attachment.php


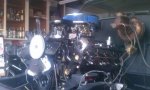
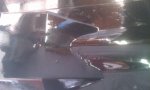
Passenger side top view

attachment.php


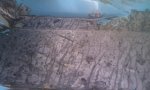
Drivers side top view

attachment.php


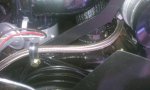
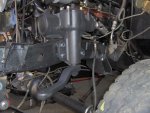
I also installed the new fuel pump and pump to carb fuel line. I followed where my original line went but used braided stainless fuel line here instead of the original rotted hard fuel line. I used some line clamps attached in 3 different spots (water neck, water pump, and alternator bracket) to make sure the line would stay secured properly. For now it seems to clear everything just right. I rotated the carb inlet down just a tad to clear the water neck yet still clear all the throttle linkage as well.

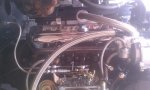
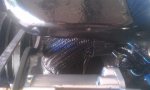
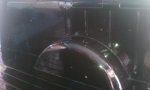
Here's a couple pics of the fuel line path:

from fuel pump
it doesn't contact the water tube, yet. Not sure if that would cause any problems but I could easily put a spacer in if it does.

attachment.php


Water pump and pulley area
everything clears great here.

attachment.php


Carb inlet
as of now this is how I'm going to keep it. If I notice any problems I can always switch out to a straight fitting on the carb.

attachment.php


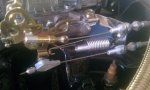
I have also installed the lokar kickdown and throttle bracket on the new Holley carb. I have yet to cut the throttle cable to the proper length but will be doing so after I pull, clean up, and fix all the slop at the pedal bracket.

Here's a couple pics of the installed lokar cables:

attachment.php


attachment.php


Final thing I have gotten finished up is the bypass hose radiator hose. It is a stock bypass hose with black thermal wrap and some gates heat shrink clamps. The radiator hoses will be getting the same treatment.

Here are some pics of the bypass hose:
not all that exciting but I included them nontheless.
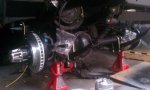
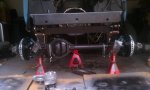
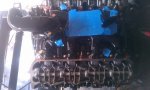
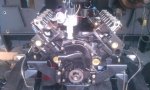
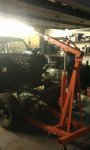
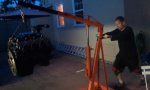
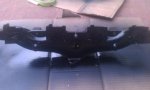
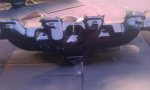
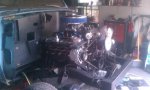
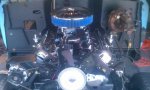
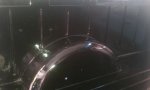
attachment.php


attachment.php


attachment.php
 

Attachments

  • 2012-07-18 07.51.08.jpg
    2012-07-18 07.51.08.jpg
    53.3 KB · Views: 2,949
  • 2012-07-18 07.50.43.jpg
    2012-07-18 07.50.43.jpg
    51.9 KB · Views: 3,132
  • 2012-07-18 07.52.15.jpg
    2012-07-18 07.52.15.jpg
    47.8 KB · Views: 3,225
  • 2012-07-18 07.51.56.jpg
    2012-07-18 07.51.56.jpg
    39.7 KB · Views: 3,173
  • 2012-07-18 07.50.19.jpg
    2012-07-18 07.50.19.jpg
    32 KB · Views: 2,958
  • 2012-07-18 07.51.29.jpg
    2012-07-18 07.51.29.jpg
    49.1 KB · Views: 3,038
  • 2012-06-19 18.23.10.jpg
    2012-06-19 18.23.10.jpg
    43.8 KB · Views: 3,227
  • 2012-06-19 18.23.29.jpg
    2012-06-19 18.23.29.jpg
    39.9 KB · Views: 3,271
  • 2012-07-04 17.20.07.jpg
    2012-07-04 17.20.07.jpg
    23.2 KB · Views: 2,849
  • 2012-07-04 17.20.30.jpg
    2012-07-04 17.20.30.jpg
    43.5 KB · Views: 2,893
  • 2012-07-04 17.21.02.jpg
    2012-07-04 17.21.02.jpg
    41.4 KB · Views: 2,959
Last edited:
Started clearing out the interior of the Scout in preparation of the re-wire that is coming soon. Found some rust on the floor pans but much less then I expected. Considering this truck sat in tahoe in the snow I am pretty pleased and surprised that no floor pans will need replacing. Spent yesterday wire brushing out all rust spots and coated the metal in metal etch to soak overnight. Today I still need to sand down the good paint with some 400 grit sandpaper so that the por 15 will adhere properly.

Here are some photos of before cleaning:

drivers floor pan

attachment.php


Passenger floor pan

attachment.php


attachment.php


attachment.php


Firewall

attachment.php


attachment.php


Here are some after photos:

drivers floor pan

attachment.php


attachment.php


Passenger floor pan

attachment.php


attachment.php


Firewall

attachment.php


attachment.php


Rear bed

attachment.php


This thing is slowly but surely becoming a rust free Scout. Still a long way to go but I would say it is 75% rust free now.
 

Attachments

  • IMAG0512.jpg
    IMAG0512.jpg
    36.3 KB · Views: 2,859
  • IMAG0513.jpg
    IMAG0513.jpg
    36.1 KB · Views: 2,932
  • IMAG0509.jpg
    IMAG0509.jpg
    29.9 KB · Views: 2,873
  • IMAG0508.jpg
    IMAG0508.jpg
    16.4 KB · Views: 2,932
  • IMAG0511.jpg
    IMAG0511.jpg
    42.2 KB · Views: 2,837
  • IMAG0510.jpg
    IMAG0510.jpg
    24.1 KB · Views: 2,868
  • IMAG0525.jpg
    IMAG0525.jpg
    45 KB · Views: 2,825
  • IMAG0516.jpg
    IMAG0516.jpg
    19 KB · Views: 2,761
  • IMAG0515.jpg
    IMAG0515.jpg
    18.1 KB · Views: 2,822
  • IMAG0524.jpg
    IMAG0524.jpg
    47.3 KB · Views: 2,930
  • IMAG0519.jpg
    IMAG0519.jpg
    42.5 KB · Views: 2,761
  • IMAG0523.jpg
    IMAG0523.jpg
    50 KB · Views: 2,777
  • IMAG0514.jpg
    IMAG0514.jpg
    25.4 KB · Views: 2,746
Last edited:
Put por15 on the entire interior of the tub yesterday. It was a total of 2 coats plus a couple touch ups. This will eventually get sound/heat padding and carpet so I wanted as much rust protection as possible. It's the best pictures I could get considering this stuff dries like black glass.

Here are the pics:

rear wheel well areas

attachment.php


attachment.php


Rear bed

attachment.php


Trans tunnel

attachment.php


Drivers and passengers floor pans

attachment.php


attachment.php


Best firewall pic I could capture

attachment.php
 

Attachments

  • 2012-07-30 10.28.31.jpg
    2012-07-30 10.28.31.jpg
    24.3 KB · Views: 2,727
  • 2012-07-30 10.28.18.jpg
    2012-07-30 10.28.18.jpg
    18.2 KB · Views: 2,720
  • 2012-07-30 10.28.04.jpg
    2012-07-30 10.28.04.jpg
    12.7 KB · Views: 2,780
  • 2012-07-30 10.27.40.jpg
    2012-07-30 10.27.40.jpg
    30.8 KB · Views: 2,892
  • 2012-07-30 10.24.11.jpg
    2012-07-30 10.24.11.jpg
    45.3 KB · Views: 2,743
  • 2012-07-30 10.23.49.jpg
    2012-07-30 10.23.49.jpg
    29 KB · Views: 2,769
  • 2012-07-30 10.23.36.jpg
    2012-07-30 10.23.36.jpg
    29.4 KB · Views: 2,782
Last edited:
That looks great but I work with that por 415 alot here at my shop and in my experience por only sticks to rust it will not stick to painted surfaces or raw clean metal. It will peel off paint and and clean metal surface but there is a paint prep chemical that por also sells that willl make it adhear to other surfaces
 
that looks great but I work with that por 415 alot here at my shop and in my experience por only sticks to rust it will not stick to painted surfaces or raw clean metal. It will peel off paint and and clean metal surface but there is a paint prep chemical that por also sells that willl make it adhear to other surfaces

I sanded the paint with 120 to get all the "gloss" off and then used the metal etch prep stuff so that it would adhere to the shiny metal. According to the por15 FAQ's it should work fine. Checked it this morning and it is all rock hard.
 
Got the steering box resealed today. I have a 3/4" input shaft but needed the 13/16" input seal kit. Jeff and the boys seem to think there are a few of these hybrids out there. Here's a link to the thread I started in the "IH only product questions" forum if you're wondering the difference.

http://www.forums.IHPartsAmerica.co...tions/8508-steering-box-reseal-question.html\

Got all the gunk cleaned off and painted up the box in low gloss black with the eastwood paint. Borgsen kit is waiting for the steering column clean up and paint. Pictures of the seal install came out extremely out of focus but it is a very easy job in my opinion.

Here are some pics of before and after clean and reseal:

attachment.php


attachment.php


attachment.php


attachment.php
 

Attachments

  • IM000418.jpg
    IM000418.jpg
    70 KB · Views: 2,860
  • IM000417.jpg
    IM000417.jpg
    56.7 KB · Views: 2,886
  • IM000415.jpg
    IM000415.jpg
    44.2 KB · Views: 2,822
  • IM000414.jpg
    IM000414.jpg
    53.7 KB · Views: 2,831
Last edited:
Indeed, it's coming along very nicely and looks great. I have used por-15, too, for the floor in my past build ups. And I plan on doing the same thing with the floor with my current 73 beast. But after I repair the cancer in the normal spot on the driver side floor body mount area.

I agree with Scout-it-out about the bolts for the steering box. I use no less than grade 8 bolts for that. I might even suggest adding a reinforcement plate to at least one side of the frame, if not both sides. Ihon sells a 1/8" thick steering box reinforcement plate just for this application. rpt Scout II steering box reinforcement plate. I actually made my own out of 1/4" plate. The frame on my my 74 Scout II was getting a little tweeked right at one of the steering box bolts. And I have actually watched the steering box flex a little bit while rotating the steering wheel. I have seen and heard of people fabbing up a crosse member piece that attaches to the inner frame rail where the steering box mounts going to the opposite frame rail, kinda like the trans mount bracket. Food for thought

other than that, loven the progress.
 
indeed, it's coming along very nicely and looks great. I have used por-15, too, for the floor in my past build ups. And I plan on doing the same thing with the floor with my current 73 beast. But after I repair the cancer in the normal spot on the driver side floor body mount area.

I agree with Scout-it-out about the bolts for the steering box. I use no less than grade 8 bolts for that. I might even suggest adding a reinforcement plate to at least one side of the frame, if not both sides. Ihon sells a 1/8" thick steering box reinforcement plate just for this application. rpt Scout II steering box reinforcement plate. I actually made my own out of 1/4" plate. The frame on my my 74 Scout II was getting a little tweeked right at one of the steering box bolts. And I have actually watched the steering box flex a little bit while rotating the steering wheel. I have seen and heard of people fabbing up a crosse member piece that attaches to the inner frame rail where the steering box mounts going to the opposite frame rail, kinda like the trans mount bracket. Food for thought

other than that, loven the progress.

I will be doing either the reinforcement plate or straight steer. I have yet to find out the advantage of one over the other. Got any opinions? I would love to hear them.
 
Scout started puking some wires today. The wiring looked daunting in the beginning but since reading a bunch and looking at all that is involved it doesn't seem that it will end up being as difficult as originally thought. Also was able to get the cd ignition box, coil, and starter solenoid mounted to the firewall today. It's a mallory hy-fire 6 cd box, mallory e-coil, and regular old Ford starter solenoid. I am going to order a 6th cylinder live wire to use as my coil wire. It is about 28 inches long. I am following Maybens ignition upgrades because they seem to be the best choice for ultimate ignition reliability and performance.

Never start wiring without a beer and a koozie.

attachment.php


Here are some pics of the mallory cd box, coil, and starter solenoid.

attachment.php


attachment.php


attachment.php


attachment.php
 

Attachments

  • IM000419.jpg
    IM000419.jpg
    59.6 KB · Views: 3,161
  • IM000420.jpg
    IM000420.jpg
    72.3 KB · Views: 3,078
  • IM000421.jpg
    IM000421.jpg
    51.5 KB · Views: 3,028
  • IM000422.jpg
    IM000422.jpg
    55.4 KB · Views: 3,082
  • IM000423.jpg
    IM000423.jpg
    61.9 KB · Views: 3,031
Last edited:
I will be doing either the reinforcement plate or straight steer. I have yet to find out the advantage of one over the other. Got any opinions? I would love to hear them.

I know on my 74 Scout, all three bolt holes, for the steering gear box, in the frame are sleeved, to prevent the frame itself from being deformed when the bolts are tightend. The straight stear that you speak of will help destribute the force between both frame rails. It also adds a cross brace where none was mounted from the factory. My theory is to add both - a reinforcement plate and the straight steer. The plate being on the outside of the frame, sandwhiched between the steering gear box and the frame. That was where my frame was getting tweeked. Not so much on the inside(engine bay) of frame.

In my build thread of my 74, I believe I added photos of the 1/4" plate that I fabed up. I then welded it to the out side of the frame, then bolted the steering box on top of that. Then fine tuning the alignment to compensate the 1/4" plate. I also added a reinforcement plate - similar to what IH Parts America sells - to the inside(engine bay) of the frame.

Hope that helps some what
scooter

btw - good luck and enjoy the re-wiring. Been there done that. And I'm about to do it again. Glutten for punishment oh boy

After reading up on some other threads I think that I will end up doing both the reinforcement plate and straight steer. The outside of my frame hasn't started deforming at the bolt holes yet but some preventative maintenance can't hurt. Thanks for the ideas.
 
Back
Top