Project Karma

Tahoedonner

Member
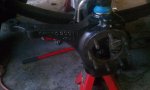
I bought a 72 Scout 2 when I was a sophmore in high school in 1998. It was my favorite thing on earth but was slightly neglected because I was so young. Brought that Scout to college with me and still kept it for 5 years after while I was getting my feet wet in the working world. 3 years ago I was, not forced, to sell said Scout to the tow truck driver for $500 because that was the 4th time in 6 years it had been towed. Total bill for all 4 tows was about $4000. I have regreted it ever since. Today, however, everything has come full circle. I scored the deal of the century through a friend, of a friend, of a friend, of a friend, of a friend. Got myself a pretty solid '79 for $500. At this time I only have 1 picture. Here she is. I look forward to conversing with all of you in the future as I am, and have always been, a Scout nut. More details on the tear down and build up to follow over the next 2 to 5 years.

attachment.php


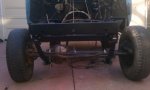
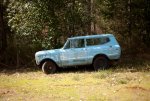
Here is my original '72 from high school circa '95 yes I took my girlfriend to prom in a Scout.

attachment.php


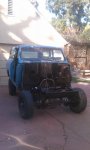
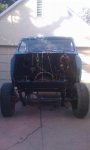
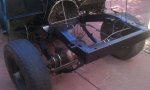
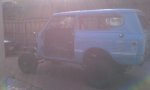
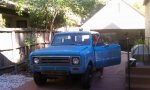
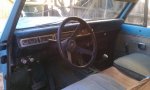
Here is my Christmas gift from my wife, not my prom date. Needless to say it is one of the best gifts ever!!

attachment.php
 

Attachments

  • New Image.jpg
    New Image.jpg
    96.8 KB · Views: 7,110
  • mail.jpg
    mail.jpg
    57.9 KB · Views: 6,014
  • photo (2).jpg
    photo (2).jpg
    38 KB · Views: 5,098
Last edited:
Looks like you have a good project for the next 2-5 years. What do you plan on doing with the Scout, as far as the re-build goes?
 
Finally got the beast towed home from placerville. It's a little more beat up then I had previously thought. But still worth the $500. Especially since it has a clean title. Oil in the 345 looks good. I will be changing out the plugs and wires this weekend in hopes that I can fire this thing up and see how it runs. Hasn't been started in 5 years says the po. Wiring in the engine bay looks a little shotty.

attachment.php


attachment.php


attachment.php


attachment.php

Anyone know what all the white stuff is caked around my carb?
 

Attachments

  • 800.jpg
    800.jpg
    62.7 KB · Views: 6,526
  • 785.jpg
    785.jpg
    45.6 KB · Views: 6,522
  • 796.jpg
    796.jpg
    69.2 KB · Views: 6,537
  • 798.jpg
    798.jpg
    60.5 KB · Views: 6,563
Last edited:
Anyone know what all the white stuff is caked around my carb?

Corrosion. Your carter thermo-quad carburator has an aluminum throttle body (base) & metering cover (top). Aluminum does not rust, but it does corrode.
You can be sure the interior of your carb is just as bad looking.
 
Thanks for that thread ron. Ordered up the oil pump drive tool and some valve cover gaskets today from ihon. Looks like I will have everything needed soon to accomplish the initial start up correctly. Last thing I want to do is screw something up. In that thread someone posted about getting rid of the old gas. I'm pretty (90%) sure that the tank is empty. Is there some product recommended to dump in with some new gas? Should I put on a new fuel filter before I try and start it the first time? I have a feeling I'm asking questions that have already been answered but I can't seem to find the answer I'm looking for. Thanks for any help.
 
That sounds great, the big concern is the cam bearings as michael said in his post. As far as gas, you can just thump the tank and you should be able to tell if it's empty. Any gas in there is probably bad and it would be best if you dumped it out. But if there is not very much you could just add some and be alright. Just make sure you have a filter on the tank side of the fuel pump! Keep in mind how old this gas tank is they rust inside if not used for length time.
You could also disconect the line at the fuel pump and stick it in a bucket, then have someone stick an air hose in the filler neck and seal with a rag and apply "some" pressure, not alot, and force the gas out the line in the bucket, if the is any.
Good luck
ron
 
Welcome back to the insanety of Scout ownership - lol - unless we all consider it the sane thing to do is owning a Scout.

Redwood city is a hop, skip and a jump from where I'm located. That is if you're in califunkia. If ya need help wrenching, feal free to look me up. I just recently completed the spring over conversion on my 74 Scout II and took it down to hollister last week. When I get time, I'll post a thread of my build up.
 
Thanks scooter,

I will definitley be needing some help once I start getting to the fun stuff. Right now I am dealing with all the issues of buying a non-running lawn ornament. I believe I might need to edit my original post of "deal of the century".

Oddly enough I think I was looking at your build on another site last night.

Cheers
 
thanks scooter,

I will definitley be needing some help once I start getting to the fun stuff. Right now I am dealing with all the issues of buying a non-running lawn ornament. I believe I might need to edit my original post of "deal of the century".

Oddly enough I think I was looking at your build on another site last night.

Cheers

I can relate to that huge door stopping of a non-running lawn tractor. Kinda how I received my daily driven 74 about 7 years ago, but for free:yesnod:
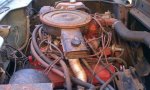
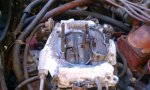
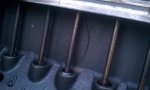
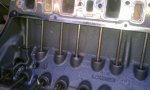
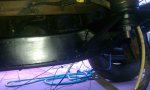
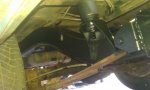
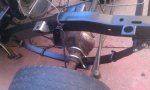
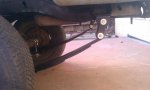
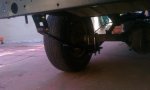
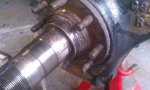
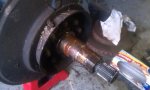
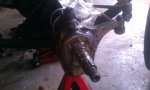
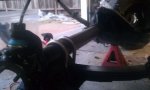
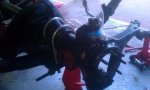
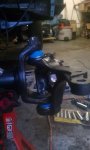
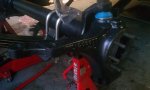
. The previous owner had no clue what he was doing. Long story being short - after doing a lot of work in stages, I finally had the opportunity to head up to the rubicon with it this last weekend. Except for carburation issues, my Scout handled awsome.

Only other place I May have posted any of my build up is over on a gaming forum. I keep meaning to post up a thread of my build up over here. Just been a tad bit busy lately to do so.
Fun fun
 
Last edited:
Haven't updated in awhile so here it goes:

changed the oil and all was well but did notice that the radiator was bone dry. Not worried though because it sat for so long. Followed the instructions on Maybens old iron doc and had both rockers oiling well. Buttoned her all back up and put some water in the radiator. Uh oh, tons of water coming out underneath. Never even occured to me to check the freeze plugs. Easy fix though because the one behind the starter was completely missing. Much easier to replace when you don't have to pull it out. So more water into the radiator. Damn, more water coming out. This time from the drivers side. Not so lucky here though. Two rusted out freeze plugs on this side. To get to the front one I needed to remove the oil filter. Here is where things go wrong. As I am loosening the filter I notice some water coming out of the filter. Hmmm, that's interesting. I decide that I would loosen the drain plug before pulling the filter to see if there is also water in the oil pan. You bet there is and lots of it. Well, there goes my plans of getting this thing running and playing with the suspension first. Probably for the better though. I've since pulled off all the engine accesories and found a ton of rust all throughout the cooling system. I've added a couple pics of what I found under the surface.

attachment.php


attachment.php


attachment.php


attachment.php


attachment.php
 

Attachments

  • IMAG0150.jpg
    IMAG0150.jpg
    61.4 KB · Views: 6,357
  • IMAG0192.jpg
    IMAG0192.jpg
    53.5 KB · Views: 6,212
  • IMAG0195.jpg
    IMAG0195.jpg
    53.3 KB · Views: 6,249
  • IMAG0191.jpg
    IMAG0191.jpg
    46.1 KB · Views: 6,266
  • IMAG0189.jpg
    IMAG0189.jpg
    57.6 KB · Views: 6,197
Last edited:
Got my welder extension cord done tonight. It's a 3-prong dryer plug to 220 outlet.
 

Attachments

  • IMAG0204.jpg
    IMAG0204.jpg
    42 KB · Views: 4,414
Update on the old beat up engine that was leaking water into the pan. Pulled the valley pan and found a huge crack in the block. Time to find a new block.

attachment.php


attachment.php
 

Attachments

  • IMAG0250.jpg
    IMAG0250.jpg
    46.3 KB · Views: 5,745
  • IMAG0251.jpg
    IMAG0251.jpg
    59.6 KB · Views: 6,235
Last edited:
Finished sanding and grinding down the frame and coated it with eastwood extreme chassis black paint and primer. Really like how it turned out. Won't know how tough the paint is till I get this thing on the street but it is supposed to be very durable. This is 2 coats of primer and 3 top coats.

attachment.php


attachment.php


attachment.php


attachment.php
 

Attachments

  • IMAG0279.jpg
    IMAG0279.jpg
    42.3 KB · Views: 6,104
  • IMAG0278.jpg
    IMAG0278.jpg
    41.8 KB · Views: 6,320
  • IMAG0280.jpg
    IMAG0280.jpg
    48.3 KB · Views: 6,091
  • IMAG0281.jpg
    IMAG0281.jpg
    43.7 KB · Views: 6,198
Last edited:
That sucks. When I was reading back through your description of massive coolant contamination in the crank case, I was thinking either head and/or intake gasket failure, or the much more catastrophic casting crack. That thing looked super mungy internally. You would have had a devil of a time restoring those coolant passages to even marginal condition. You'll be better off with an engine that hasn't been subjected to quite so much abuse and neglect.
 
Picked up a Skyjacker 4" lift and installed it. Pretty straight forward installation. Also bought some heavy duty spring plates and u-bolts from IH only and coated them with the chassis paint as well. Scout is pretty level now. I didn't re-use my passenger side spring spacers, front or rear, because pre-lift it was leaning drastically to the passenger side. Once I drop the engine in and let it settle I will see if any other leveling/ tweaking will be needed. Also installed a 2" body lift from IH only. Haven't figured out what I will be doing with shocks yet so I left the stock towers un painted. I'm going to be installing a reverse shackle in the next couple months, from IH only, and am not totally convinced that I want to keep the stock shock towers. Nor do I know if they will even work with the reverse shackle.

These pics, although crappy, show the current height with 4" spring lift and 2" body lift. No heavy duty shackles yet.

attachment.php


attachment.php


attachment.php


The rest of the pics are just random suspension shots after installation of the Skyjacker springs.

attachment.php


attachment.php


attachment.php


attachment.php


attachment.php


attachment.php
 

Attachments

  • IMAG0289.jpg
    IMAG0289.jpg
    59.2 KB · Views: 4,082
  • IMAG0290.jpg
    IMAG0290.jpg
    51 KB · Views: 4,135
  • IMAG0291.jpg
    IMAG0291.jpg
    30.1 KB · Views: 4,121
  • IMAG0292.jpg
    IMAG0292.jpg
    21.7 KB · Views: 4,056
  • IMAG0288.jpg
    IMAG0288.jpg
    39.5 KB · Views: 4,159
  • IMAG0286.jpg
    IMAG0286.jpg
    35 KB · Views: 4,126
  • IMAG0284.jpg
    IMAG0284.jpg
    45.5 KB · Views: 4,154
  • IMAG0283.jpg
    IMAG0283.jpg
    34.5 KB · Views: 4,182
  • IMAG0282.jpg
    IMAG0282.jpg
    20.8 KB · Views: 4,142
Last edited:
that sucks. When I was reading back through your description of massive coolant contamination in the crank case, I was thinking either head and/or intake gasket failure, or the much more catastrophic casting crack. That thing looked super mungy internally. You would have had a devil of a time restoring those coolant passages to even marginal condition. You'll be better off with an engine that hasn't been subjected to quite so much abuse and neglect.


Yeah I was hoping for just blown gaskets also. The truck was up in placerville in the snow quite a bit so I figured he let it freeze a few times and it spit out all the plugs and probably damaged a few other cooling system internals but oh well. Was able to pick up a used 345 from a member on here for a great price and will be dropping it in this weekend. Hope to get Maybens old iron revival stuff done to it to see if it is useable now or if it needs to be rebuilt right away. Didn't get to hear the engine run but the guy said it ran fine when it was pulled. For $150, plus I got some interior side panels, I really just need it to be a solid block to make it worth it. Keeping my fingers crossed on this one.
 
I didnt realize this was your truck I been watchin this tread I like it so far hope everything from here on out will work out sorry about the engine problem
 
So with the engine still in limbo I have decided to refresh the front d44 with new ball joints, u joints, wheel bearings, spindle bearings and seals, new locking hubs, powder coated calipers, and some dimpled and slotted disc brakes.

Here is a link to my post in the axle tech section:

http://www.forums.IHPartsAmerica.com/axle-tech-questions/7865-front-d44-refresh.html#post55254


With Jeff's advice I am just going to clean the rust off the shafts and seal it all back up.

Here are some photos of what I found during the breakdown:

attachment.php


attachment.php


attachment.php


attachment.php


attachment.php


attachment.php


attachment.php


attachment.php


attachment.php


attachment.php
 

Attachments

  • IMAG0354.jpg
    IMAG0354.jpg
    20.8 KB · Views: 3,488
  • IMAG0350.jpg
    IMAG0350.jpg
    33.9 KB · Views: 3,494
  • IMAG0351.jpg
    IMAG0351.jpg
    38.2 KB · Views: 2,305
  • IMAG0349.jpg
    IMAG0349.jpg
    33.1 KB · Views: 3,525
  • IMAG0347.jpg
    IMAG0347.jpg
    28.7 KB · Views: 3,486
  • IMAG0346.jpg
    IMAG0346.jpg
    29.2 KB · Views: 3,501
  • IMAG0344.jpg
    IMAG0344.jpg
    36.7 KB · Views: 3,439
  • IMAG0341.jpg
    IMAG0341.jpg
    55.2 KB · Views: 3,579
  • IMAG0343.jpg
    IMAG0343.jpg
    43.5 KB · Views: 3,510
  • IMAG0339.jpg
    IMAG0339.jpg
    42.7 KB · Views: 3,474
Last edited:
Got the new u joints and ball joints installed. Also cleaned up and painted the knuckles and axle housing with the eastwood chassis black paint. Next step is to get the wheel bearings, calipers, rotors, spindles, and new locking hubs installed. Here are a couple pics of what has been completed so far.

Ball joints and painted knuckles:

attachment.php


attachment.php


attachment.php


Freshly sanded and painted axle housing:

attachment.php


attachment.php


attachment.php


New ujoints and cleaned up axle shafts:

attachment.php
 

Attachments

  • IMAG0366.jpg
    IMAG0366.jpg
    31.6 KB · Views: 3,474
  • IMAG0365.jpg
    IMAG0365.jpg
    32.8 KB · Views: 3,510
  • IMAG0364.jpg
    IMAG0364.jpg
    38.4 KB · Views: 3,462
  • IMAG0363.jpg
    IMAG0363.jpg
    34.8 KB · Views: 3,543
  • IMAG0362.jpg
    IMAG0362.jpg
    26.2 KB · Views: 3,509
  • IMAG0361.jpg
    IMAG0361.jpg
    39.8 KB · Views: 3,507
  • IMAG0360.jpg
    IMAG0360.jpg
    38.4 KB · Views: 3,465
Last edited:
Got the spindles all cleaned up and bearings installed.

attachment.php


attachment.php


Wheel hubs are getting powder coated so couldn't finish the job today. Here's what the old wheel bearings looked like. Top one is from the drivers (long shaft) side. Grease is solid black.

attachment.php


attachment.php
 

Attachments

  • Picture 003.jpg
    Picture 003.jpg
    39.5 KB · Views: 3,486
  • Picture 001.jpg
    Picture 001.jpg
    32.5 KB · Views: 3,385
  • Picture 002.jpg
    Picture 002.jpg
    51.6 KB · Views: 3,449
  • Picture 004.jpg
    Picture 004.jpg
    30.8 KB · Views: 3,476
Last edited:
Wow looking good on redoing all those parts. I want to ask you if u need any engine parts I have a load of brand new stuff if your in need of anything and I still need to come get that old junk one from you. I am planing on going to the hollister meetup on the 24th
im not sure if your goin at all mayby we can meet up some time.
 
Back
Top