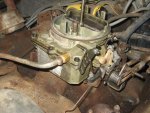
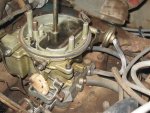
Holley 22XX Series Carb Stuff

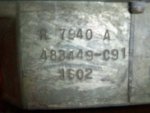
Holley carbs don't use id tags, the list number is stamped into the front of the bowl section of the main body. You should also see a chrysler part number stamped into the body adjacent Tom the list number.

There are several identification aids contained in this thread, way back in the beginning, including pics of the id numbers with location.

Spreadbore carbs are very difficult to deal with today, the oem carb on that chrysler manifold would have been a carter thermoquad. We do rebuild those on a custom basis, but the thermoplastic main bodies can be very difficult (and expensive) to deal with..

The spreadbore rochester quadrajet is equally difficult to deal with in a reman process. Edelbrock discontinued their clones quadra several years ago though some are still in the marketplace.

The edlebrock performer and thunder series carbs are not spread bore units, though they do incorporate two different primary/secondary throttle bore sizes. And the aftermarket edelbrock "performer" series manifolds are designed primarily for the use of the companion carbs, if you run a squarebore Holley, the adapter plate included with the manifold is required.
 
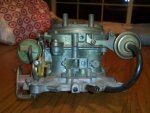
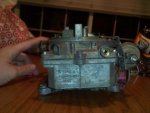
I am working on a really clean 2210c 6620 that seems to be the original carb. The pv actuator was never unstaked until I did it because I was concerned that it felt sticky.

I ran a test on the pv actuator circuit with a mightyvac and I wanted to share. Also a short video can be seen here:

pa230058.flv video by rusty_scout - photobucket

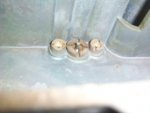
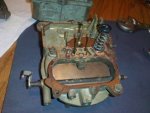
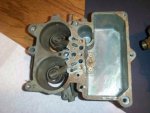
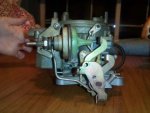
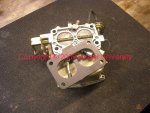
Here are some pics of the air horn inverted on the bench:
pa230050.jpg


pa230051.jpg


Using a mightyvac and pumping a few times to get 5-8 in. Of hg I am able to get the actuator to move down a little but it will not hold vacuum.

If I really pump the mightvac the valve bottoms out but does not stay down.

If I hold down the actuator all the way and then pump up to about 20 in/hg it will hold the actuator down (upside down air horn on the table) for about 5 seconds as it leaks down to about 10in/hg where it releases.

If I unhook the mightyvac and give that tube a long drag with my mouth at about 4in/hg the actuator seems to be working more smoothly but does not provide much of a seal.

The lead plug in this circuit on top of the airhorn seems tight.

It seems to check out but this is my first 2210c experience.

Side note: no evap system on my 1975 150 pickup and no evap on the carb
 
Much nicer looking carb than the other shots ya sent me steve!

I'd still go ahead and remove the pv actuator carefully, you will no doubt find some varnish and water-caused corrosion in the bore. Polish the actuator piston and same for the bore. Before re-assembly, I smear a very slight film of antisieze on the piston surface as an aid to operation over time.

These actuators will not hold a static vacuum such as produced by the mityvac. The clearance between the piston and the bore precludes that from happening and the rod is not "sealed" to the staked retainer.

That does not matter as long as the lead plug in the top is sealing...if in doubt, put a dab of jbweld over the plug but that is rarely needed unless someone has tried to remove the plug. That can be tested by holding the meat of a finger tightly on the plug while pumping the mityvac...if the actuator holds vacuum a bit longer...then the plug is leaking.

What does matter is that the actuator is held up when the engine is running and developing maximum manifold vacuum which is applied to the feed port for the actuator. So ya might think of that as a "metered" (calibrated for when the idle mixtures are adjusted) vacuum leak...that is a designed-in feature. And of course...it matters that when manifold vacuum drops, the power valve actuator opens the power valve!

Once it's re-assembled, then test with the mityvac again for proper operation.

I see that carb has been converted to a manual choke system! Do you plan to retain that workaround?? If not, I can prolly fix ya up with the proper used parts to put it back original if ya still have the choke stove installed on the intake...I don't have any of those parts left though Jeff does have a few at the shop in Loomis. And hopefully your nylon fast idle cam is still present and in good condition, I've got none of those left now except on complete core carbs for rebuilding.
 
Thanks for the reply on my 2210c test. Yeah I have a good feeling about this carb based on quality of the finish. This is only a last ditch $31(price of the carb kit) effort to make ol' pumpkin run a little better before I plunk down $400 on a new 2300 fully kitted out.

Luckily all the working choke parts were on the manifold and this carb was complete. Any reason not to switch back to the manual choke system the po had set up with that trick machinist scale?

olpumpkin.jpg
 
Howdy, moving on to the carb stuff.

Onna 1976 International 345 w/mallory unilight dist and mallory coil with t-19 trans.

Courtesy of the po I have a non-carb legal carb, Holley 0-4412 that gotsta go. Managed to scrounge up what was called a 2210 for chrysler 360 that should work.
#C266806230310#P450774240310#F8#.jpg
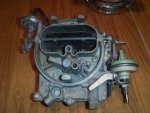
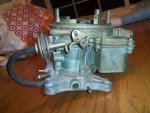
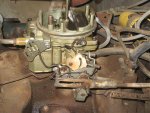
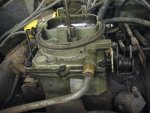
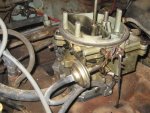
I have been following along with this handy guide and have noticed that this carb has some 2245 features as well as 2210c features. Lotsa pics to follow. Is this going to cause some sort of devastation at the smog station? I don't think so on accounta the vacuum lines will all hook up, but it is no doubt confusing.

Will the power valve cause a problem? It was stated that the body will only accept the proper valve, but I have the sqwat 2210 valve and the non-machined hic of the 2245.
Image1.jpg
#C266806230310#P740774240310#F8#.jpg
Also have the 2245 fast idle cam and air cleaner vac nipple
 

Attachments

  • #C266806230310#P420774240310#F8#.jpg
    #C266806230310#P420774240310#F8#.jpg
    34.2 KB · Views: 576
  • #C266806230310#P130774240310#F8#.jpg
    #C266806230310#P130774240310#F8#.jpg
    34.1 KB · Views: 566
  • #C266806230310#P150774240310#F8#.jpg
    #C266806230310#P150774240310#F8#.jpg
    32.4 KB · Views: 613
  • #C266806230310#P140774240310#F8#.jpg
    #C266806230310#P140774240310#F8#.jpg
    35.2 KB · Views: 584
  • #C266806230310#P440774240310#F8#.jpg
    #C266806230310#P440774240310#F8#.jpg
    36.1 KB · Views: 592
  • #C266806230310#P750774240310#F8#.jpg
    #C266806230310#P750774240310#F8#.jpg
    30.3 KB · Views: 636
Last edited:
howdy, moving on to the carb stuff.

Onna 1976 International 345 w/mallory unilight dist and mallory coil with t-19 trans.

Courtesy of the po I have a non-carb legal carb, Holley 0-4412 that gotsta go. Managed to scrounge up what was called a 2210 for chrysler 360 that should work. I have been following along with this handy guide and have noticed that this carb has some 2245 features as well as 2210c features. Lotsa pics to follow. Is this going to cause some sort of devastation at the smog station? I don't think so on accounta the vacuum lines will all hook up, but it is no doubt confusing.

Will the power valve cause a problem? It was stated that the body will only accept the proper valve, but I have the sqwat 2210 valve and the non-machined hic of the 2245. Also have the 2245 fast idle cam and air cleaner vac nipple

First off...your list 7940a Holley is not a chrysler app by any stretch of the imagination. The chrysler pattern throttle body is completely different and will not bolt to any IH sv 2v intake manifold. In fact, I currently have on hand two new holleys that are correct for a chrysler 360 or 400 app. And...the ihc part number is clearly visible in the bowl stamp!

What you do have (at least in the pics posted) is a 2210 application for a m/y '77 345 kalifornikate-emissions. So somehow you did end up with a possible winner after all!

Visually it should work out fine for the smognazi. Will it pass smog? Who knows! I'd definitely run the rig at a "test only station" and find out once it's operational. Not having an active hicd is of absolutely no consequence as far as idle test numbers are concerned.

And yes...the power valve itself must match the power valve actuator design, otherwise it won't work! If that carb has the "long" actuator that will actually contact the "short" power valve, then yes it should work just fine once rebuilt.
 
Thank you for the quick response :icon_biggrin:

that sounds like just what I needed to hear. The power valve/actuator combo does make good contact so that shouldn't be a problem. The thing has obviously been sitting for a looong time, but fortunately not outside and everything came apart easily and seems to function smoothly.

Just out of curiosity, is the main difference between the Holley 2210 and 2245 the single or multi unit power valve? I was under the impression the body was different, but this *looks like the 2245 body but the part number is 2210.
 
This is much confusion and mis-information out there regarding which Holley 22xx variation is which.

Only the list number stamped into the bowl is definitive in regards to what the carb "was" originally. Since these mixers have been botched-over and mix-and-matched repeatedly over time, what I see daily is carbs that are basically "unknown" with few exceptions. Much of that has been covered in this thread which I why I started it in the first place.

Then...we see the commercially-remanned carbs that have had the same parts mixed in order to create a "kinda" list number that is not representative of what is actually stamped on the bowl!!! When those are presented for rebuilding, they can be a real bitch to make operate in a satisfactory manner.

For instance...you cannot match a chrysler-pattern 22xx with a ihc-pattern throttle body as we've already detailed. But...right now...on my bench I have three ihc list carbs that all have the wrong throttle body insulator gasket, one of 'em is an actual reman from Holley in bowling green which according to the customer never worked properly right out of the box...but at that point he simply gave up and bought a new 7448 and then gave me the 22xx core. It's a very nice core and now that it's rebuilt correctly is nearly indistinguishable from new. And it is dedicated to that very rare individual who desires a perfect 22xx for a restoration project, not just a dd.

All of the ihc list main bodies for the most part are identical when they are cast. The difference will be in the bowl cover casting as far as which type power valve actuator is going to be incorporated for which list number. Also...which type vent is going to be used in the bowl cover determines what additional machining processes are used. The main body also must go through an additional set of machining steps if an active hicd is part of the list.

For the chrysler-pattern 22xx, the main body casting, the bowl cover casting, and the throttle body casting are completely different...though very similar in appearance.

The amc and Ford applications of the 22xx follow the same design as the ihc with the "four ear" throttle body, only the chrysler variation is different.

This pic is a Holley 2210, list r7024a. This is an aftermarket replacement for the oem carb, thus it is considered not an exact calibration for the original, though it will not impact smog numbers if the engine does not have other issues. Application is for any 1973 chrysler 360 or 400 engine, any transmission. And...a chrysler 360 is a completely different engine series for the "b" block 400 series.

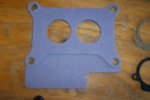
Notice the much smaller throttle body bolt pattern as compared to the ihc version, along with the companion base gasket/heat insulator. And the main body on this carb cannot be installed on the throttle body of the ihc version and expect correct performance.

The only way to determine which parts are original to which list number is to first determine what the application for the list number is. Then using that list, you look up the original specifications/bill of material in the various Holley reference guides. This information is not in a typical ihc parts list since those drawings and even the part number id is not considered definitive. And yes...even the Holley "factory" references are sometimes inaccurate!

Once you have the bom identified, then you go through the carb piece-by-piece and determine what you have (part number-wise) to work with. This is not a simple, quick thing to do and sometimes I spend more than an hour doing an analysis, especially on the 22xx carbs since po virus has scruud nearly all of those that cross my bench.

And...in some cases I have to use the parts from two completely different carb kits to come up with all the correct parts needed to build one mixer. That is because all the "correct" service kits were discontinued years ago!
 

Attachments

  • Holley 7024A 002.jpg
    Holley 7024A 002.jpg
    129.4 KB · Views: 1,480
Thank you for the wealth of knowledge on the various issues of these carbs.

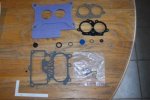
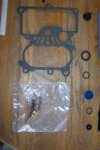
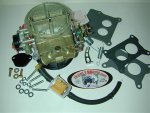
Figured I'd post up some shots of the rebuild kit I picked up for this thing. It did not come with any replacement power valves, fortunately the one I got moves very nicely so it should work, will find out later if I need to tear into it again. This kit also has the correct base gasket, it did include the proper dam(n) gasket.
100_1240.JPG
100_1241.JPG
Win some, lose some. Now back to cleaning...
 

Attachments

  • 100_1244.JPG
    100_1244.JPG
    24.1 KB · Views: 562
  • 100_1246.JPG
    100_1246.JPG
    34.5 KB · Views: 620
  • 100_1249.JPG
    100_1249.JPG
    26.4 KB · Views: 553
  • 100_1243.JPG
    100_1243.JPG
    31.7 KB · Views: 544
Last edited:
In your pic, the heat dam/base gasket is not turned correctly in order to mount.

The item "should" be marked "front" on the overhanging portion...that goes towards the front of the engine with the stamping visible from the top.
 
in your pic, the heat dam/base gasket is not turned correctly in order to mount.

The item "should" be marked "front" on the overhanging portion...that goes towards the front of the engine with the stamping visible from the top.

It is reasons like this why I am not surprised that I got laid off a couple weeks ago :frown2:

once again, thank you! I was probably just gunna re-use the old one
 
Hello mr. Mayben,
I am in the process of rebuilding my 2210 Holley carb. Might be a dumb question but here it goes.....what is the spec weight of the carb float? My foat is not metal and I suspect it has retained weight over the years. Thanks
 
hello mr. Mayben,
I am in the process of rebuilding my 2210 Holley carb. Might be a dumb question but here it goes.....what is the spec weight of the carb float? My foat is not metal and I suspect it has retained weight over the years. Thanks

I am not sure how it could have gained enough weight so as to not function properly, but who knows :crazy: have you tried assembling the float in just the bowl with the top off and then filling the bowl with solvent to verify that your current float still floats? It shouldn't take much to get the float to act on the needle.

My .02 and I could be out in left field.
 
hello mr. Mayben,
I am in the process of rebuilding my 2210 Holley carb. Might be a dumb question but here it goes.....what is the spec weight of the carb float? My foat is not metal and I suspect it has retained weight over the years. Thanks

I've looked for years for the callout for the float weight for those carbs and never found it!

But... Nearly every 22xx I do gets a new float.

The oem (and replacement) floats are a very dense, closed cell foam known as "nitrophyl". A very durable material but they are attacked by this shit e10 fuel we're forced to use today. The oem floats are a reddish-brown color, the replacement is normally black.

If you compare a used float with a new one juggling in both hands, you can tell the difference in weight! However, it' won't show up when ya "float" 'em in gasoline (not solvent or water). The difference shows in performance simply by the sunk float not sitting high enough to maintain a stable fuel level. If you set the fuel level "low" enough to not overflow the vents, then once the motor is at speed, the bowl will run dry enough (major surging) that you think you are running out of gas...in actuality...you are! And...across rough terrain, the "heavy" float will bounce terribly and also cause an erratic fuel bowl level.

I have a collection of more than 20 "sunk" nitrophyl floats onna daisy chain right now, I just replaced one on my own carb (Holley 4160) two days ago! They May go on the xmas tree!

Always replace the nitrophyl floats when doing surgery on any mixer nowadays, the replacement ya need is a standard hygrade fl9...though I "think" an fl 12 will also work just fine.
 
I have a 75' dodge w100 4x4 w/ 360 engine...2bbl 2010 Holley carb. I have had this issue for a few years now...the truck is used for moving snow at my house only, so probably sees maybe 30 miles a year...which at first is hard on them on know.
The engine it self has appromiately 85000 miles on it with main bearings doine and a rv cam. I have replaced plugs, wires, cap, rotor, run grounding strap to all fender and firewall mounted electronics, cleaned all electrical connections to firewall, and all in engine, carb kit, and just a few days ago replaced accel pump, new master cylinder, new vaccum hoses from carb and to distribuiterk, fuel pump new a year or two ago

the problem I am having is a couple first when I put the peddle to the wood, the truck falls on its face and then comes back to life. Many said replace the accel pump...which I just did last year when carb was rebuilt but did again a couple days ago, still falls on its face. So kinda stuck on this one

also when I apply the brakes, I have to push them almost to the floor...kinda acts likes it has no power brakes??

Thanks for any help you guys can give me.
 
Buzter, I can't be real accurate since this is a dodge, but since you have a brake and carb prob, I am going to assume it has a vacumm booster on the brakes. You might try to pull the vacumm hose off the bb and plug it to see if your carb issue goes away. Your brake booster could be bad causing a vacumm leak.

Ron
 
Nice detail buzter!

First off, the best thing you can do for this rig right now is introduce it to a dose of "stabil" marine formula fuel conditioner. That will be the "blue package, not the red one we've used forever!

This stuff is not snakeoil, but neither will it work miracles! But, it's your only defense against this shit e10 fuel we have now and to add some long-term stability to fuel that is consumed on only an intermittent basis. I'm saying out loud here, the "shelf-life of e10 is about two weeks if kept in a non-vented container where air can't enter and create the oxidation issue". And fuel hydrocarbon evaporation and oxidation is exactly what starts to occur inside the vented fuel bowl of any carburetor as soon as the engine is shut down.

Once the volatility of the fuel is degraded, then it simply won't light off in the cylinder when mixed with air!

Your dodge version of the 22xx has four slots for the accel pump link to possibly seat in, correct?? Depending upon where ya now have it, I'd put the link in the second from the top slot...and then bend the rod so that the instant the throttle arm even looks like it's going to move off the idle position, the accel pump begins the squirt. Pay no attention to the kit instructions regarding all this schnizz...just make yours work!

If you can post a pic of your carb setup on the throttle side, I can possibly see some other issue also.

And...the idle mixtures must be set perfectly (a bit to the Rich side) in order to achieve best "tip-in" performance like you describe which is imperative for accurate plow work!

Also...are you certain that ya did install the "accel pump check needle" in it's correct location??? If not, then the pump shot won't be for shit! The pump shooter on this carb is cast in the body and not removable like on other Holley mixers, make certain that it's nozzles are clean. The pump shot you get when ya jack the throttle on these carbs must be extremely strong and "focused"...not like a fog/drool/dribble, or appear to be air-entrained.

As for the brakes...have you rigged a vacuum gauge on a manifold vacuum port and read the level?? If the carb is ratty, manifold vacuum will be low/erratic which will certainly affect the brakes. Also make sure the vacuum check valve in your brake booster is functional, those a dirt cheep to replace!

If your diagnosis of the booster checks out, then ya might consider that the master cylinder is bypassing, that means replacement. Hydraulics would rather be active, just like carbs! They don't take well to sitting around not working!

Make certain that the fuel in the rig right now is fresh! If it's leftover from last season, ya can't even use the crap for starting a burn pile!
 
I know some of the details dont pertain..but you never know...I have added seafoam..but not the marine formula. The gas in it is new, and not the ethanol shit...I know that can screw it up big time...especially for using it only a few times a year.

I will take some pictures and get them posted

I will have to check on the accel pump check needle...but when I hit the throttle at the carb, it is a good strong spray into the carb.

I need to get the book out and do some messin with the idle mixtures.....relearn..my old dog brain on that,

will do a few more checks on the booster...found the ol vac gauge last night...and will do some tests..

And I hear ya on the gas...cheaper...anything you can make cheaper...and they want to put 15% now into the ethanol...these old rigs are not made to run on that shit..at all..

Thanks so much for some starters...I knew after going thru your thread, the guys here would have some ideas..
 
Mike,

I have a 76' Scout II with a 304 v8. I have a rebuilt holly 2210 that is pouring fuel into my engine. How can I go about upgrading to the 2300 set up?

Thanks,

dan p.
 
Thanks for hooking up with ihon dan!

Alotta folks get frustrated with the 22xx mixers...including myself! There was a time when I would not mess with 'em since a decent kit was near impossible to source. But...that's not the case right now (May be in the future though!).

And like any other mechanical device, these carbs have many nuances to make 'em play nice, it's not sufficient to just throw a kit at it and hope it sticks. Every one I do I find something "wrong" about it, and learn a new method for keeping 'em working. I'm no smarter than anyone else, just more experienced in having scruud up much stuff over the last 50 years! And if ya think every carb I do is perfect first time, then ya need to come spend a week here at binder u. And see how my world fails too! But...in the end we always win and no customer gets a pile in return for their expenditure!

That said, have you considered having your carb "built" by someone that knows the score??? Or, use it as a core on an exchange for one that is ready-to-play? If so, then please post the list number stamped into the fuel bowl and I'll see what we can do...and a few pics will really tell me if you'd be better off to go with some other mixer.

This pic shows a new Holley 2300 centerhung "kit" which we custom assemble and jet for each customer order. If interested, then ya need to call Jeff and discuss this and he can price it out for ya. And on occasion, we have some in stock that are either Holley-done "remans" that have been set up the same as ya see in the pic...or even one that I might have reconditioned set up also and then placed on the shelf in the store.

I will say...if you should chose to have us rebuild your carb for ya...you will receive complete documentation of any issues/corrections, along with pics of the mixer running on an engine. You will be 100% satisfied with the results!

Either way ya go, we want your business!
 

Attachments

  • Kit Contents Shot.jpg
    Kit Contents Shot.jpg
    78.7 KB · Views: 1,074
I think it would be best to just upgrade to the 2300. I do not know what wire hooks up to the choke? Below are the two wires that could hook up to an electric choke. The first is coming out of the engine wiring harness, the second is directly off the fire wall. What do you think?

harness.jpg


firewall1.jpg
 
Last edited:
Simple to find out!

What ya need for an electric choke switched b+ feed May actually be inside the wire loom that travels down the top of the intake manifold/valve cover on the passenger side.

Caution...do not connect the choke positive terminal to any wire that has anything to do with the ignition system. Most especially, do not connect it to the ignition coil positive terminal.

Your harness, inside the corrugated loom, May have one or two wire runs that are not connected to anything, one May be a spade connector onna black wire, the other May be either black or green with a termination like you show in your pic. If your rig is a "California" emissions rig, then one of those wires is there to connect to the thermo-control for the divorced choke, that wire is switched b+ from the ignition switch and is a perfect feed that looks like oem! You will also more than likely find a kind of "beige" color wire wrapped with a fiberglas braid not connected...do not connect to that wire as the item is actually a 1.8ohm resistor and ya can never heat the choke if you connect to that wire!!

But to determine which wire might be "hot" when the key switch is "on", ya need to verify with either a voltmeter or a test light.

The electric choke on a converted 2300 has it's "ground" or negative terminal pre-terminated and grounded to the carburetor body. When you bolt the carb to the manifold, that completes the ground path for the electric choke "heater".

You will soon learn that depending upon "which" version of a Scout II/traveler/terra ya might have, there are many original wires that "deadhead". That is because one engine bay harness was used for many configurations...therefore some terminations are not connected to anything.

Then...ya have the issue of the "po virus" where someone has added wire runs or loads in a haphazard fashion with no regards for proper installation practices! That's the kind of stuff that needs to be removed once ya figger out why it's there and what it does (or does not!) do!

I promise ya...IH did not use lampcord, 12/2 romex, coathanger, cat5e cable, or laser beams to move the electrons around!
 
Michael...from your orignal ideas to me on 12-22-09 I have some answers..pictures..etc

why use the stabil marine formula?

The accel pump has 4- slots..I will change to slot 2 and adjust accordingly..see what happens

I have attached some pictures of the carb

I have not done anything with the idle mixtures have to get back into the book to refresh myself on those

accel pump needle should be good

brakes...I have 18-19" of vaccum at the booster...took check valve off, and I can not blow thru valve...but can suck back so I am also thinking booster...going today to get one and try it out also put on new rear wheel cyl as one was leaking...and had to put on new brake lines...so front and back have new brake lines...etc...

Took awhile to get back to ya..but we got socked in with 19" of snow....
 

Attachments

  • IMG_8092.jpg
    IMG_8092.jpg
    97.5 KB · Views: 792
  • IMG_8095.jpg
    IMG_8095.jpg
    100.9 KB · Views: 605
  • IMG_8112.jpg
    IMG_8112.jpg
    89.7 KB · Views: 1,019
  • IMG_8114.jpg
    IMG_8114.jpg
    99.8 KB · Views: 1,019
  • IMG_8117.jpg
    IMG_8117.jpg
    97.8 KB · Views: 1,096
Stabil marine formula is the product used to combat the negative effects of this shitgas the government has forced on us referred to a e10. And it's highly concentrated. This is not some kinda snakeoil "lead in a bottle" or octane enhancer, this is for stabilizing fuel supplies in long-term storage (more than 2 weeks) and if used per the instructions will ward off the negative effects of the alcohol. The old standby stabil "red" is great stuff for a fuel stabilizer, but won't do anything regarding fighting alcohol.

Your carb was/is originally a commercial reman, I can see the two mylar labels, one is the dot on the fuel bowl cover, the other is the label on the front of the fuel bowl. That adds to the problems encountered when a novice then tries to rebuild em'! Who knows how it was done in the past...I have no use for commercial remans nowadays!

Are you certain that all gaskets you used from the kit are identical to the gaskets that you removed??

And...when you open the throttle lever quickly without the engine running, do you get a heavy/forceful discharge from both accel pump nozzles down into the venturis?

Set each idle mixture screw to two turns out from seated for a starting point. Only after the engine is fully up to temp...then adjust each screw alternately for best idle quality/highest manifold vacuum level, while doing that, you must keep the idle speed at the correct setpoint which for that engine is most likely 650>700rpm.

If the brake booster is leaking internally, the idle quality will be real shitty! That check valve is a one way item and needs to be replaced on a regular basis as a maintenance item.
 
Sounds good on the stabil...I hear ya on the shitty gas...I only run straight in her...but will thow a bottle in

not for sure where to find a good rebuilt carb in my area...ideas...maybe that is my major problem...I do have the original also that came with the truck..but I thought there were some major problems with that one...

I am pretty darn sure I got all the same gaskets in place...I am human...pretty good human...with lots of mistakes..ha...so there is a chance one is incorrect..I will check into that..

When I hit the throttle the gas is pretty strong...and it is alot better than it once was...alot...so I am going to play with the timing...and mixture screws...see if I can get it better dialed in

as for the power booster...I think I found the problem...got another booster...took mine off...laid it down..turned it over to put the bolts back on..and brake fluid came out of it...uggg...so didn't know if it was the recent master cyl...got a new master cyl...put it on...then found a leak in the main line going back to the rears...will replace that today...hopin the ol girl will be ready to go...

I do appreciate all your great help...I hope you have a great new year..
 
Back
Top