T407/TF 727 Band Adjustment

Michael Mayben

IHPA Tech Moderator - Retired & No Longer Online
Automatic transmissions can last virtually forever as long as periodic maintenance is performed, fluid levels are maintained, and the fluid is not allowed to overheat.

The chrysler torqueflite 727 is consider to be amongst the strongest units ever built, though there were many internal configurations used depending upon the oem platform it was installed in, the vehicle gvwr/horsepower it was spec'd for, and the intended vocational use of the vehicle. The ihc code for the 727 is t407.

The 727 became the standard slushbox for ihc beginning with phase-in for fullsize stuff and Scout II sometime in 1972. And it continued in production up through eop for sii in 1980. They are not "all the same" inside as chrysler made many detail changes over the years, and there are minor differences between sii and fullsize apps internally as well. So it's imperative that ya know "which" version ya got if you are gonna become intimate with it!

But for routine maintenance...they are "all the same".

Standard service procedures calls for dumping the oil (and draining the torque converter if yours has a drain plug, not all of 'em do), cleaning the pan, and do an r&r on the filter.

While the pan is down, why not go a step further and adjust the bands??? That's also a "periodic maintenance" item that has a great deal to do with the life expectancy of these trannys.

We're not gonna go through the drain and fill process, if ya can't figger that out ya dam shore don't need to be messin' with the bands! But there is no black magic involved in band adjustment (though gittin' to the kickdown band on any IH product can involve voodoo). But it does take some tools to do it right.

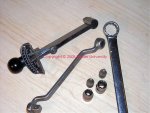
Here's a shot of the tools.

First off...ya need an inch pound torque wrench!! Nothin' fancy, doesn't need to be micro-calibrated. The one in this shot is the jinyoowine chrysler factory tool from about 1958, oriignally built for the "powerflite" predecessor to the 1st gen cast iron torqueflite. It's made by p.a. Sturdevant and is considered to be a "deflecting beam" design though it does incorporate a "click stop" for working blind. The clicker in this pic will be set for 72 inch/pounds which is the magic number we're gonna use.

Ya can also see a torque extension that was originally pinned to the head of this torque wrench. That was to allow easier access to the kickdown band adjusting screw when the tranny is installed in the vehicle. I made it removable many years ago so I could use this tool for other purposes.

The 3/4" box end wrench is nothing special, but that allows manipulation of the adjusting screw locknut for both bands. In some cases, that nut could measure 13/16" or even 7/8". Doesn't matter, just use the correct size wrench!

The actual adjusting screws for both bands have a square head with "round" corners. That means ya gotta use an eight point socket for proper fit. Those can be kinda hard to come by but I find 'em hanging on the wall at the local sears shop. You will need two sockets as usually, the screw heads are two different sizes. I had no idear why chrysler did that back in the early 60's, but they did! So you will need a 1/4" (craftsman 45790) and a 5/16" (craftsman 45791) to cover both.

In later years chrysler changed the adjusting screw design over to a torx pattern. Since it's entirely possible that ya might find late model parts in earlier units, ya might need a torx t20 and a torx t30 in the proper drive size for your torque wrench (the chrysler wrench is 3/8" drive). Torx pattern screws May have also been used for retaining the filter to the valve body in some cases.

That's all the tools needed for band adjustment once the pan is out of the way.
 

Attachments

  • 727 Band Adjust Tools.jpg
    727 Band Adjust Tools.jpg
    86.9 KB · Views: 27,114
Thanks for starting this michael, I have two 727s to service in the new year. One in my sii and the other in a dodge mh behind a 360. Thanks again.
 
Mike, have ya considered writing this stuff for a liv'in?
This is a great read, right up there with carl munroe. You make it more interesting with the "texus" spin on it.
 
Thanks guys! I'll finish this up Friday, done had somma Mike's hard tonite (doc sez I git two bottles a year so I sukked down four) so I'm havin' a hard time with tha keypunch and math. Go drain yore erl and I'll be back...make shore ya hit tha pan closer than I can.
 
As others have said michael, great read! I will be following this. I know this is band adjustment, will you touch on how to determine if bands need replacing? (before they leave you stranded:gringrin: )
ron
 
as others have said michael, great read! I will be following this. I know this is band adjustment, will you touch on how to determine if bands need replacing? (before they leave you stranded:gringrin: )
ron

Ok ron, after ya see the guts of a 727, I'll throw up some inspection guapo. You are right though, most all 727 failure comes from "no maintenance" over the years, followed by a rig being resurrected and then havin' big tires stuffed under and then go out and see if we kin git stuck! Kinda like the cam bearing deal onna sv motor that ain't been rotated this century!
 
Let's adjust the ez band first, that would be the front band...most folks refer to that one as the "kickdown band".

The tranny in this pic is a very early chrysler 727 and resides in major screwups 383-powered sii. I called it the "holstein" 727 since it's been artificially inseminated with some Scout II innards and then wiped down with some por-15 that didn't wanna stick to the case. Once it was built, I did blow on some rattlecan so it would at least look like it had been "rebuilt". It wuz dam shore an uglyazz bitch, especially when it was underneath terry's primo chrysler/IH hybrid!

And this case is mounted inna rotating stand and is not installed in the rig so the pic is ez to decode. The tranny is rotated upside down...not the picture! Stand on yore haid in front of yore monitor if you are confused.

This screw location is high up on the outside of the case, above and forward of the shift lever and kickdown rod. The cooler pressure line May be in the way of access also but ya just gotta deal with that in yore own way! Maybe have the neighbor kid come over and challenge him??

So...ya use whatever wrench fits the locknut on the adjusting screw and back that nut off four/five turns to get it out of the way.

I want ya to count the number of turns it takes to run the screw in until it stops firmly. That "count" will tell ya how "loose" the band was before ya started this process and is a major clue as to tranny condition overall. Normally, about four turns would be no cause for concern...that would indicate that the band had prolly never been adjusted and that's exactly why we're doing this. More turns than four...it's possible the tranny had been acting erratic on occasion and as long as it had not been severely overheated, a band adjustment will bring it back to life. Six turns or more, then the band friction material was most likely found inna big pile in the bottom of the pan when ya dropped it and has almost disappeared...that is a wakeup call that an overhaul is imminent!

So run the adjuster screw in and out several times to kinda "set" it for the final tweek. Ya should be able to turn it with your fingers. For the final adjustment, watch your torque wrench and snug the screw up to 72 in./lbs. That is the majik number that all 727 trannys use, no matter what case/vehicle installed in...industry standard!

Next...ya loosen/back out the screw a specified number of turns. Real rocket science! Most of the time I back that screw off 2-1/4 turns as that falls right in the middle of the "specs". The actual spec will vary depending upon which "kickdown lever" ratio is installed in the box. I've never seen an ihc-app 727 that did not have a ratio other than "3.8" installed oem. But it's certainly possible that some were different.

The most common spec for an sv-powered 727 in an ihc rig is 2-1/2 turns. If the lever has been swapped out, then ya really need to know what it's number is and consult a non-standard reference...but even the 5.0 lever which is a very common aftermarket "upgrade" part requires only two turns out.

Folks that build/maintain drag race 727 boxes have their own methodology for band adjustment...that is because there are many variations of that band available, most of those are entirely unsuitable for a street/trail/tow rig!!! Those are intended for ten blasts down the strip and then the tranny is built again! That is not what we're talkin' here!

So...2-1/2 turns...2-1/4 turns...either will work just fine!!

So now...while holding the adjuster screw in position, tighten the locknut to 25>30 ft./lbs. (I just make it tight!), and if the adjuster did not move then you are done!
 

Attachments

  • Kickdown Band Adjust.jpg
    Kickdown Band Adjust.jpg
    116.2 KB · Views: 25,794
Last edited:
Now on to the other band adjustment...the "rear" band is referred to as the "low/reverse band". In order to access the adjustment point, the pan must be removed.

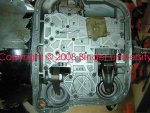
This shot shows a nice, fresh valve body that's not yet had oil installed. Yours will be a slimee mess with oil drippin' out for at least two weeks and runnin' down yore arms and the driveway. And if that tranny has been overheated, it'll smell like tha gates of hail too!

The filter on this valve body has not yet been installed...and it also has the "shift command" option installed at major's request. The gold-color plate in the top/right of the pic shows that item which is a component included inna transgo tf-2 kit. A stock tranny will not have that plate installed so don't think sumthin' on yours is missin'!

In the bottom right of the pic ya see the adjuster for the rear band. Ya treat this one exactly like ya did the front band!!! When ya go to break the locknut loose, most likely the apply lever will pivot...that is what it's supposed to do! Spend some time playin' with that so you will know how that works. Look up inside with a flashlight and you will actually see the rear band and drum and it's actuating strut. Remember what that looks like, we're gonna talk about that point later. Take some pics of yours!

Again the adjusting procedure is exactly the same as for the front band...but, ya back off the screw 2-1/4 turns. In some cases, the spec is 2 turns. Again, that is not supercritical as long as ya used the 72 in./lb. Setting for the screw preload. And like the front band, drag race bubbas have their own methodology for doing this which I would not do on any tranny I build.

In the case of the later model 727 variations used in dodge truck apps (most especially the cummins-powered rigs), both of the adjusting screws will be a torx design. Thus the need for tha torx sockets if that's what ya find in yore tranny.
 

Attachments

  • Valve Body.jpg
    Valve Body.jpg
    122.5 KB · Views: 32,269
For the later dodge truck specs, I found this somewhere on the 'net a long time ago, got no idear who to credit for this and I've not validated it! I've never had my hands on one of the stretched slushboxes though major is playin' with one now in the torkosaurus buildup, he's got some good pics of one posted here:

http://www.forums.IHPartsAmerica.com/I-h-s-t-o/792-project-torkasaurus.html

1994
front band - tighten to 72 in-lb, back off 2-1/2 turns
rear band
32/42rh - tighten to 72 in-lb, back off 4 turns
36/37/46/47rh - tighten to 72 in-lb, back off 2 turns
1995
front band
42rh - tighten to 72 in-lb, back off 2-1/4 turns
46rh - tighten to 72 in-lb, back off 2-7/8 turns
47rh - tighten to 72 in-lb, back off 1-7/8 turns
rear band
42rh - tighten to 72 in-lb, back off 4 turns
46rh - tighten to 72 in-lb, back off 2 turns
47rh - tighten to 72 in-lb, back off 3 turns
1996
front band - tighten to 72 in-lb, back off 2-7/8 turns
rear band - tighten to 72 in-lb, back off 2 turns
1997
front band
46re - tighten screw to 8n.m or 72 inch pounds, back off* 2 7/8 turns
47re - tighten screw to 8n.m or 72 inch pounds, , back off* 1 7/8 turns
rear band
46re - tighten screw to 8n.m or 72 inch pounds, back off* 2 turns
47re - tighten screw to 8n.m or 72 inch pounds, back off* 3 turns
*the adjustment screw inside the case is a square head bolt. You will need a special 1/4 square head socket to fit your torque wrench.
1998 unknown
1999
front band
47re - tighten band adj. Screw to 72 inch pounds, back off 1 7/8 turns
42 re - the final adjustment for the front band has been changed to:
back off 3 turns. (tsb 21-16-98)
rear band
47re - tighten band adj. Screw to 72 inch pounds, back off 3 turns
the 47rh rear band requires a 1/4" hex driver, the front band requires a t-30 torx driver, the filter is held in place by two screws which require a t-20 torx driver
2000-2001
front band
42re - tighten to 72 in-lb, back off 3 turns
44re - tighten to 72 in-lb, back off 1 7/8 turns
46re - tighten to 72 in-lb, back off 2 7/8 turns
47re - tighten to 72 in-lb, back off 1 7/8 turns
rear band
42re - tighten band adj. Screw to 72 inch pounds, back off 4 turns
44re - tighten band adj. Screw to 72 inch pounds, back off 4 turns
46re - tighten band adj. Screw to 72 inch pounds, back off 2 turns
47re - tighten band adj. Screw to 72 inch pounds, back off 3 turn
 
Shoot michael, this needs to be a stickeeey.

Good stuff, I May need it for a future project.:gringrin: .......:icon_eek:
 
Last edited:
shoot michael, this needs to be a stickeeey.

Good stuff, I May for a future project.:gringrin: .......:icon_eek:

It's stuckt!

How about forgoin' the buildup of the bw 11 in yore aristocrat project and stickin' inna 727?? Between ihon, iho, and me we got plenty donors for the next 20 years!!!
 
Now let's look a leetle deeper into a 727 slushbox so's we can understand why periodic band adjustment is crucial to tranny performance and longevity.

Here's a pic of pink's "built" hybrid tranny which started life as a dodge motorhome box and has been converted to an sii output shaft so the sii /married d20 can be bolted to the azzend. The valve body and associated quapo is missing in this shot so ya can see the pieces more clearly.

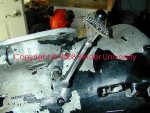
On the left is the kickdown servo and apply lever. That is the lever I mentioned which is available in several different "ratios". On oem lever will have it's ratio designation stamped underneath so it has to be removed to read the number. I have a fullsize tranny being assembled now which has the ratio number stamped on the side so it's easier to see. An aftermarket lever (very common item) May have it's number stamped where it's visible without removing. The lever in this shot is a "3.8" which is the common oem setup for both fullsize and sii 727 apps. Some fullsize units May use a 2.8 lever. There is no "standard" ratio used in all applications.

This lever applies pressure (tightens) the band around the drum based upon a command from the valve body. When you adjust the band correctly, then the band itself is applied based upon throttle position/load (throttle pressure or "kickdown"), shift lever position, and governor interaction. That's why the band needs the proper "clearance' in relation to the drum, it must allow free rotation when needed and also exert tremendous force on the band to hold the drum at the appropriate time.

If ya want to replace that lever for some reason, the torque converter must be removed to allow access to the pivot pin.

There are many different kickdown band configs available in the aftermarket, the proper band is selected depending upon anticipated/intended use of the vehicle. The oem design band is an extremely durable item and is outstanding for it's intended application if it's kept adjusted properly! The normal replacement part is more than satisfactory for a normal 727 rebuild.

On the right is the low/reverse band apply lever assembly, it's a bit more complex to deal with and in order to service the rear band system the entire tranny must be gutted.
 

Attachments

  • Valve Body Removed.jpg
    Valve Body Removed.jpg
    109.2 KB · Views: 41,511
Last edited:
Here's a closeup of the kickdown lever and servo, you can easily see the pivot pin, it's retained in the case by a pipe plug threaded in from the front of the case.

If the kickdown band is allowed to be come "too loose", it's very common that when it's forcefully applied, the strut which transmits the lever movement to the band will cause it to either bend (it's tool steel), break, or simply jump out of position and allow the band to float. "sometimes" ya can fix that by dropping the pan and valve body and performing surgery, so it's not catastrophic if you are lucky!
 

Attachments

  • Kickdown Apply Lever.jpg
    Kickdown Apply Lever.jpg
    83 KB · Views: 24,656
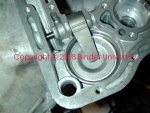
And this is a closeup of the low/reverse band apply system and servo. You won't find multiple ratios available for this system, though there are some aftermarket/performance components available for upgrade. Most noticeably, the servo system itself but a discussion of that area is not within the scope of this thread. We can address that separately if anyone is interested.

What does impact that servo is lack of band maintenance! The "piston flop" syndrome occurs as a lack of maintenance and an upgrade/replacement system is sometimes needed in order to salvage a case where the servo has flopped one too many times! Beware of boneyard trannys in this respect!

And to address ron's question...complete loss of reverse gear (as in..."worked when parked, now it won't go") is normally because the band has not been adjusted during it's life and the extreme amount of slop caused the "anchor" on the band (it's a rigid band) to break off when applied onna "cold" tranny and the pieces of the apply linkage and the band are floating around up inside the case! That means major overhaul time to repair.
 

Attachments

  • Low_Reverse Band Apply Lever.jpg
    Low_Reverse Band Apply Lever.jpg
    100.9 KB · Views: 43,754
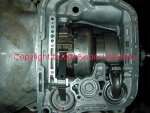
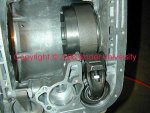
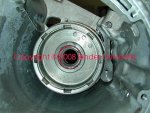
This shot is looking into the case from the front so ya can see the low/reverse band and actuator linkage. The band is wrapped around the drum, behind the drum in the case is the overrunning clutch or "sprag". That's the first item loaded in the case during reassembly.

Since 1968, I've built hundreds of these slushboxes...but still...assembling the drum/band/linkage combo is the most tedious job involved for me personally in one of these overhauls! And there are at least two ways to assemble this set wrong and not know it until it's too late!

So...if ya keep the bands adjusted, ya shouldn't have any issues!

Questions???
 

Attachments

  • Low_Reverse Band and Drum.jpg
    Low_Reverse Band and Drum.jpg
    108.3 KB · Views: 4,933
Last edited:
Questions: you kinda lost me with this pic. Just what angle is this view, from the output end? Also what "quapo" is associated with the valve body? I have always been nervous about auto trannys because I have heard springs and ball bearing fly every where when you pull them apart:icon_eh:
when I bought my 74 I was told the bands needed replaced, I don't quite see how you can visually see that by just pulling the pan. The 74 seem to shift alright, except for the kickdown seems weak, just does not down shift like it should or kicks into 3rd to soon.
Learning alot here!
Ron
 
Ron he's looking at the tranny on a bench, which means the tranny is on it's back. Pan up. Looking in from the front with half of the guts removed. This is how far you need to go to replace that rear band.

Let me know if this mess up your sticky and I will delete it. The rear bands are subseptale to braking on the 727 which mean a major tear down to repair.

I know what you mean about that lever, you need to give it a 3 finger salute. Not that one! You just have to hold your hand funny to keep it in place while screw in the adjustment bolt. Not a lot of room in there and it wants to fall out of position.
 
Last edited:
Ron...just to remove the valve body onna 727 is fairly simple and nothing will go flying if you are careful. The rod for the parking pawl is connected to the shift rooster comb internally and that can be a bit trickee to disconnect but certainly doable if careful, there are a couple of ways to do that. And working on this on the bench beats hail outta doin' it layin' on yore back in a pool of red slime!

Now if you are gonna disassemble and split the valve body, ya better dam shore be careful and know what you are doing! And installing the transgo tf-2 shift kit is a bit more involved than any of the other similar items on the market as it's much more full-featured and has optional features you can chose from.

I re-assemble these trannys with 'em bolted to an "adapted" mounting head on an engine stand, some folks like to have 'em sittin' with the bell housing pointed at the ceiling, but I prefer the engine stand method as it allows total access no matter what componentry you are working with. And...I can sit down while doing it which is important for old farts.

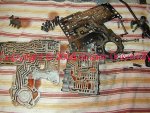
This is a pic of a valve body laid out that was fulla crap, each piece must be carefully inspected, then the mods performed. It should be reassembled like you are inna "clean room" environment. This is only the tear-down phase! Can ya count tha bawls??? This is only a partial teardown at this point, there are three other sub-assemblies yet to be removed with their own sets opf spools and springs!

The "bands need to be replaced" is a typical old "sales technique" most often employed by aamco and their like! 'cause that is a maxi-dollar generating job! Most of the time all that's needed is a simple service/maintenance, but they don't make any dinero off that! But it does allow them to "upsell" an overhaul/replacement which many times is not needed!

When I advised "counting" the turns on the band adjustment screws, that is an excellent indicator of possible wear! So is the amount of friction material found in the pan and filter when being serviced. That stuff does wear, just like brake shoes and pads and clutch discs! But only about half of what you find is from the bands, the rest of the stuff is from the clutch sets. What appears to be a mountain of material is really a normal condition, that is why there is a filter employed!

A broken band May be easily seen if the valve body is removed. A "worn" band can't. And the friction material surface on either band is so thin when new that unless nearly all of the material is stripped off (ya don"t wanna let that happen!!) visual inspection is useless!

What I'd suggest on your rig ron...service the tranny (including filter replacement) like we've discussed here. Do that first. Then give the throttle pressure control (kickdown linkage) some attention. Bet that wakes it up just like a fresh overhaul! The quickee method for throttle pressure control tweeking is here in post #23:

http://www.forums.IHPartsAmerica.com/transmission-tech/588-torqueflite-727-guapo.html

Nothing other than oil is gonna go flying! No matter how careful ya are, it's a dam messy job...especially layin' on yore back!
 

Attachments

  • Split Valve Body.jpg
    Split Valve Body.jpg
    164.8 KB · Views: 4,582
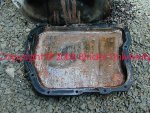
Wanna see the pan that was encapsulating pink's valve body pre-overhaul and build??? This is not the result of monte working on it...he received it like this!
 

Attachments

  • Pink's Pan.jpg
    Pink's Pan.jpg
    159.5 KB · Views: 4,476
Since this is about maintenance. Every auto I've owned has had issues from lack of maintenance. I just changed out the pan on my tranny to a deep dish and it look bad, not like the one above. But lots of clutch material in the oil. I did the band adjustment r&r the filter and filled it up with red blood. Then I added a can of k&w tranny cleaner sealer. I've used this stuff before will good results. I like to put about a 100 miles on the tranny and then drain and fill again, but no filter change. Then drive it a while, say several hundred and drain and fill again. This get the cleaner sealer out and the insides get all cleaned up too. Since I'm thinking about rebuilding mine I would like to start with a clean tranny.:winky:

micheal ever use this stuff?
31v8xskrm9l._sl500_aa280_.jpg
 
In my very personal opinion...

The only beneficiaries of "chemical fixes" are the people who make / sell such products....

If you think these "chemicals" work, then your transmission / engine probably really needs to be rebuilt / correctly fixed...
 
Craig...consider yoreself bitchslapped...again!

I can preach about snakeoil for hours so I won't. Robertc's comment is the same one I expounded continuously!

If "stuff" is stuck inside the tranny (as in varnish deposit), it's not hurting anything!! Breaking it loose will cause the damage and can completely trash a valve body! Same for the guts of the torque converter!

Fresh atf alone has a considerable "solvent" action, some formulations more than others. That is why I always advise that if a tranny has never been serviced, doing so onna high milage unit will most likely create some shifting issues. The only way to handle that is a complete teardown, inspection, cleaning, and rebuild.

That "sealer" shit is just like that nylock shit for mobile hvac systems...a contaminate. It works by being reactive with the non-metallic components...ya don't fix a worn out seal by swelling it, ya replace it! And the polymers used in sealing elements (including internally tranny seal rings) used in today's rebuild assemblies are not the same as the stuff used in a tf 727 in 1973! Yes...cast iron rings are cast iron rings, but the rest of the "soft goods" reflect current technology..current silicone/teflon composite sealing elements will not "swell" but will melt!

All that shit that is "released" is gonna collect in the valve body and contaminate the governor, most likely sticking/scoring the pistons. If ya didn't have shifting issues before, ya will now. There is one way to clean something, that is disassemble to the base components, and mechanically clean with appropriate processes, then prelube with appropriate materials as it's being reassembled maintaining cleanliness. Just one frog hair present onna spool valve can cause it to stick inna bore and if it's a blind hole ya May have no way of removing it!

The heavy accumulation of "grit" in the pan and on the filter is normal!!!!! The bands and clutches are consumable items! They are not lifetime components. If the tranny is a fresh rebuild, and ya drop the pan say at 1,000 miles, what ya find in the pan looks like a sandbar in tha new river down on the messkikin border! That's normal!

And if ya run one through a water crossing and stop or slow way down, and ya don't have the relocated vent systems onna sii, then it'll look like pink's pan inside of an hour! Just like the axle "vents", hubs, etc. Water and grit is literally sukked into those heated components.

These trannys have no electronics internally (thankgoodness!!!!), but later versions that do, and receive a dose of snakeoil, will have all sorts of issues develop regarding solenoid deterioration, actuator "sticking", composite materials failure, etc. A shop will always know when snakeoil has been poured in and will bend the customer over accordingly!
 
Since major screwup and monte started this whole slushbox tranny maintenance deal, let's see what's inside of a unit approximately 3,000 miles after a major overhaul.

This is mobinder's hybrid tranny, a very early 727 (circa 1963) tf 727 converted to Scout II innards and installed behind a chrysler 383 inna Scout traveler. That would be the "holstein" tranny I refer to in the pics. And this is terry's pic so I won't take credit for it, he did the tranny service operation at this point after setting up a really nice cable-controlled kickdown system of his own design!!!

Iirc this was the pan at about 3,000 miles of service after the overhaul. This tranny was meticulously cleaned internally during the repair phase after catastrophic internal failure resulting from a previous rebuild done by a "pro". And the valve body was converted with a tf-2 kit as well as several internal components replaced. Most noticeably a "bolt-in" overrunning clutch assembly. And the torque converter was replaced with a reman unit at the time of installation also, since this is an early 727, the input shaft is different from later versions and torque converter for these can be difficult to come by.

What ya see in this pan (a chrysler/mopar accessory item) is perfectly normal! The larger "flake" of aluminum is most likely sluff from a planetary carrier, a piece of casting flash. This kinda stuff is shed continuously in any autotrans, that's why they have filters that should be serviced! This the stuff in the sump of the pan, and it stays right where ya see it, causing no issues whatsoever!

This is exactly what one would expect to see onna tranny after 5,000 miles of service onna rebuild.

This tranny has a high flow brass filter screen supplied by transgo and is renewable by washing in solvent.
 

Attachments

  • Holstein 727 First Service.jpg
    Holstein 727 First Service.jpg
    45.5 KB · Views: 3,831
Back
Top