T407/TF 727 DIY Reseal

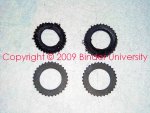
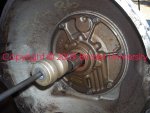
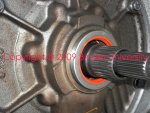
Next up ya simply re-install the two seal/bearing retainers to the clean case mating surfaces! No pics of that, if ya can't figgr it out, ya shoulda had a pro do this job!

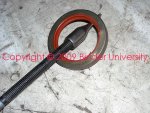
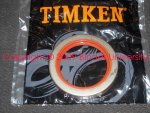
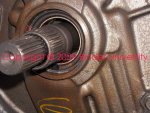
Use a new gasket (front and rear gaskets are completely different!) with no sealant needed. Above all...do not ever use rtv on those flanges, no matter what ya do it will extrude and contaminate the bearing(s) and block the lube return port in the casting. The gasket also serves as a distance piece for the bearing being retained against it's peripheral snap ring, it serves as a "shim" and must be used. That bearing "floats" in it's bore and is not a press fit in the case.

Also I always use loctite on the bolt threads, prevents backing out and seals the threads against lube migration past the threads and bolt head when tightened.
 
One final area to address...the np 205 uses rubber seal "washers" that are slipped over the spline after the coupling or yoke is installed. And again, the sizes of each are different.

These seals prevent lube migration down the splines of the interface and past the retaining nut. A small detail often overlooked.

This shot shows the old seals that are badly damaged/distorted, along with a new pair of replacements. These are not simply some kinda hose washer, they are engineered with internal and external spline segments designed to fit this application!
 

Attachments

  • NP 205 Output Spline Seal.jpg
    NP 205 Output Spline Seal.jpg
    102.2 KB · Views: 2,189
nice! Wasn't expecting a tc overhaul too!:thumbsup:

Leaks is leaks dude! Ya said seal tha bitch...so ya gitta bitch back that's sealed!

We don't work like a reglar "for pay" shop around here, we fix shit right and also fix shit before it's broke if we can 'member what is gonna break! But I do take lotssa naps in between fixxin' broke shit!
 
We're gittin' close to tha end now, two more leaks to address.

The dip stick tube is a major leaker on these trannys if not fixed as soon as a leak starts. The seal for the tube is a simple "o" ring placed into a neckdown portion of the tube, then the tube is stuck into a hole that has a heavy chamfer on top to guide the "o" ring in. The tube is retained in place by a stay welded to it, that is retained by one of the bell housing-to-block bolts.

This one shows a heavy accumulation of grunge...that needs to be cleaned away before removing the tube so shit don't fall inside the pan.
 

Attachments

  • Dip Stick Tube Leakpoint.jpg
    Dip Stick Tube Leakpoint.jpg
    125 KB · Views: 2,204
Just pull up hard on the tube and it will pull out of the hole. If tranny fluid is still in the pan, it will pour out! So it's best to re-seal the dip stick tube while the pan is down for service.

Here's the old tube seal, the "o" ring has turned square and hardened from heat and age.
 

Attachments

  • Damaged Dip Stick Tube O Ring.jpg
    Damaged Dip Stick Tube O Ring.jpg
    83.5 KB · Views: 2,283
Remove the damaged "o" ring and discard. Then clean the tube very well, inside and out, along with the dip stick itself.

Many times you will find all kinds of "sealers" slathered around that area, especially fuckin' rtv. All that shit must be completely removed and the metal nice and bright!

Clean really well around the tranny hole also, and remove any sealer residue. The hole must be clean in order for the new "o" ring to seal.

Then simply slide a replacement "o" ring over the tube and seat it in it's groove.
 

Attachments

  • Replacement Dip Stick Tube O Ring.jpg
    Replacement Dip Stick Tube O Ring.jpg
    71.6 KB · Views: 2,244
Common practice when doing an r&r on any tf 727, is to remove the dipstick before dropping the tranny out. That way the dip stick won't hang up on anything and get damaged.

Since this powertrain is going into a total custom install inna sii, I've put a temp plug in the tube hole to keep the mice out. Once t gits the package installed for the final time, he can install the tube in position...in fact, he May end up having to relocate the tube or even eliminate it if it poses an interference issue with the body. That temp plug will not serve as a permanent plug, it will blow right out once the tranny is placed in operation.

When re-installing the dipstick tube, don't evewr use rtv! It will get inside the trans!

I use either permatex #97 or hylomar on the "o" ring in this location, that "lubricates it when moving into position, and then forms a resilient bond between the "o" ring, the tube, and the hole.
 

Attachments

  • Dip Stick Tube Hole Sealed.jpg
    Dip Stick Tube Hole Sealed.jpg
    113.2 KB · Views: 2,167
Last edited:
Now...our last leak point...and also the most common. It's often mistaken for a rear crankshaft seal leak.

This is referred to as the "front pump seal" most commonly, some call it a "torque converter seal", or an input shaft seal. It actually seals the snout of the torque converter when it rotates in the front pump and takes a tremendous amount of abuse! And of course sees a significant pressure behind it.

The primary reason the seal eventually fails (other than po virus fuckin' it up when a tranny is r&r'd), is because the bushing in the pump that supports the converter hub wears out. So when the seal is replaced, the bushing is commonly replaced also. That can be done from the outside, no need to remove the pump to do that.

Easiest way to remove that seal is with the seal puller attachment that is normally part of a small slide hammer set. The "hook" tool.

Carefully insert the hook tool between the shaft and the seal lip, twist to engage the metal case and lip of the seal, and pop it out, a very ez job and no surprises will jump out at ya!
 

Attachments

  • Front Seal Remove.jpg
    Front Seal Remove.jpg
    131.1 KB · Views: 2,360
Here's a better shot of the seal hook, slide hammer, and failed seal. That seal is a silicone rubber item, and can tolerate extreme heat conditions. Sometimes the replacements are green in color, sometimes they have a small flange to prevent driving in to deeply, there is no preference for which seal is used, I use any seal I can get from the supplier at the time. And for the 727, that seal has not changed since 1965 or so!
 

Attachments

  • Front Seal Removed.jpg
    Front Seal Removed.jpg
    140.1 KB · Views: 2,192
Look careful inside the hub of the pump body...ya can see the bushing. That is a tri-metal type bushing, very similar to a full shell cam bearing in an engine. Steel backer, then a couplea layers of copper/babbit and a oilite bronze wear surface.

The bushing in t's tranny has been replaced fairly recently with an aftermarket item. That one has a wear surface that is "dimpled" for lube oil retention and appears to be perfect. So in this one instance, I'm not going to replace it. In normal tranny seal replacement, and of course during an overhaul procedure, this bushing would be replaced.
 

Attachments

  • Front Pump Bushing.jpg
    Front Pump Bushing.jpg
    137.2 KB · Views: 2,243
Here's a typical replacement part seal, these are available under many different "brand names", name don't matter as long as the seal is the correct application. This happens to be a timken brand..."made in taiwan".
 

Attachments

  • Timken Pump Seal.jpg
    Timken Pump Seal.jpg
    120.1 KB · Views: 2,139
The counterbore in the front pump where the seal will reside must be clean and sterile.

Here ya see the replacement seal has been lightly pushed into the counterbore, the seal case has a slight chamfer on it to help guide into position in the counterbore.
 

Attachments

  • In Place.jpg
    In Place.jpg
    136.3 KB · Views: 2,027
While a special tool "driver" is nice to have to seat the seal, it's certainly not necessary.

If the pump is on the bench when replacing the seal, then I do use a driver. If the pump is installed as in this case, I simply tap around the perimeter gently using a brass hammer, until the seal is fully seated in the counterbore.
 

Attachments

  • Seated.jpg
    Seated.jpg
    145.1 KB · Views: 1,980
We're done!

Last step is to make certain the tranny penetrations are all completely sealed off so that no particulate or moisture can enter the case. Whether you are simply finishing it off and planning to re-install soon, or prepping for long term storage, the unit should be sealed to exclude any small animals or shopcrap. In this case I use a pvc vacuum cap to plug the vent, and duktape to seal the input side.

This tranny now goes outside to the degreaser and powerwashing station, then dried with the leaf blower, and loaded in the truck for delivery to t on May 30.
 

Attachments

  • Prepped for Storage.jpg
    Prepped for Storage.jpg
    122.6 KB · Views: 2,024
I just bought new seals from napa to fix my leaking shift shaft and the larger one doesn't look the same as the one I pulled out. I put it in anyway and it leaked right away, it doesn't have as much rubber on at as the old one. Where do you get the ones you use? Part #? Thanks
 
While I try and not deal with napa at all for anything, I have used the seal they supply in the past.

There are two different shift shaft seals used in these transmissions...I'm talkin' the shift shaft seal...not the "soft" throttle pressure control seal.

The one you need is the "thin" seal case item. It will measure 0.250" in thickness (1/4").

The seal you are trying to use will measure 3/8" in thickness and will not work in your transmission...but you already know that! That seal is for a much later variation of the base 727 model, the four speed unit with lockup.

There are many part numbers for that proper seal for your unit. But all the various numbers I use won't mean anything since they are proprietary to various wholesale suppliers I use and are not "standard" seal numbers.

If you insist upon using napa as a parts source for this item, then tell 'em ya need the shifter seal for a '78 dodge d100 pickup with 318 engine, auto transmission. And take your old part with ya for validation!

The best place to find this seal is your local independent transmission rebuild shop.
 
Thanks for the tip, napa had the same seal again even for the dodge. I got the right one from a local trans repair shop.
 
Just want to post how helpful this thread is. I changed a leaking shifter seal and not-leaking throttle seal without issue in our '73 travelette.

Now, I get to drive the truck and see what else might be leaking. :d
 
just want to post how helpful this thread is. I changed a leaking shifter seal and not-leaking throttle seal without issue in our '73 travelette.

Now, I get to drive the truck and see what else might be leaking. :d

Big insider tip tim...if it's got liquid inside...it's leaking!

Next up..re-seal the valley cover, install new pcv grommet and then intake manifold gaskets! Replace the front crank seal (adding a repair sleeve if needed). Toss that gasket under the distributor mounting flange and replace with an "o" ring.

When ya make the left coast move, stop by here and we'll handle it all!
 
Back
Top