The Ultimate IH Fourbanger

Hmmm, I thought that crank looked familiar!...:icon_up: good to see that it is being put to good use! Damn that engine is going to be clean. By the time I'm ready to go with the 196, you'll have all the quirks worked out and it'll be a breeze in the engine rebuilding.:yesnod:
 
I'm thinkin' we put the 152 crank in yore motor, by gittin' the compression down way low, we kin run it on coal oil or drip gas???? Or turpentine ya kin make yoreself.

Layin' the 196 crank over in that rotten 152 block beside it didn't make it look any better though! Both cranks are equally focked!!
 
Mm,
I am posting details of my fiat stroker build because it is some what relevant and well documented.
Started life as a 1800 cc 87hp mill. I stroked it up 11mm(.433")
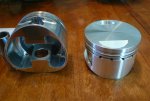
and bored it 1mm (.03937") to net 2050cc and 160+ hp. I designed rods and pistons and had them made here in (hotrod heaven) socal.

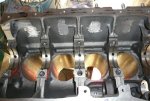
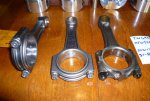
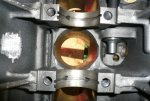
The block picture I posted shown the typical clearancing needed for the larger stroke. The rods were speced with a low profile big end so machining would be held to a minimum and the stock oil pan would still work.

Remember the IH has a lot more surplus room to accomodate the stroke increase so I expect only the bottom of the cylinder bores will need to be modified to clear the rod I beam.

P1000381 (Large).jpg

P1000378 (Small).JPG

P1000388 (Small).JPG

P1000380 (Small).JPG
 
Last edited:
Thanks for the profile of the fiat Robert! That should really help other folks that May have an interest in what we're doing!

I'd forgotten all about the "notching" deal at the bottom of the cylinders!!!! I was more concerned with having to mod the piston skirts. But I just don't see any way to finalize all the clearance stuff until I have the rods and pistons we're gonna use in hand.

But no matter what, as you say...there appears to be plenty of clearance space in the bottom end of these tractor motors.

Just for my own curiosity...does that fiat mill have a "balancer" shaft or is that a quill shaft for an accessory drive I see???? And this is inna spider or a x1-9???
 
Just for my own curiosity...does that fiat mill have a "balancer" shaft or is that a quill shaft for an accessory drive I see???? And this is inna spider or a x1-9???

The shaft pictured is a carry over from when the fiat twin cam had a block mounted dizzy. It also had the mechanical fuel pump eccentric on the end that I had to machine off for rod clearance. The old dizzy location still drives the oil pump so the shaft needed to remain.

The engine is in a 124 spyder.

To further this a bit, I recommend that all of the clearancing needs to be done before any final block machining or boring is completed. First pick your crank and rods and have the crank modified to need and rod fit then machine a piston for a preliminary mock-up and clearance block needed. Then measure the finished deck and compression height requirements and choose a piston or have them made. I usually leave the piston in the hole .010 or .010 below the expected finished location to allow block desk surface refinishing.
 
Last edited:
While waiting for paint ta dry on some distributors, I thought I'd play with my own stuff a bit.

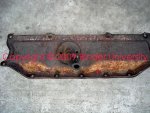
Needed to clean up a lifter chamber cover and get it ready. So I robbed one that was a later model cover set up for a pcv connection off another engine that has seen some time underwater. Typical ratty po piece of crap!

The cover came off too easy! Normally takes a bunch of effort to unstick 'em. Ya can see in this shot that in the past, someone cut the connecting hose, even though all the pcv and manifold adapter for it were still in place, just had the hardened rubber hose sliced off.
 

Attachments

  • I-4 Lifter Cover 002.jpg
    I-4 Lifter Cover 002.jpg
    143.9 KB · Views: 1,331
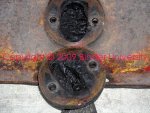
The round fitting that is bolted to the cover connects to the pcv valve scruud into the intake manifold adapter.

Now ya can see why someone cut the hose...the sumbitch couldn't breathe!!!!

In all my years of scruuin' with motors, I've never seen one that has such a large breather passage that is totally sludged/clogged with no opening to the pcv! If ya just pulled periodic maintenance on this pcv, that would not have done nuthin' as far as allowin' the motor to breathe!!!

So this will be one more priceless part saved from the crusher.
 

Attachments

  • I-4 Lifter Cover 004.jpg
    I-4 Lifter Cover 004.jpg
    129.1 KB · Views: 1,367
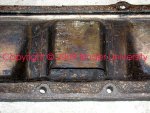
Now here's the backside of the cover showing the baffle for the breather connection. Notice the lack of sludging on the sheetmetal...someone has scrapped gunk off in the past, ya can easily see that.

So someone went to the trouble of pulling the cover, and cleaning the backside, but never cleaned out the breather tube!!!! And then no doubt pissed and moaned about "all IH crap leaks oil!". Well hail yeah...I guess so, if you were this constipated I'd say ya would have sum trouble gettin" yore motor revved up too!
 

Attachments

  • I-4 Lifter Cover 005.jpg
    I-4 Lifter Cover 005.jpg
    156.4 KB · Views: 1,234
Ok so you drug me into your stroker 4, and now I am curious about the progress/success. Any new status on this build? Did you resolve your piston/connecting rod combination?
 
ok so you drug me into your stroker 4, and now I am curious about the progress/success. Any new status on this build? Did you resolve your piston/connecting rod combination?

Unfortunately both michael and I have been very busy with other stuff. The rod deal is a fairly easy situation to figure out.

Pistons will require a custom design based on the stroke you choose.

For a 152/304

you can use a bbc 6.135 c to c rod and have the stock crankshaft rod journals welded offset ground and narrowed to fit them and that is the cheapest solution.

Next best is a custom forged steel rod to fit the oem bearing and weld and offset grind the crank to what ever your heart desires within the physical constraints of the block.

Other than this we will have to wait till such free time pops up.:icon_cry:
 
Last edited:
Robert has a real job and don't have time for this worthless schnizz since all his luv goes into the funny car now!

I only have this toy job here and still don't have time (or cash!) to spend on needless schnizz!

But that is changing rat now!

I got the new rear driveshaft installed in the beater truck project tonite, so it's back in dd service for now. And my wife now has work again after a year off even though it May not last for another year!

So next week I hope to take my 152 block to the machine shop for a bake/blast/magnaflux. If it passes crack inspection, then we'll decide which pistons we're gonna go with so I can have it bored while still at the shop.

The 196 crank I had sourced has turned out to be non-existent, some folks will flat out lie to ya about the parts they have, the crank turned out to be a 152 which I have three of already! So I'm back to looking for a 196 crank again that needs some work, crunched journals are just fine as the crank is gonna get some custom massage anyway.

I have a nice flywheel I swapped for that had just been surfaced, and a new 11" diaphragm clutch that was allowed to get wet in the original IH packaging in someone's parts department, so that clutch cover and it's companion clutch disc are going to the rebuilder for freshening. Once I have that stuff back in hand, the clutch set and flywheel go to the machine shop to add to the pile of parts for the engine balance.

That leaves the connecting rods to work out, and have Robert machine the crank trigger wheel for my crank hub. That will complete the package of parts needed for the engine balance work. At that time, I'll have southworth do the crank, bore the block, and then do the balance job.

I dug out the transmission project again yesterday so I can do some work on setting up the clutch release system, that thread will be revived here:

http://www.forums.IHPartsAmerica.com/transmission-tech/911-Scout-80-t18-four-speed-swaperoo.html


 
Bringing this stroker project back up, Robert and I have been discussing the rods to use and it looks like we're now gonna split a set of chev big block rods between us to go with the offset grind on the 196 crank.

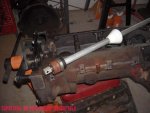
Gotta new cam bearing tool a few days ago, so I need to finish stripping the 152 block I've designated and haul it to the machine shop for bake and blast and magnaflux before going any further.

According to the parts lists, there was only one cylinder head produced for 345 and 345a engine apps, part number 432091-c92. That number is for a replacement head assembly and that number May not be found on the actual casting. We need to verify the p/n for the head casting itself for correct I.d. In the field. But bottom line is, there was/is only one head for a 345 so this is simple. Does this jive with your research Robert?? I don't have any 345 heads here, only 152 and non-ic 196 (and ic 392).
 
If your block fails inspection, let me know. I have a 152 block that I have been cleaning up for my bottom end machinist class at sierra college. Crack free and getting ready to bore this Thursday. The block was previously taken 30 over and has 6 thou taper in the number 1 cylinder (worst) so hopefully it will clean at 40, if not then it will be bored to 50 over. Had to take 10 thou off the deck to get it to clean also.

I have absolutely no use for this motor and have been considering not even spending money for pistons and gaskets to put it all back together. I have just been using it for practice and experience with the class.
 
I know the 152 is a under achiever but it'll make over 196 inches and make more power per cu/in at a given rpm than a similarly trimmed 196. Don't know why guys hate them so much. Keep tuned to this channel.:ihih:
 
I am interested in seeing how this comes out, if I had a 196 crank I would even be following right along. These little 4 bangers are sure neat motors, stout for sure. I have been keeping my eyes out for an 80 or 800, but as of now I simply have 2 of these motors with no truck body to put them in. :icon_wink:
 
I need to drop this block at the machine shop Friday, so yesterday between kidney boulder attacks I was able to get the cam bearings and core plugs out of the way.

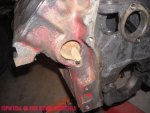
The big chunks of near-concrete you can see broke loose when I knocked the core plugs out. The entire rear half of this block is totally plugged with hardened sedimentation, there is no way this motor could have cooled effectively nor would any type of cooling system flush have been effective. All too typical of these engines that have not been maintained in any way over the years.

The bake and blast process will remove all traces of this crap and leave the block appearing freshly-cast inside and out! Far more effective treatment than any "hot tank" process for stuff like this where ya can't get inside.
 

Attachments

  • Water Jacket Sedimentation.jpg
    Water Jacket Sedimentation.jpg
    80.1 KB · Views: 1,109
This is a lisle cam bearing tool I picked up last week. This newer version uses two different thickness sets of rubber sleeves for the expanding mandrels, that gives much better bearing protection that the older style that used multiple "o" rings.

The driver bar is now machined out of solid aluminum bar stock, about half the weight of the older tool.
 

Attachments

  • Lisle Cam Bearing Tool.jpg
    Lisle Cam Bearing Tool.jpg
    58.5 KB · Views: 1,133
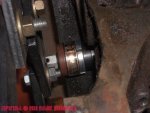
This shot shows the #5 cam bearing popped out and still engaged on the expanding mandrel, to remove it ya just loosen the mandrel and pull the shell off and then back the tool up and remove #4, etc.
 

Attachments

  • #5 Cam Bearing Removed.jpg
    #5 Cam Bearing Removed.jpg
    56 KB · Views: 1,084
I can't do decent macro pics with my camera, but this is #5 bearing. It has significant wear over it's entire running surface, with copper showing through the babbitt layer which is virtually worn away.
 

Attachments

  • #5 Wear.jpg
    #5 Wear.jpg
    61.3 KB · Views: 1,075
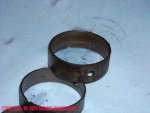
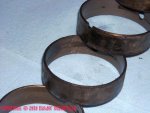
This is cam bearing #3.

That "mottled" appearance is the result of moisture-related damage over time. When the oil is not changed on a regular basis, acids accumulate that will then attack the friction-type bearing materials.

Cam bearing #4 is just above #3 in this pic. That one is missing it's entire babbitt layer, that folded up like a slinkee spring and was found in then pan. While it appears like it's just "worn" it's actually missing about 0.006" of it's id!

In actuality, each of the five cam bearings in this engine show a different type of wear/damage!

This motor set un-run each year until elk hunting season in late summer. Then it was started and run just enough to get the po into his hunting ground. About 6 years ago the fuel system plugged so badly it would no longer run and the po let it sit until a friend found it and managed to make it run again.

Then he poured cash into a total pos motor that took a cam bearing dump before our eyes one day (after bending several pushrods). At that point I swapped in a known good 152 and this one went in the core pile. This is a very early 152, produced in either '60 or early '61.
 

Attachments

  • #3 Acid Damage.jpg
    #3 Acid Damage.jpg
    64.9 KB · Views: 1,078
Michael,
before ya spend any sheckles on that old chunk of iron you'll need to very cylinder wall thickness and core shift... I'll let you know how my junk looks.

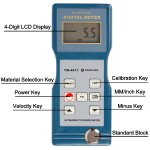
I have a new ultrasonic thickness tester but I need to make sure I can use it accuratly and veryify it on a .250 wall known cylinder.
 
michael,
before ya spend any sheckles on that old chunk of iron you'll need to very cylinder wall thickness and core shift... I'll let you know how my junk looks.

I have a new ultrasonic thickness tester but I need to make sure I can use it accuratly and verify it on a .250 wall known cylinder.

Ok!

So...let's put this pooter technology to work. If I mount the block on the new er gurney, and wheel it up close to one of my pooter monitors, can ya use yore new tool and test my block over the 'net in real time?? If I set up three monitors around the block, can ya do a 3d scan for me?? And if the webcam is running on it at the same time, can ya line bore it with yore laser system while it's on the bodywagon???

We gotta nuff bandwidth for all this kinda shit???

Let's see pictures of tha new tool!!!! Ya needa gurney to go with it??
 
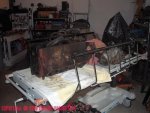
Is this about the right height for settin' tha bodydolly? Do we need to call in monte for a certified view that can be interpreted by monte's bosslady?
 

Attachments

  • Body Dolley.jpg
    Body Dolley.jpg
    68.9 KB · Views: 1,111
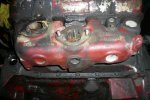
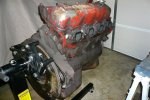
Well making progress... My doner 196 arrived but it maybe to good to rip the heart out of... Came via a sw friend and bro from a 76 terra outa a pull-a-part.


It is an ic 196 and has the manifold should mayben need it. :cornut: should work on a 345 head. Clean inside, turns easy and has compression on all 4....

P1010349 (Medium).JPG

P1010348 (Medium).JPG

P1010347 (Medium).JPG

P1010345 (Medium).JPG
 
Last edited:
Back
Top