Proper Clutch Identification

on the subject of throwout bearing collars, mine appears worn down substantually (.075") after 400,000+ hard miles.
Although it was working ok in a 1975 sii xlc, replacement is in order.
It measures 3.168" not including the bearing. 3.250" from the bearing surface to the opposite end.

In post #11 in this thread, the throwout collar in the pic on the right should be the one you need.

Jeff most likely has some of those on hand at the shop. If he does not, I have one I can give up, it shows no wear whatsoever on any contact point.

So that is where your "clutch throw"/travel has gone.
 
thank you mr. Mayben. I will check the ihonlynorth online store first.
Thank you for the advise and generous offer.
 
thank you mr. Mayben. I will check the ihonlynorth online store first.
Thank you for the advise and generous offer.

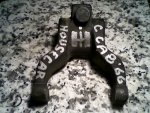
Check carefully your "clutch release fork" (p/n 62 635 hd). Verify the two pads that contact the collar are not worn down also. A combination of the worn fork pads and the worn collar pivot points adds up to total lack of proper clutch pedal travel vs. Pressure plate actuation.

I don't have any of the clutch release forks here. If needed, those points can be built up with electric weld material mig is easiest but stick can also be used carefully) and then reground to an approximation of the original dimension.
 
check carefully your "clutch release fork" (p/n 62 635 hd). Verify the two pads that contact the collar are not worn down also. A combination of the worn fork pads and the worn collar pivot points adds up to total lack of proper clutch pedal travel vs. Pressure plate actuation.

I don't have any of the clutch release forks here. If needed, those points can be built up with electric weld material mig is easiest but stick can also be used carefully) and then reground to an approximation of the original dimension.
I have a spare clutch release fork. It was from a 1966 IH housecar with a t-98/sv392. It shows very little wear and mics the same as the 1975 sii crf. The pads and fork tangs are beefier on the sii unit. The sii crf pads were very rough which is were I suspect the wear problem came from. I am using this 1966 crf.
 

Attachments

  • CRF 66.jpg
    CRF 66.jpg
    89.8 KB · Views: 1,465
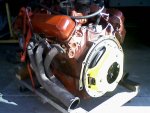
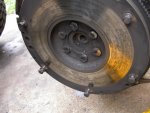
neutrally balanced flywheel and cover (resurfaced)
with nos 12" driven disc installed on sv345 engine.
Thanks to Isa, michael and everyone for the correct collar, to bearing and help.


Attachments

  • sv345.jpg
    sv345.jpg
    66.8 KB · Views: 1,784
Last edited:
I'm replacing my clutch in my 76 Scout II t-19 and I have my original flywheel that will be resurfaced, however I will be using a new clutch assembly.

I was talking to another IH'er about this balancing of an IH flywheel and he told me the following:

the ihsv crank is externally balanced by an offset balanced flywheel. In other words, the flywheels on these engines are not "zero" balance. If you have the flywheel machined, tell them to check the balance before machining and restore it to the original balance after machining. I think the shop that did mine used temporary weights to zero it out before machining, zero'd after, then removed the temp weights.

From reading this thread, I've confirmed that he is right about the offset balance, but I haven't seen anything on this method of temporary weights used for machining the flywheels.

Should I follow his advice on the temporary weights when I take the flywheel to the machine shop?


good work!

Neutral balance of the entire rotating mass is the right way to do this!
 
A competent machine shop will be able to rebalance the flywheel to the original balance or you can have the flywheel and new pressure plate neutral balanced. This will take care of the pressure plate which will be off more than the flywheel even if you didnt rebalance.
I May be wrong, but if you removed .005 or even .025 across the surface of the flywheel the effect on balance should be extremely minimal due to it being removed in an equal manner. The weight in metal removed would be small and imho having the 2 neutral balanced would be more beneficial since you cant do the whole rotating assy.
 
Last edited:
well, here goes:

I have a 1977 SII, 196, 3-spd with a chain drive transfer case. I have purchased a T-19 close ratio w/ D20 transfer case to replace the 3 speed. My questions are:

I am a bit confused about the TO bearing re: the length issue. In this thread there is discussion about different type of TO bearing and length. I do not understand one TO bearing from another, so is reusing the TO bearing from the 3 speed ok? or not? I am trying not to ask a dumb question, but need to know. Or are all Scout II's (regardless of engine/transmission) the same? Is the TO bearing differences because of the discussion of Scout 80's/800's? I have not pull the 3 speed yet (this weekend), but would like to get some basic understanding of the different length issues.

Another question: with the 3 speed, the clutch engages really high up on the clutch pedal. Is this a TO bearing issue, or a clutch adjustment issue?

Thanks for the responses.
 
If your 3 speed set up is all stock, I would think it is an adjustment issue with peddle height. There should be an adjustable length rod going from inside the cab, through the floorboard and to the bell crank. Basically you loosen jam nuts at each end of the rod, and then spin the rod to make it longer or shorter to adjust . A service manual would help and is an essential item in your set of tools, as well as the parts manual, which has many exploded views with part numbers. I know there are several different length collars that the throw out bearings get pressed on to, as well as versions that allow you to grease the bearing while it is installed - as long as you press the bearing onto the collar correctly. You may also run into issues with the bell housing/transmission interface. don't know if the 3 speed and T19 use the same bell housing.
 
Last edited:
Ya know: dumb me!

Thanks for the quick reply. Let me rethink what I was trying to say re: the TO bearing/collar. I am switching from a 3 spd with a chain drive transfer case to a 4spd T-19 with a D20 transfer case. I am also swapping out the bell housing as the 3spd bell housing is not drilled for the 4spd. I have the bell housing for the 4spd.

I plan to re-use the same 11" disk and pressure plate from the 3spd as it only has about 5K miles on it.

My concern was the TO bearing/sleeve from the 3spd. I am trying to determine if that same TO bearing/sleeve will work on the 4spd. Crap, the 4spd and Transfer case weigh a pretty penny, and I didn't want to hook everything up and find out it is too long/short for this application.

Again, thanks for the response and any other info is appreciated.
 
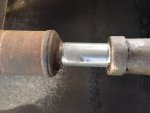
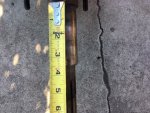
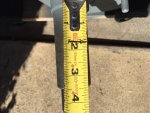
The answer is yes keep the same throwout bearing that you are currently using. Length wise they need to match the clutch, then the transmission. However, One thing I would double check is the front bearing retainer length. Otherwise known as the "snout" of the transmission, this is the part that your throwout bearing collar rides on. If the one on your T19 is much shorter than the one on your 3 speed transmission, then yes you may need to change the throwout bearing collar to a different one to prevent the bearing from falling off the end of the snout. I hope this all makes sense. If not, post pictures of the front of each of your transmissions with a tape measure coming off the front mounting surface(where the bellhousing bolts to) so we can verify you won't run into this problem. I bring this up as we do run into this problem from time to time and still do not know why IH had Borg Warner shorten up this part on some later T19's.
 
well: here goes

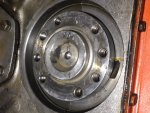
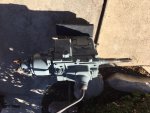
got the 3sp/chain drive t/c off,cleaned all part (disk, t/o sleeve/bearing, pressure plate, flywheel). Good news: the snout of both the 3spd and 4spd are the same length (approx 3.5 inches). I can use existing t/o bearing.

Pressure plate looks very clean (can still see machining swirls), disk look barely used.

Questions:
#1 - what would you use on surface of flywheel, pressure to clean? is brake cleaner sufficient?
#2 - is there any way to "clean/freshen up" disk?
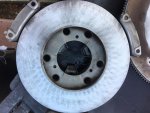
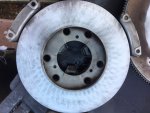
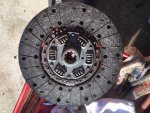
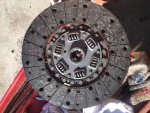
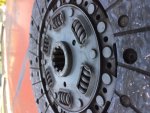
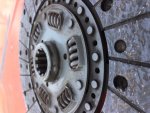
#3 - on the disk, there are no markings that tell me which side goes towards engine. Picture attached shows one side with a slightly more protruding hub/nose. I don't want to screw this up.

Also found where my rear of engine leak was coming from! Stupid me for not checking! when I had the engine rebuilt 15 yrs ago, the shop that did the work put the rear main seal in backwards, and the flywheel bolts did not have any type of sealer on the threads. When I took one/two of the flywheel bolts off, oil came seeping through the bolt hole.

Anyway, if possible, would like to get some quick replies on this post. It is 7:30 a.m. here and I would like to get this s.o.b. done today. By the way, this 4 speed weights a ton! DAMN! it's heavy.
 

Attachments

  • rear main view .JPG
    rear main view .JPG
    149.3 KB · Views: 556
  • pressure plate .jpg
    pressure plate .jpg
    66.3 KB · Views: 595
  • pressure plate 2.JPG
    pressure plate 2.JPG
    115.7 KB · Views: 586
  • disk view of snout.JPG
    disk view of snout.JPG
    103.7 KB · Views: 539
  • drive shaft .JPG
    drive shaft .JPG
    90.6 KB · Views: 552
  • snout on 3 spd.JPG
    snout on 3 spd.JPG
    167.5 KB · Views: 609
  • snout on 4 spd.JPG
    snout on 4 spd.JPG
    107.4 KB · Views: 638
  • disk view 2.JPG
    disk view 2.JPG
    161.2 KB · Views: 563
  • disk 1.JPG
    disk 1.JPG
    163.3 KB · Views: 597
  • 4 spd trans.JPG
    4 spd trans.JPG
    136.3 KB · Views: 581
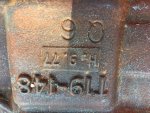
  • 4 spd ID marking.JPG
    4 spd ID marking.JPG
    180.5 KB · Views: 594
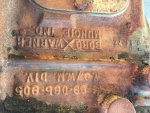
  • 4 spd ID marking 2.JPG
    4 spd ID marking 2.JPG
    183 KB · Views: 581
also:

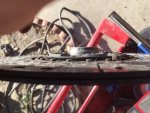
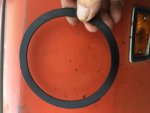
The “odd piece” was behind the rear main seal when I removed it yesterday. Any idea what it is, and I don’t see it in my shop manual. It is cardboard material.

The clutch disk question: one side has a larger spline protrusion. Does this side go towards engine? Dumb me, I didn’t keep track when I took it out yesterday.

Thanks for the assistance.
 

Attachments

  • odd piece 2.JPG
    odd piece 2.JPG
    53.2 KB · Views: 558
  • odd piece 1.JPG
    odd piece 1.JPG
    79.2 KB · Views: 568
  • Disk side 2.JPG
    Disk side 2.JPG
    113.6 KB · Views: 579
  • disk side 1.JPG
    disk side 1.JPG
    118.6 KB · Views: 575
The larger protrusion, be it from the spline hub or the entire center section, goes towards the pressure plate.\

As for the paper board ring.... I have no idea. I guess it could be some type of oil slinger ring.
 
The paper ring is a spacer for the rear main seal so that the seal rides on a fresh spot on the crankshaft. I never use them.
 
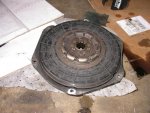
Need it installed so that the springs in the center of the disk are furthest from the bolts that mount the flywheel to the crankshaft. Mine was installed backwards by the PO, and the clutch disk started eating away at the flywheel mounting bolt heads. Also make sure the bolts that mount the pressure plate do not bottom out before the pressure plate is fully seated on the flywheel. If the flywheel has been turned multiple times this can happen and you need to add extra washers/lock washers or you will get some very annoying clutch noises. Can also get some shorter bolts. Just dug up some pictures, and I have a different style clutch disc, so someone else may have a better answer. That's the way mine came out, and it was ass backwards.
 

Attachments

  • DSCN1791.jpg
    DSCN1791.jpg
    78.5 KB · Views: 558
  • DSCN1793.jpg
    DSCN1793.jpg
    71.8 KB · Views: 556
Last edited:
almost done!!!!! Damn- that T-19 and D 20 was heavy!!!

I am reading that the recommended gear oil is :

Use GL-4 or GL-3 ONLY. Must NOT use GL-5 or GL-4/GL-5 with bronze synchromesh manual transmission. Manual synchromeshed transmission oil is included here for information only

Can I get a "reasoning" for not using GL-5? I am reading where GL-5 is a more durable gear oil. No? will GL-5 destroy the synchos, or cause early wear?

Thanks>
 
The GL5 most likely has sulfur in it which attacks the bronze parts.The T19 weighs in at 160 and the Dana 20 at around 60. I run Redline MT 90 in both. If you have any leaks they will tend to leak more because it's thinner. Nowadays it doesn't cost much more than the standard 90 weight.
 
Ok, the good:

got everything in lined up, bolted down. Started the 196 with clutch pedal full depressed (good sign), figured out how the 4 spd shifter went into the top and "presto", good to go. everything shifts just fine (had to get used to 4 speeds vs. the 3 speed that I had for 15 yrs). Transfer case engages just fine, all is good.

the bad:

I have what sounds like either throw out bearing failure, or end of snout "chatter". The T/O bearing is well greased (zirk fitting) and when I had it out when changing trannies, it seemed fine. There was no looseness or wobble at all.

The sound I get is not when standing still when engaging any of the 4 speeds, it only shows up when moving. when shifting from one gear to the next, I hear this "rattle", then it goes away when clutch is released.

Is it possible that the T/O bearing/collar is too short for the snout? since I have the console cover off when driving, I can really hear it, but I will confess that I recall hearing the same noise when I had to 3 spd in, only I didn't think about it (and the console cover was on, so not as noticeable).

When I had the T/O bearing/sleeve off to clean, it had literally no wear on "contact to fork" points/locations, and the fork itself appeared just as nice.

Bottom line: I am guessing that if is a collar that is too short, at some point, will it fall off the end of the snout? I will leave it alone for right now - the Scout drives just fine.

Random thought: since the snout and sleeve are stationary, someone could invent/design a "bolt on" sleeve (maybe 1.5") to attach to the end of the actual sleeve to eliminate this issue. I would hate to have to remove this 220 lb. dead weight again! It was painful the first time around.

I did not think to measure the T/O bearing/sleeve when it was out since it was the original one. I will take pix and post later today.

Damn! working on this sled is some real good mental therapy!

 
well, and afterthought:

to eliminate the obvious, what is the longest T/O bearing/sleeve available? I will measure mine and post. :yikes:
 
See if you have an access cover on the bottom of the bell housing. Both my 75 with a 258, and my 72 with a 345 have them. After taking it off you should be able to see what is going on with the throw out bearing, and just about everything else in there. Also make sure that the pressure plate is fully seated against the flywheel. Sounds like it has something to do with your clutch linkage, pressure plate, or pilot bearing. Also make sure you transmission and motor mounts are in decent shape. Have someone push the clutch pedal in and out while you are underneath observing things (you can have the engine running, but block the wheels, make sure it's someone you trust, and don't put it in gear).
 
Last edited:
Back
Top