no juice to coil

Richard

Member
1977 SII, 345, 2 bbl, 4 speed, d20 tc, D44 front and back, pertronix, p/s, p/b. Basically stock.

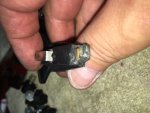
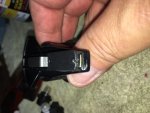
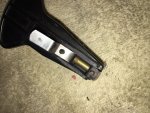
My scout has been getting progressively harder to start when sitting for more than a day or two. I thought that maybe it could be the carb (2210), but I can see the jets squirting gas when I pump the gas pedal. Then I thought that it may be the rotor and/or disto cap (but no, they are new) I looked at the carbon tracking in the cap (where the rotor hits the individual spark plug posts) and I noticed that the is very little carbon tracking, and then only on the very edge of the post.

so, tried starting the Scout this week, no go. it feels like it wants to start, but negative. I then pulled off the coil wire (center post) and tried starting to see if there is any spark - NOTHING.

What am I needing to look at next? Please advise!!

Richard
 
What was described is no juice from the coil. Check and see if there is juice 12v to the side terminals.
 
ya know, I was in such a hurry, I totally neglected that. Also, looking at the wiring schematics I see that positive side goes to the ignition switch. I will have to investigate further. so, let's fast forward: either ther is a bad wire from the positive side of coil to the ign. switch, or the ingnition switch is going bad, or the ignition switch is not lined up correctly/exactly?

1632255910121.png
 
ya know, I was in such a hurry, I totally neglected that. Also, looking at the wiring schematics I see that positive side goes to the ignition switch. I will have to investigate further. so, let's fast forward: either ther is a bad wire from the positive side of coil to the ign. switch, or the ingnition switch is going bad, or the ignition switch is not lined up correctly/exactly?
So Richard, I'm confused by your reply. Did you get out your meter or other voltage tester and measure if there was 12v on the + coil terminal? Seems like you are jumping ahead and skipping steps. 20 on the schematic is a resistance wire and under load like with the coil on load the voltage at the coil will be about 9 volts, l no load the coil will have 12 volts on it. This assumes no one has wired something else on BY-16-16 like a electric choke.
The correct test procedure is ignition in run position and meter on ground and the + coil terminal. The - coil tern is not ground and only truly negative if either the points are closed or the electronic module in the distributor is switching it to ground.
 
Mr. Kenney:
you are correct, I was jumping the gun and I did not test correctly. I will be doing that this weekend and I truly appreciate the response.
 
well, well, well:

sooooooooooooooooooo, I checked the + side of the coil with the key on. I have 11.6 volts. could be due to low battery now. Anyway, pulled off the disto cap, pull off the rotor, and found that the brass tang of the rotor was very loose. I played with it and voila! the brass tang fell off. I did not know that there was a small sort of resistor under the little plastic piece to the end of the brass tang (the end that strikes each of the spark plug posts. I put another rotor on and bang, starts right up. GOOD GOD! The pertronix that is in the disto is about 20 years old and has been running fine, but I think I want to switch over to the pertronix II while I am playing with this disto.

Thanks all for the help and advice.
 
random question:

Does the pertronix module affect the stock coil re: a hotter spark? I am hearing that the pertronix conversion will eventually burn out the stock coil ? Does anyone have thoughts, experience? Should I go to a performance coil? or is it necessary?
 
Not using the oem resistance wire or ballast. The pertronix will switch faster than points and make a better spark. That won’t hurt your coil.
 
excellent it fired up and runs !
i cant answer your coil question definitively. i do know any ignition system, pertronix or others are designed with a certain amount of resistance in mind. the components need to match that resistance. the original pertronix which i think you have called for a 1.5ohm coil. i know it wont burn out tomorrow, or the next day. i ran my pertronix with an accel supper coil for 20+years. never burned out. just recently during a turn up i switched to the pertronix flame thrower coil of correct resistance. by the way im also still on my original 20+ year old pertronix ignation. its never missed a beat. thats with tons of 4 wheeling, from deep snow to 100 degree days.
thats my experiences, to sum it up, as Robert posted above, i dont think there is any danger of the coil or anything burning out.
 
ya know, I have never, ever had an issue with rotors until this issue. Never thought that a rotor could go bad, or fall apart. Oh well.
 
Mr. Kenney:
re: the oem resistance wires you are talking about? on this 77 Scout, it has all of the original wiring harness intact. the wiring from the coil to the firewall and under the dash is original. I figure, why mess with it if it still functions. I mean, the only thing that I have done to the wiring is check for bad wires, clean up and re-wrap parts of the harnesses that needed it.

Thanks.
 
Sorry, I forgot to add the needed verbiage to the first sentence.
Not if you are using the oem resistance wire or ballast. The Pertronix will switch faster than points and make a better spark. That won’t hurt your coil.
You should be fine. Look at the ignition switch, the resistance wire has light to white colored fabric looking insulation in contrast to the other plastic wires. The resistance wire is designed to get warm under normal use as it drops voltage and thus consumes wattage. Under normal stock resistance coil loading it will operate normally. If you add a lower resistance coil in an attempt to make a hotter spark, the resistance wire will be dissipating a lot more power due to the circuit running a lower total resistance and higher current.

Like posted already, your Pertronix module should be fine.
 
By 1977, Scouts were no longer being equipped with breaker points and consequently no resistor wire feed to the coil. Your stock ignition system would have been the Holley electronic ignition with remote amplifier module, more commonly known as the Gold Box.
 
I am curious:

the Prestolite rotor has an internal resistor at the end underneath a plastic cover. What is the reasoning for the resistor?
 
Attention ignition gurus!

I have found what I think may be a problem and I do not know what the cause is. My previous post re: no juice to coil seems to get more interesting. attache snapshots show a new rotor, a rotor with no more than 500 miles, and a partial rotor that shows an internal "resistor". if you look at the rotor that looks "burnt", I don't know what could be causing this problem. Is there some issue with the rotor itself? If you look at the rotor with the internal resistor, all it is is a piece of brass that connects the center tab to the brass end that connects with each disto post (in turn firing each plug).

As this is a Prestolite disto with a pertronix I module, I thought that maybe, after 20 or so years, that the module finally pooped out. Looking at the rotor, I'm not so sure. In trying to get my 77 SII running I took the rotor and pertronix magnet out of my 79 Traveler (also a Prestolite with Pertronix I), and put them in the 77SII, Scout started up. I also noticed that the rotor out of the 79 was a little burnt but I cleaned it off with wire brush and installed it in the 77.

I had purchased a Pertronix II to install (I did that today). The burnt rotor that you see was not that bad when I put it in the 77 SII. The 77 SII started right up with the Pertronix II, I adjusted the timing (12 degrees), adjusted the carb, vacuum is at 19 steady, voltage at alternator is right at 13.4 volts, at battery voltage is at 12.7. I am running MSD 8.5 super conductor spark plug wires.

Does anybody have an idea why the rotor looks fried? is there too much voltage? Too much resistance? The rotor should not look like this.

Appreciate any input. Thanks,
 

Attachments

  • bad rotor.JPG
    bad rotor.JPG
    107.3 KB · Views: 171
  • new rotor.JPG
    new rotor.JPG
    96 KB · Views: 180
  • rotor with internal resistor.JPG
    rotor with internal resistor.JPG
    153.5 KB · Views: 217
It looks like impact damage to me. What does the inside of the cap look like? That might not be the correct rotor for the application.
 
Back
Top