ok guys so im back with some basic questions:
1. Oil capacity for a 304 with filter change and recommended weights?
@ 6 quarts to the fill line. As per a service bulletin from back in the day, Scout II's with the dual sump oil pan should run 1 quart over full to reduce the chance of top end oil starvation during long intervals at upper revs. In your climate, 20w-50 would be a good choice year round. Use a quality oil filter such as wix, baldwin, hastings, or purolator in that order. Avoid fram oil filters like the plague. They suck.
2. Atf fluid capacity on a new rebuilt 727, and I got a connection for lucas oil products does anyone run it in their trans? Good idea or go with swepco?
in light of my present "status", I will always pimp the products available through ihon first, such as the swepco line of lubricants. Whatever you use, it should be dexron iii backwards compatible. Add 6 quarts to begin with. You'll need several more on hand. Run the engine for a few minutes and move the gear selector slowly through each position ending at n. Always remember, 727 fluid level is to be checked only with the engine running and gear selector in n for accuracy. Add sufficient fluid to bring the level to the "add 1 pint" Mark. Recheck the level after the engine has reached operating temperature. It should always be in the safe range between the "add" and "full".
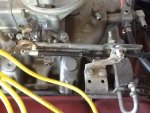
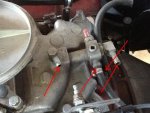
3. Nss... I did a 14 circuit kwikwire , the purple wire from the fuse box goes to the stater post then down to the nss switch? What are the other 2 prongs on the nss for?
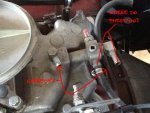
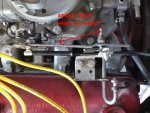
you don't want a wire running from the starter solenoid (battery +) to the ns switch on the trans (chassis ground). That would make for an electrifying experience. The ns switch serves two functions. First is to provide a ground to complete the start circuit only when the gear selector is in p or n. The other is to complete the reverse lights circuit when the gear selector is in r, which is accomplished via the outside prongs.
Your kwikwire kit is universal in nature, but somewhat setup with a GM vehicle in mind, so there's a couple wiring tasks youll need to perform in order to complete the nss circuitry for the Scout.
I'll describe the circuits as they pertain to the factory layout. Hopefully, this will make some sense to you. There should be a relay under the dash with three prongs. If not, you'll need to get one. This is your auto trans relay. Think of it as an interruption of the purple wire between the fuse panel and the solenoid. It is identical to your horn relay found on the driver side inner fender. It has 3 male blade connectors. Viewing the connectors head on as an upright triangle, the top blade is where you will connect the purple wire from the fuse panel. Take another chunk of the purple wire and run it from the bottom left relay connector to the starter solenoid as indicated in your instructions. Then you'll need a wire run from the bottom right relay connector to the center prong on the ns switch at the trans. This wire provides the ground as mentioned above. Clear as mud?
4.transfer case oil? Its just gear oil? What weight recommended and where do I fill it from and how much?
the swepco gear lube can be safely used in your axle diffs as well as your t-case. The same cannot be said of more commonplace gear oils.
There is a large, square head fill plug on the rear surface of the t-case. Do yourself a favor and invest in a hand operated fluid transfer pump which you can insert into the bottle to draw from. One minute spent underneath looking at the surroundings will be enough to convince you that a gravity feed approach is not advised. It will take a skosh over a quart.
5. Im going to fire her up hopefully in a few days...I know I need to prime the oil pump first but do I need to have the motor tdc before attempting to fire? Ive never done it before so if im missing a step or 4 please let me know your advice is much appreciated. Thanks sean


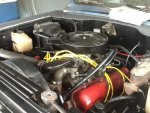
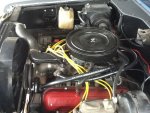
 pics are always helpfull im a visual person
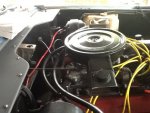