LD`s Custom Scout II

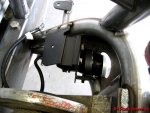
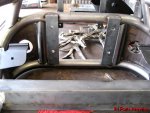
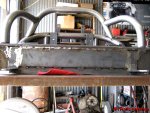
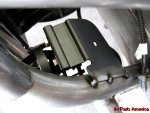
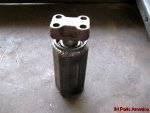
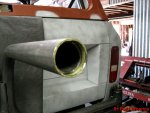
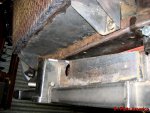
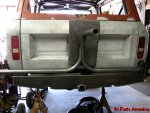
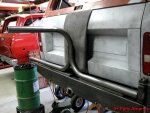
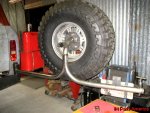
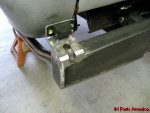
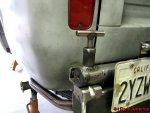
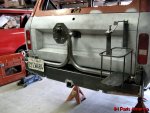
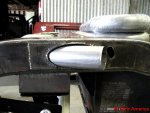
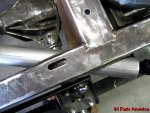
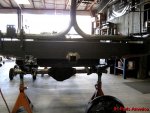
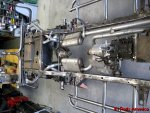
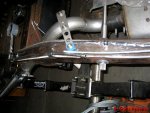
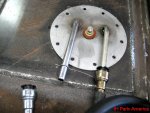
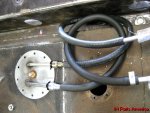
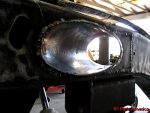
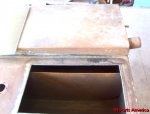
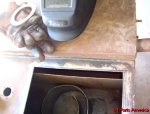
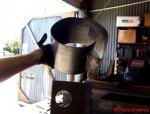
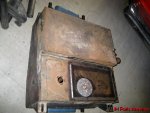
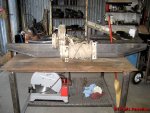
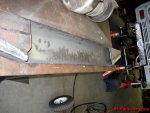
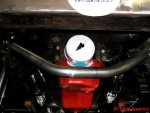
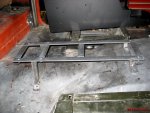
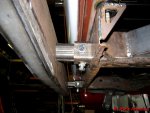
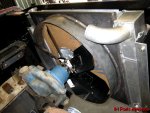
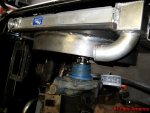
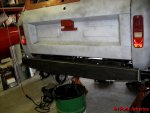
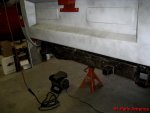
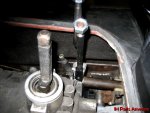
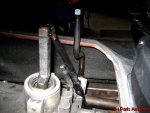
With the mpfi system we wanted an in tank fuel pump. After a phone call or two we were able to locate a universal fuel pump mount that will house the fuel pump and fuel lines. The fuel tank was first plated on the bottom for extra strength. Then a large access hole was cut into the topside of the fuel tank. A 'fuel can' so to speak was fabbed to help keep fuel at the pump inlet at all times - even in extreme angles.

attachment.php

attachment.php

attachment.php

attachment.php

attachment.php

(sorry about the crappy fuel tank pictures)
 

Attachments

  • 100_3325.JPG
    100_3325.JPG
    72.5 KB · Views: 3,330
  • 100_3326.JPG
    100_3326.JPG
    88.3 KB · Views: 3,318
  • 100_3327.JPG
    100_3327.JPG
    93 KB · Views: 3,271
  • IMG_0009.JPG
    IMG_0009.JPG
    104.3 KB · Views: 3,402
  • 100_3323.JPG
    100_3323.JPG
    124.1 KB · Views: 3,348
Last edited:
Jeff

I am from the rice burner crowd but I dig your work. This is some really tricked sh*t.

After seeing fast talking bull from another shop last year, I was real close to kicking some ass but my bro reigned me in. I am glad to see the truck ending up getting honest good work at your place.

Ant.

P.s. I sold the datsun roadster.

Thanks ant! Looks like we need to build you a Scout since the roadster is gone.:cornut:
 
Tube sliders/nerf bar/running boards(whatever you'd like to call them) were built and mounted on three points to the frame. Using oval mounting plates we were able to make the sliders removable. We also fabricated and welded in a steering box frame stiffner (also known as a straight steer) and began fabrication of the front bumper.
attachment.php

attachment.php

attachment.php

attachment.php

attachment.php

attachment.php

attachment.php

attachment.php

attachment.php

attachment.php
 

Attachments

  • IMG_0013.JPG
    IMG_0013.JPG
    122.7 KB · Views: 3,333
  • IMG_0019.JPG
    IMG_0019.JPG
    133.4 KB · Views: 3,238
  • IMG_0018.JPG
    IMG_0018.JPG
    103.6 KB · Views: 3,248
  • IMG_0016.JPG
    IMG_0016.JPG
    64.1 KB · Views: 3,214
  • IMG_0015.JPG
    IMG_0015.JPG
    101.6 KB · Views: 3,276
  • IMG_0011.JPG
    IMG_0011.JPG
    92.7 KB · Views: 3,304
  • IMG_0012.JPG
    IMG_0012.JPG
    74.7 KB · Views: 3,205
  • IMG_0010.JPG
    IMG_0010.JPG
    88.6 KB · Views: 3,278
  • IMG_0008.JPG
    IMG_0008.JPG
    106.9 KB · Views: 3,272
  • IMG_0007.JPG
    IMG_0007.JPG
    75.2 KB · Views: 3,225
Last edited:
Time for another update. We started fabbing the rear bumper, pretty much finished up the front bumper, fabbed up a fan shroud, fabbed a mount for the center console, and got the atlas transfer case shifters adjusted to clear the nv4500.

attachment.php


attachment.php


attachment.php


attachment.php


attachment.php


attachment.php


attachment.php


attachment.php


attachment.php
 

Attachments

  • IMG_0042.JPG
    IMG_0042.JPG
    68.4 KB · Views: 3,413
  • IMG_0055.JPG
    IMG_0055.JPG
    45.7 KB · Views: 3,192
  • IMG_0054.JPG
    IMG_0054.JPG
    72.9 KB · Views: 3,183
  • IMG_0044.JPG
    IMG_0044.JPG
    74.9 KB · Views: 3,230
  • IMG_0030.JPG
    IMG_0030.JPG
    95.6 KB · Views: 3,224
  • IMG_0026.JPG
    IMG_0026.JPG
    116.8 KB · Views: 3,811
  • IMG_0027.JPG
    IMG_0027.JPG
    98.1 KB · Views: 3,318
  • IMG_0028.JPG
    IMG_0028.JPG
    93.5 KB · Views: 3,553
  • IMG_0025.JPG
    IMG_0025.JPG
    75.6 KB · Views: 3,217
Last edited:
A couple more pics of the front bumper and transfer case shifters.

attachment.php


attachment.php


attachment.php


attachment.php


attachment.php
 

Attachments

  • IMG_0067.JPG
    IMG_0067.JPG
    92.1 KB · Views: 3,256
  • IMG_0068.JPG
    IMG_0068.JPG
    93.1 KB · Views: 3,161
  • IMG_0069.JPG
    IMG_0069.JPG
    75.5 KB · Views: 3,141
  • IMG_0070.JPG
    IMG_0070.JPG
    80.6 KB · Views: 3,118
  • IMG_0071.JPG
    IMG_0071.JPG
    74.7 KB · Views: 3,164
Last edited:
Nice build.
I'm really interested in the top.
I used to love to go topless in the summer but after building a full cage it is so hard to remove the inner panels and side bolts now that I rarely remove it. I have thought about notching the fiberglass inner panels at each bolt but I hate to modify them.
Have you worked out an easier method or just plan to leave it stock?
 
thanks ant! Looks like we need to build you a Scout since the roadster is gone.:cornut:

Amen! As long as it has 4 cylinders, short shift trans and a turbo......... Speaking of which, my bro just picked up a '65 sport-top from your bro. He's been talking restore. I need to talk to him :devil:

that front bumper is hot.... Allows plenty of airflow through the grill :icon_up:
 
Jeff, would you please stop posting all this eye candy. You know I'm indecisive when it comes to the Scout and this stuff does not help. Once again, beautiful work. :icon_up:
 
lookin awesome Jeff:yesnod:
Thanks Mike!
nice build.
I'm really interested in the top.
I used to love to go topless in the summer but after building a full cage it is so hard to remove the inner panels and side bolts now that I rarely remove it. I have thought about notching the fiberglass inner panels at each bolt but I hate to modify them.
Have you worked out an easier method or just plan to leave it stock?
The plan is to leave it stock. The downside to this cage being so tight to the hard top is that it will make it very difficult to remove the side panels in order to access the hard top bolts.
amen! As long as it has 4 cylinders, short shift trans and a turbo......... Speaking of which, my bro just picked up a '65 sport-top from your bro. He's been talking restore. I need to talk to him :devil:

that front bumper is hot.... Allows plenty of airflow through the grill :icon_up:
That sportop would make an awesome builder.
Jeff, would you please stop posting all this eye candy. You know I'm indecisive when it comes to the Scout and this stuff does not help. Once again, beautiful work. :icon_up:

Thanks. If this helps any with your decision we do accept all four major credit cards, checks, and cash.:wink5:
 
Now for a long overdue update. We finished up the front bumper. Mounted smaller driving lights to the bumper and filled in the open area to cover up the mounts. The inside of the bumper got plated for extra strength. For as strong as this bumper is it only weighs 73 pounds:eek6: .
attachment.php

attachment.php

attachment.php

attachment.php

attachment.php

attachment.php
 

Attachments

  • IMG_0078.JPG
    IMG_0078.JPG
    102 KB · Views: 3,706
  • IMG_0081.JPG
    IMG_0081.JPG
    116.2 KB · Views: 3,654
  • IMG_0080.JPG
    IMG_0080.JPG
    136.1 KB · Views: 3,689
  • IMG_0079.JPG
    IMG_0079.JPG
    111.4 KB · Views: 3,721
  • IMG_0077.JPG
    IMG_0077.JPG
    97.7 KB · Views: 3,686
  • IMG_0076.JPG
    IMG_0076.JPG
    114.5 KB · Views: 3,670
Last edited:
One last picture of the bumper with the shackles installed. The shackle mounts(sometimes known as a clevis) was welded to the inside of the frame for the ultimate in strength.

attachment.php


We started the rear tire carrier by first building a custom hinge. I've seen and heard of too many of the trailer spindle type hinges breaking so I wanted to make sure that the hinge was held in double shear. We used new bearings from a closed knuckle dana44 front axle as they were on the shelf and fit close to the material we were using.

attachment.php

attachment.php

attachment.php
 

Attachments

  • IMG_0082.JPG
    IMG_0082.JPG
    99.1 KB · Views: 3,603
  • IMG_0083.JPG
    IMG_0083.JPG
    99.7 KB · Views: 3,717
  • IMG_0084.JPG
    IMG_0084.JPG
    100.3 KB · Views: 3,693
  • IMG_0085.JPG
    IMG_0085.JPG
    118.8 KB · Views: 5,217
Last edited:
We welded in a receiver hith to the rear bumper and highly reinforced it to the bumper mounts. With this set-up all the weight when towing will be off of the bumper mounts as opposed to the bumper itself.

attachment.php


The tire rack was fabbed from 2" tube sleeved with 1 3/4" tube for extra strength and was built to go across the full length of the rear bumper.

attachment.php

attachment.php

attachment.php
 

Attachments

  • IMG_0092.JPG
    IMG_0092.JPG
    114 KB · Views: 3,774
  • IMG_0093.JPG
    IMG_0093.JPG
    128.3 KB · Views: 4,048
  • IMG_0090.JPG
    IMG_0090.JPG
    119.8 KB · Views: 4,806
  • IMG_0091.JPG
    IMG_0091.JPG
    122.1 KB · Views: 3,793
Last edited:
Here are more pictures of the rear tire carrier. We made a spring loaded latch so the rack will auto lock when shut. The stinger pointing back to the tailgate helps prevent the rack from shaking but also helps keep the rack in the shut position.

attachment.php

attachment.php

attachment.php

attachment.php

attachment.php
 

Attachments

  • IMG_0100.JPG
    IMG_0100.JPG
    100.7 KB · Views: 3,612
  • IMG_0101.JPG
    IMG_0101.JPG
    120.1 KB · Views: 3,677
  • IMG_0102.JPG
    IMG_0102.JPG
    105.2 KB · Views: 3,622
  • IMG_0103.JPG
    IMG_0103.JPG
    104.1 KB · Views: 3,656
  • IMG_0106.JPG
    IMG_0106.JPG
    126.4 KB · Views: 3,913
Last edited:
We built rear quarter panel guards that are removable.

attachment.php

attachment.php


At this point it was time to remove the body from the frame and put it back on our roller chassis in order to send it off to paint.

attachment.php

attachment.php

attachment.php


The cage was removed for some final welding.

attachment.php
 

Attachments

  • IMG_0108.JPG
    IMG_0108.JPG
    116.1 KB · Views: 3,550
  • IMG_0110.JPG
    IMG_0110.JPG
    120.3 KB · Views: 3,631
  • IMG_0109.JPG
    IMG_0109.JPG
    129.2 KB · Views: 3,660
  • IMG_0107.JPG
    IMG_0107.JPG
    103.7 KB · Views: 3,702
  • IMG_0105.JPG
    IMG_0105.JPG
    87.4 KB · Views: 3,602
  • IMG_0104.JPG
    IMG_0104.JPG
    118.7 KB · Views: 3,581
Last edited:
We welded on a couple more gussets to the front body mounts.

attachment.php


With the body off we were able to finish off the exhaust tail pipes. With the limited room around the rear suspension and the 2.5" tail pipes we had no choice but to route the exhaust thru the frame:eek6: .

attachment.php

attachment.php

attachment.php

attachment.php
 

Attachments

  • IMG_0116.JPG
    IMG_0116.JPG
    120.9 KB · Views: 4,311
  • IMG_0112.JPG
    IMG_0112.JPG
    142 KB · Views: 3,625
  • IMG_0113.JPG
    IMG_0113.JPG
    127.2 KB · Views: 3,542
  • IMG_0114.JPG
    IMG_0114.JPG
    118.3 KB · Views: 3,559
  • IMG_0115.JPG
    IMG_0115.JPG
    131.4 KB · Views: 3,418
Last edited:
We fabbed up a mount for the hilift jack to mount to the roll cage.

attachment.php


Here's a couple of random pics.
attachment.php


attachment.php


This brings us up to date.
 

Attachments

  • IMG_0117.JPG
    IMG_0117.JPG
    123.2 KB · Views: 4,050
  • IMG_0119.JPG
    IMG_0119.JPG
    117.2 KB · Views: 3,476
  • IMG_0118.JPG
    IMG_0118.JPG
    146.6 KB · Views: 3,476
Last edited:
Work has continued on with lots of progress. Fuel and brakelines were prerouted on the frame. The bumpers, roll cage, sliders, and other misc parts were sent off to powdercoat. Those parts came out looking awesome! A better picture of the thru frame exhaust. The fuel pump assembly was modified some more so quick disconnect fittings could be added in for easier service of the assembly.

attachment.php


attachment.php


attachment.php


attachment.php


attachment.php


attachment.php


attachment.php


attachment.php


attachment.php


attachment.php
 

Attachments

  • IMG_0350.JPG
    IMG_0350.JPG
    112.8 KB · Views: 3,730
  • IMG_0372.JPG
    IMG_0372.JPG
    127 KB · Views: 3,380
  • IMG_0371.JPG
    IMG_0371.JPG
    130.5 KB · Views: 3,439
  • IMG_0370.JPG
    IMG_0370.JPG
    97.2 KB · Views: 3,436
  • IMG_0363.JPG
    IMG_0363.JPG
    140.8 KB · Views: 3,370
  • IMG_0362.JPG
    IMG_0362.JPG
    115.8 KB · Views: 3,466
  • IMG_0354.JPG
    IMG_0354.JPG
    124.2 KB · Views: 3,431
  • IMG_0353.JPG
    IMG_0353.JPG
    129.1 KB · Views: 3,413
  • IMG_0352.JPG
    IMG_0352.JPG
    111.3 KB · Views: 3,438
  • IMG_0351.JPG
    IMG_0351.JPG
    109.5 KB · Views: 3,463
Last edited:
With all the fabrication complete the chassis was stripped down to a bare frame.
attachment.php


attachment.php


attachment.php


The main body was picked up from my buddy Mike the painter. Mike layed down one of the smoothest paint jobs that I've seen in awhile.

attachment.php


attachment.php


attachment.php
 

Attachments

  • IMG_0374.JPG
    IMG_0374.JPG
    71.7 KB · Views: 5,031
  • IMG_0375.JPG
    IMG_0375.JPG
    129.9 KB · Views: 3,399
  • IMG_0377.JPG
    IMG_0377.JPG
    116.2 KB · Views: 3,441
  • IMG_0413.JPG
    IMG_0413.JPG
    129.6 KB · Views: 3,514
  • IMG_0414.JPG
    IMG_0414.JPG
    146.1 KB · Views: 3,773
  • IMG_0415.JPG
    IMG_0415.JPG
    129.5 KB · Views: 3,450
Last edited:
Back
Top