IHC Vehicle Distributor Identification

Michael, sorry bout the misleading info,the module is under the breaker plate and the little white colored pickup is the only thing mounted on the plate. They have installed the wrong cap , according to the previous threads, female lugs should be male? Correct? Will post pics in the next reply if I can figure it out . This damn lectronic thang aint no junk iron.
 
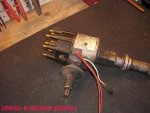
Brad, here's a pic of the prestolite I just installed in my rig, it's just the top view but it sure sound like the one you have.
dscf1492.jpg


Ron
 
michael, sorry bout the misleading info,the module is under the breaker plate and the little white colored pickup is the only thing mounted on the plate. They have installed the wrong cap , according to the previous threads, female lugs should be male? Correct? Will post pics in the next reply if I can figure it out . This damn lectronic thang aint no junk iron.

No doubt what you have is the prestolite electronic as shown in ron's pic.

There are several things "wrong" with trying to interchange the caps between the Holley and the prestolite-pattern distributor bodies. Primarily...they don't fit correctly! And to really add to mystery performance, the phasing of the terminals in the two caps is not the same resulting in really crappy performance.

There is a way to use the prestolite cap on a Holley body, I did a swap on Jeff's converted efi Holley distributor on his white sii yesterday...but even that one is not optimum...yet.

Yes...a correct cap for the prestolite will have male terminals (contrary to popular belief, delco did not originate that concept as seen in an hei distributor design). Also..stay away from the aftermarket prestolite caps with aluminum terminals/contactors...those are garbage...and the internal terminals are not shaped/manufactured correctly for the prestolite rotor design.

I'll post some additional info with pics regarding the prestolite sparker this coming week after I get home and can shoot some pics of the sample parts.

The time we spent with navybill and navyjoe this past week dealing with the efi-enabled distributor variations will result in a converted distributor that is optimized with all the good stuff that fits properly and can be used with or without efi.
 
Yep thats the puppy. Ok now can this diz be hooked up like a GM hei to eliminate the points diz I have now and if so how. I can purchase the correct cap and rotor thru napa only one I can seem to find at the wally world stores are the junky aluminum contact ones. Good thing there are still a few good part stores around. Anyway I woulld love to do the swap if possible. If not oh well. Any info would be greatly appreciated. Thanks.
 
Thanks to monte and his fil ron, I was able to add to the distributor collection here at binder u. So we can continue updating this thread.

This a prestolite idn-4000 series electronic distributor. These units were phased into light line vehicle production towards the end of the m/y '77 production run. However, they commonly May be found in "retrofit" applications on any I-4, sv, mv, lv engine application, sometimes as a replacement for the Holley 1530 gold box system.

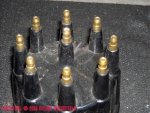
Easily identified due to the use of the male cap terminals, the "square" section design of the body below the cup, and the removable portion of the vacuum advance assembly which retains the calibration spring.

The white wire found in the harness pigtail is used as part of the emissions-related dtm system on some vehicles, and has nothing to do with actual distributor operation. In many applications that wire is simply hanging and not connected to anything.

These are outstanding sparkmakers!
 

Attachments

  • Prestolite IDN 4000 Series Electronic Distributor 002.jpg
    Prestolite IDN 4000 Series Electronic Distributor 002.jpg
    101.5 KB · Views: 3,505
Here the detail of the exterior of the prestolite cap, it's also used for the breaker point prestolite distributor which shares this same body and drive system.
 

Attachments

  • Prestolite IDN 4000 Series Electronic Distributor 005.jpg
    Prestolite IDN 4000 Series Electronic Distributor 005.jpg
    104.4 KB · Views: 3,373
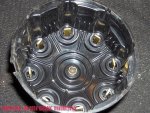
This is the interior of the prestolite cap. A completely differnt design as seen in the Holley caps.

Most significant differences...the flat-type terminals and the way the cap is located on the distributor body itself.

This is an oem-type cap, and also representative of the premium quality caps available for these distributors. Brass terminal that are well bonded to the bakelite receptacles.

The cheezeball caps are going to be found with aluminum terminations and will most likely have several segments that are "loose" in their receptacles and able to move around, that condition sure doesn't provide any stability to ignition timing! But they are much cheeeper than the premium caps, so buyer beware.
 

Attachments

  • Prestolite IDN 4000 Series Electronic Distributor 004.jpg
    Prestolite IDN 4000 Series Electronic Distributor 004.jpg
    126.6 KB · Views: 3,360
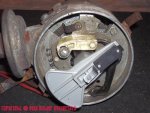
Here's the guts.

Ya see the rotor which is somewhat unconventional, we'll look at that next.

Underneath the rotor and attached to the mechanical advance unit is the toothed wheel referred to a the "reluctor" or some May call it the trigger wheel.

The white plastic pod is the actual electronic pickup, it's mounted in an adjustable fashion as part of the setup on these units involves setting the "air gap" between the pickup and the reluictor. The air gap is what determines "dwell", similar to what we understand about a breaker point system. Only in this case, that air gap can't change over time unless the distributor becomes badly worn internally, or some ham-fisted po thinks they can increase performance by tweeking it!

Underneath the "breaker plate" you will find the electronic amplifier/control unit mounted. Again, that is a somewhat unique setup as compared to many other electronic ignition distributors. That module can be replaced as a set along with the breaker plate. There is no other electronic module mounted to the vehicle other than the coil. The bulkhead-mounted dtm module is an emissions device that is controlled to a degree by the distributor amplifier, but has no bearing on distributor functionality.
 

Attachments

  • Prestolite IDN 4000 Series Electronic Distributor 003.jpg
    Prestolite IDN 4000 Series Electronic Distributor 003.jpg
    90.6 KB · Views: 3,379
Last edited:
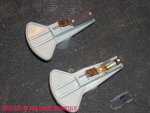
Here we have the rotor used with this distributor. Again, this item is totally different in design as compared to a Holley rotor. Don't let any parts countermonkey tell ya they are "all the same"!!! No way these rotors will interchange!

Pay close attention to that steel contactor in the center which conducts juice from the coil to the individual plug cable terminations in firing order rotation. Notice the black, rectangular segment between the spring contactor and the flat tip???

Unlike rotors used in most other distributors, this one has a resistor incorporated in it's conductor path! Looks like a tiny battery and is retained just like a battery in a small electronic device also. The idea here is to always have the distributor/coil firing into a load, that enhances coil output same as opening up the spark plug gap or using a now-obsolete "resistor"-type spark plug. It also serves to attenuate electronic "noise" that ya hear through your radio/sound system and can screw with gps nav devices and cell phones.

The problem with these rotors is that they can exhibit significantly increased resistance over time, including going "open" which means no spark to ionize the plug gap, even though there is nothing wrong with the rest of the ignition components! Many new distributors and modules have been sold over time simply because the rotor went open and needed periodic replacement!

I have three of these rotors on hand right now, all appear to be in great shape and are clean and fresh...all are "open"!! After I did surgery on this one, the reason for it's "open" can be easily seen. There is considerable corrosion between the ends of the resistor element and the conductors at each end. Just like we see with dry cell batteries inside of battery holders that have corroded!

The upper limit for resistance of these rotors is 6,000ohms per the service manual.

The Scout II (and many other service manuals have complete service information for these distributors, along with identification information based upon the IH part number and the prestolite series number stamped on the tag attached to the main body.
 

Attachments

  • Prestolite IDN 4000 Series Electronic Distributor 009.jpg
    Prestolite IDN 4000 Series Electronic Distributor 009.jpg
    109.4 KB · Views: 3,207
Last edited:
Alright michael I have to ask
thanks to monte and his fil ron,

What the hell is fil, the only thing I can find is that it refers to my "fuctional impairment level" :gringrin: :gringrin: :gringrin:

I think my fuctional impairment level is as good as anybody elses at binder u:crazy: :crazy: :crazy:

I just can't spell as good as u guys

lol
ron
 
:crazy: :icon_rotate: hahaha fil stands for father in law.:cornut:

Yep! At least mikee has retained summa that crap they filled him with in post-secondary escapade!

But hopefully he won't end up with a fil when goes south for the winter, or even worse a mil! He needs to stay focused on the training he's gonna receive from Darren in azzkickin', crapper douchin', and maybe if he's fortunate...weld grindin'.

Go out and break the I.c.e. Off the hood and check that rotor ron!
 
After searching the napa website I found a cap and rotor for the 4000 series dizzy at a etter price than a/z or adv/ or orielly. The picture shows the cap to have brass male studs and the rotor appears exactly as in the previous pics on here. The p/n are as follows
cap mpe al162sb $7.69
rotor mpe al163sb $6.29

these appear to be as the site says a high quality yet economical oem replacement. They damn sure beat the other guys aluminum studded caps and chinese rotor. According to the guy at napa they are manufactured in the usa by echlin.
Whats your 2 cents on this m/m
 
after searching the napa website I found a cap and rotor for the 4000 series dizzy at a etter price than a/z or adv/ or orielly. The picture shows the cap to have brass male studs and the rotor appears exactly as in the previous pics on here. The p/n are as follows
cap mpe al162sb $7.69
rotor mpe al163sb $6.29

these appear to be as the site says a high quality yet economical oem replacement. They damn sure beat the other guys aluminum studded caps and chinese rotor. According to the guy at napa they are manufactured in the usa by echlin.
Whats your 2 cents on this m/m

The "mpe" designation is the echlin "value" or second line. I believe you will find if ya compared the top end parts, the plastic is somewhat thinner and is a different compound.

As to performance, if it fits snuggly and indexes correctly, no doubt it willwork ok, but May not last as long.

Go to a store and look at one...if the contactors "wiggle" or appear to be loose in any fashion, don't waste the coin.

Ya git what ya pay for.

I hate the napa website/lookups. If I'm forced to comparison shop or want to confirm stuff in the napa lookup that is suspicious, I use these sites:

d&m auto parts

And:

6.4 l 392 cid v8 government open market (opm) - gov't open market - capitol supply, inc.
 
As micheal noted the mpe prefix designates their price brand. It will not have brass contacts it will be aluminum. As of aprox nov 09 napa changed their supplier of their value line from an undisclosed supplier (quite possibly from china) to the price line from standard. The stuff in the echlin box is standard's premium line, and has been for many years.

Since the mileage plus electrical line is from an undisclosed source(s) that doesn't produce their own "picture book" napa just uses the pics supplied by standard and will not necessarily be representative of the actual product.

Drop the prefix and suffix and you'll get the premium parts supplied by standard, made in usa or canada, with brass contacts, in the echlin box. Those are high quality parts and worth the extra cost for anything you plan to keep.
 
Aight, I'm a firm believer in gettin what ya pay for! But I also do .alot of comparison shoppin. Hell ya got to nowadays. I already have a cap that was on an engine I have here. And guess what it think it was the wrong app.
The dizzy in ths 79 I have here is steel or cast. Im sayin this due to the fact it has rust on the outside. But it is electronic. I think. It only has 2 or maybe 3 wires coming out of the side. Not real sure as im in the house . But if my pornagraphic memory serves me right I think its that way. I'll pull it and lokk at the pics earlier in the thread.
 
Thanks to all yall out there helping out on the tech , holy smokes talk about info.. My question is this? Thanxs to the picts an posts I have I.d.'d the diz az an prestolite breaker point ,, 75 sct 2 v8 not sure if 304 or 345 yet , am I missing it , is there a post I didn't see , ? Can anyone hit me with the point gap spec's please, 2 morrow I pick up the right stuff to start . Yes I got the frikinp.o. Blues........ Cheap ass Holley replacement parts on my presto lite, thanx again .. Love IHOnly...very greatfull for this site.. Proud member.......help my hillbilly ass... 1fatman.
 
thanks to all yall out there helping out on the tech , holy smokes talk about info.. My question is this? Thanxs to the picts an posts I have I.d.'d the diz az an prestolite breaker point ,, 75 sct 2 v8 not sure if 304 or 345 yet , am I missing it , is there a post I didn't see , ? Can anyone hit me with the point gap spec's please, 2 morrow I pick up the right stuff to start . Yes I got the frikinp.o. Blues........ Cheap ass Holley replacement parts on my presto lite, thanx again .. Love IHOnly...very greatfull for this site.. Proud member.......help my hillbilly ass... 1fatman.

A single point prestolite distributor is id'd in posts #7 and #8 of this thread.

The breaker point gap/dwell for the prestolite is the same as for most an v8 breaker point ignition system...nominal 0.015">0.017" or 28*>32*. 0.016" and 30* is the target I always shoot for.
 
Hello michael and y'all, still trying to get fossilized chunk of metal, rubber and fiberglass resembling 1975 loadstar 1600 to breath fire. Have provisionally installed holly 2200c carb rebuilt by michael (industrial art) without spacer or electronically actuated governor/throttle body. Have determied that engine is a 345 # 1180717. Distributor looks to me (unreliable source) to be holly 1510 according to pics on this site. The distributor part # (obtained with mirror, magnifying glass, hat, led flashlight and sun at the right place in the sky) appears to be and International harvestor number 427908 c91l.

Here is the 1st question. I purchased a petronix ignitor kit # 1481 but am not sure it is the right kit. The round black piece containing the magnets slides down the rotor shaft but does not click, lock or turn into place and the rotor when replaced doesn't seem to lock it in either. It's not as if there is lots of play between the magnet piece and the shaft but even with the rotor on you can readily turn the magnet piece independent of the shaft turning. Is it supposed to just sit there like that ? I realize there is not much centrifigul force at the center of a merry go round but ? Is it the wrong kit. Thanks
 
If the distributor is a 1510 Holley (aluminum body with breaker points), then the ignitor 1481 is correct.

The "late" versions of that kit have a two piece magnet ring conversion. A plastic "washer" about 1/4" thick and then the magnet ring. The earlier version had only a one piece magnet ring and will not use the plastic washer/spacer.

If you have the version with the plastic spacer, place it on top of the point cam first, then push the magnet ring down over the point cam completely, the inside of the new magnet ring is slightly octagonal in shape, that lines up exactly with the lobes on the point cam and push down hard until the magnet ring seats completely on the point cam. The magnet ring is then seated and will be driven firmly by the point cam.

If you do not have the pertronix version with the spacer, then just do the same with the magnet wheel, push all the way down over the point cam, then the distributor rotor will go right back in place just like it had points.

If yours has a black, brown, or opaque/white "dust shield" to protect the breaker points, then do not use that part, set it aside for someone else who needs one, it will not work with the pertronix conversion!
 
if the distributor is a 1510 Holley (aluminum body with breaker points), then the ignitor 1481 is correct.

If you do not have the pertronix version with the spacer, then just do the same with the magnet wheel, push all the way down over the point cam, then the distributor rotor will go right back in place just like it had points.

If yours has a black, brown, or opaque/white "dust shield" to protect the breaker points, then do not use that part, set it aside for someone else who needs one, it will not work with the pertronix conversion!

I have the early version which went on fine once I was armed with the knowledge that the ring was "slightly" octagtonal and that you had to push "hard" to get it to stretch enough to snap down over the point cam. I will forward you the opaque dust cover along with some other "extras" at some point when I'm finished.

Question # 2. Installed and gapped the box and ran the wires out through the grommet. Does red wire the attach directly to the positive side of the coil? I ran a test which indicates there May be a ballast resistor or resistance wire somewhere in the system. But I am clueless as to where. I have a new petronix coil with an internal resistor can I just install that, wire the red side of the ignitor directly to the positive side of the coil and not worry about looking for any ballast or resistor wire. My problem with electricity is you can't see it. Thank you again.
 
I have the early version which went on fine once I was armed with the knowledge that the ring was "slightly" octagtonal and that you had to push "hard" to get it to stretch enough to snap down over the point cam. I will forward you the opaque dust cover along with some other "extras" at some point when I'm finished.

Question # 2. Installed and gapped the box and ran the wires out through the grommet. Does red wire the attach directly to the positive side of the coil? I ran a test which indicates there May be a ballast resistor or resistance wire somewhere in the system. But I am clueless as to where. I have a new petronix coil with an internal resistor can I just install that, wire the red side of the ignitor directly to the positive side of the coil and not worry about looking for any ballast or resistor wire. My problem with electricity is you can't see it. Thank you again.

The red wire out of the p-tron goes to coil positive. The black wire goes to coil negative.

The ignition feed to the coil positive terminal is indeed a "resistor" wire, it's between 68" and 72" in length and has a resistance factor of approximate 1.8ohms.

It's very common to find that wire has gone "open" due to heat inside the loom where the wire is nested. In that case, the engine will start but will not run after the key switch is released and the coil switches over to the "run" circuit with the resistor wire. We find these vehicles all the time that have had a ceramic ballast resistor added to compensate for the failure of the resistor wire, again, the ballast resistor value needs to be 1.4>1.8 ohms for a v8 distributor/coil with breaker points.

The pertronix coil should not have an "internal resistor", they don't supply a unit like that. However, it does have a primary resistance of a nominal 1.4>1.8 ohms, same as the oem coil used on your truck and is common for any v8 engine with breaker points.

The pertronix conversion can be used with the oem resistance wiring for the coil. However, it works best with a plain old switched b+ feed to the coil positive terminal. All this holds true only for the pertronix conversion and not any other form of a breakerless distributor upgrade. Each manufacturer of those items has their own specification for wiring.
 
Back
Top