An Expedition Scout

71mtnscout

Member
This will be the start of a new build between the 64 and 63 s80's. There is no reason to rehash the work already done, but you can find the other threads here.
http://forums.IHPartsAmerica.com/showthread.php?t=11650

And here
http://forums.IHPartsAmerica.com/showthread.php?t=12602

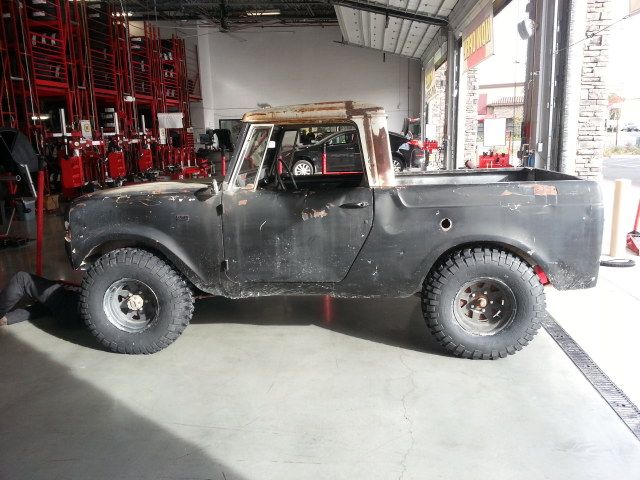
So today I bit the bullet today and ordered new tires cause a new americas tires just opened around the corner from me and they are giving $200.00 off on 4 new tires when you apply for there cc. My 33/10.50-15 BFG t/a km2's should be in on Thursday.
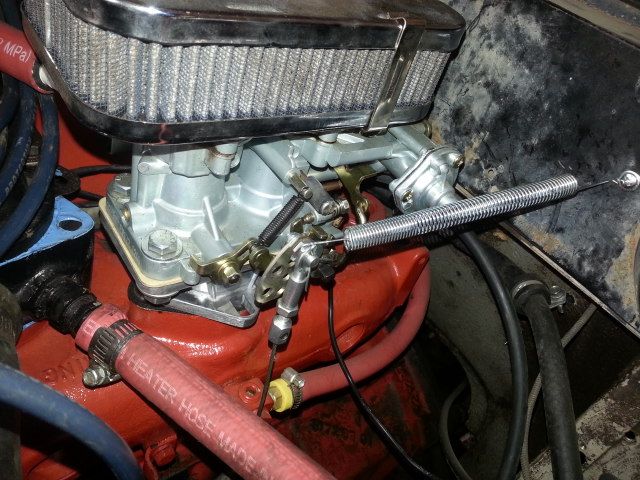
The build begins
 
Last edited:
I have bee busy since the last post;

I know have a working heater system with a new blower and the correct radiator, tires came in and are installed now, I found and fixed a linkage problem on the weber, installed a GM truck gas pedal, and started filling the various holes in the cab to try and limit the huge amounts of air leakage inside the cab.

20151210_154635_zpszhuprwr1.jpg


20151209_151742_zpspix61lqp.jpg


20151209_140010_zpsmg5lm1zm.jpg


20151210_154534_zpsruwmrc7r.jpeg


Since beater is now my dd I will get a working wiper on the drivers side this week. For now I will use the factory vacuum system cause I have it and it doesn't rain much in the socal desert.

More to come later
 
Today I ran all over hell collecting parts and supplies and I now have windshield wipers!! They are the stock vacuum ones but they work perfectly and I replumbed the system with new 1/4"id clear tubing. I'm just hooked up to manifold vacuum for now, at least they work. I will make a vacuum canister and I found a small 12v vacuum pump for $14.00 that I will use when more vacuum is needed. I had them and time will tell if they will work out for me.

20151214_164026_zpstfig6gxz.jpeg


20151214_164127_zpsju7xfbf4.jpeg
 
Did some more carb tuning today. Got a good high idle now and readjusted the mixture and idle...purring like a kitten now. Went out running around with the windows up and the heater on, wow!!! Leaky exhaust is bad...so I went by a local shop and got steered towards this little shop around the corner. We bs'd about scouts and put beater on the rack and cobbed an exhaust system together for now that the tire doesn't hit and discovered the manifold donut is trashed. That will be the next thing to repair on the list now....and he had scouts himself.

20151215_144053_zpszllashni.jpeg


20151215_144042_zpslmovl2qx.jpeg


20151215_144030_zpstozwjcy7.jpeg
 
Installed the new exhaust donut and did a hot torque on it. Man did that thing stink on the first heat cycle! Went for a short drive with the heater off and the windows rolled up......I need to seal up a few more holes and I haven't done the side dump for the exhaust yet, but its not trying to kill me anymore. ;) went down a frontage road along the 80mph stretch of the 215 through sun city, at 55 on its speedo I'm good for the slow lane now and beater seems happy at about 3200 rpm for cruising. I cant wait to change the steering box!
 
I changed the steering box out for the 64's today...wow!!!! Was the old box screwed up! Drives like a dream now...well for a 52 year old truck with no power steering! This box will work for awhile, its in great shape. So now its good while I amass the parts needed for the power steering upgrade.
 
Over the past few days I've cleaned/primed/painted the top to window rubber area in bright white and glued the rubber in on the drivers side. I have to say that I really like clesters products! It fits very well and is very soft and pliant, netting a really good seal on the window area. I haven't done the lower yet cause I have to refit the door still. I also pulled the exhaust down and welded up all the holes that didn't get done...his welds look like bubble gum. Reinstalled it with a new donut and went for a drive to heat it up and re-torque it. I now have no exhaust getting in the cab....woohoo!! And the drivers window doesn't rattle anymore.

Then the weather went to hell.
 
Finished the rivnuts in the windshield frame today and added a few to the bedrail for the rear of the top. Also added shell tape for a weather seal to the base and the top of the fold down windshield since they don't make that seal anymore and mine was there...just hard as a rock. I have a few more holes to weld in the p/u top and some finishing before I do roll on bed liner to the inside and out of the p/u top, then paint it bright white. I have decided that it will be painted desert tan with a white top.....rattle can style.
 
I finished the passenger side top and rubber today and went for a spin...its much quitter now and there are no horrible air leaks now. I took the old blower motor apart today to see if I could fix it, the rear bearing on the brush side of the housing is toast and the single speed I found is like running it on low! Does anyone have a line on a replacement bearing? I can replace the motor with a new one, but I bet its not as good of quality as the original is! Will spend tomorrow working on water proofing the cab.
 
Worked on the top today and welded up some little holes and odds and ends that needed doing. Did some sanding and priming on it for prep to be painted soon. Steel wooled the windows and the new seals are all done.

20160101_155200_zpsunbiq3yt.jpg


20160101_155226_zpsuhwowwht.jpg
 
Been working on the top lately. Finished the welding, sanding, and priming of the roof and sides and started applying the paintable 3m rubberized coating on it. This stuff takes about 3 days to cure and become paintable, and when its finished will have a bedliner type finish along with deadening the "tin can" sound of the top. I think it will take around 5 cans to do it and probably add 15 pounds to the top. At $3.50 a can its a pretty cheap way to finish the top and should be easy to fix if the need arises. I will do the rear hatch also but the one that's on right now is for the 64. I have to do some repair to the one for beater.

20160117_125053_zpsbdyxaymj.jpg

20160117_125103_zpsvxy0yvhh.jpg

20160117_133422_zpsdwcui3ox.jpg
 
Its been a bit since I posted and a lot has taken place in the last week. Really haven't done much on either of the scouts till this week. We got this wild idea at the shop and chained the 64 up to the I-beams on the rear roof structure and put the porta-power between the I-beam and the frame and wa-la!!! Now the frame is straight and true within a 1/16th of an inch from corners and cross members. Who would have thought it would be that easy to fix??

So with the wilma's frame now good, I'm going back to the original plan since the tub on the 64 is virtually rust free as compared to beaters. I liberally sprayed down all the body bolts with rust penetration spray twice today and will get all the body bolts out tomorrow. Heck I might even get the body bolted back on with new bushings and the lift blocks.
 
Will be hitting wilma hard tomorrow and hopefully will get all the new mounts for the body and engine done by the end of the day. It's time to bring her back...
 
I got the body bushings all done, it argued with me (big surprise), and I had to use the smoke wrench and drill a few out, but the body is mounted again.

20160412_143747_zps3ktzf6b0.jpg


I will get the engine/trans mounts done tomorrow and move on the front axle...don't know if its the wheel bearings or kingpins.
 
What a pita the engine/trans mounts were!! The engine and trans were tailed over to the passenger side and leaned about 5* that way too. I finally got it straightened out and bolted in the right way with new mounts, I had to stretch the firewall a little for the valve cover. The front is in the air with tires removed for the next go around...have to figure out what kinda shape the axle is in and fix what needs fixin to make it a driver. The push is to get her into a dd for the least amount of cash for now and sell beater to finance the upgrades and equipment list.
 
Had to order a set of spindle nut kits today, the stuff that was on there is in pretty bad shape, so until parts come in I'm at a standstill on that. So I started to put the engine bay back together, I will have to do a bit of repair on the front wire harness but will run it while I build a new one. Used a porta-power between the engine and the bent inner drivers fender and pushed a lot of it out. Will do some hammer and dolly work on it tomorrow to try and straighten it out the rest of the way. Pulled the torn up seats and pedestals out and started on the drivers side since it still has the factory seat mount. I will have to modify one of the pedestals for the passenger side.
 
I beat and banged on the drivers fender well today for what seemed like hours, along with the help of a porta-power, and got it as straight as I'm gunna get it.

Before
20151202_102056_zpsfh1apz2a.jpg

20151202_102111_zps5np8ot77.jpeg


And after
20160420_144125_zpsgg1mifxh.jpeg

20160420_144130_zpsdir0s93h.jpg


I need to pick up some steel tomorrow and finish the drivers seat install and I started repairing the front harness....it was 94 today and miserable.
 
I bought an oil light switch and temp sender over the weekend and rebuilt the weber 32/36 too. Installed the senders and got most of the wiring done on the engine, still need to wire the alternator, but the rest is done and working. Primed the carb and she came to life, don't have the exhaust on cause it needs to be modified since it was installed with the engine all cattywampuss and now will not bolt back up to the engine. I also got the driver seat mocked in, it seems to high to me but will work for now till I get her home.

20160502_124457_zpse3diuh3f.jpg
 
So I'm staring at the Scout and came up with a lift with parts that I already have and that wont mess up my steering geometry to add clearance for the 33's. I have a bunch of 1/4" plate left over from other projects and what I'm planning on doing is going with 5" shackles and making 2" drop brackets for the spring hangers on the frame...netting me an instant 2" lift. That along with the 1" body lift should give me plenty of room for the tires. I measured out the factory brackets, and there the same on the front and the rear. The only difference is there angle in relation to the ground...the fronts being 34* and the rears are 30*. If I make the brackets at 32* it will only change the mounting centers by 1/8", which is no big deal.

The rough cuts
20160516_173526_zpsxishh0np.jpeg


When there finished they should look like this. They will cover the factory hangers and will be self centering on them too.
20160516_173534_zps5o0feyq6.jpeg
 
Tackled the front end yesterday and today...


20160525_150403_zpsq5btfnts.jpg


Pulled the d27 and springs off and put new bushings in the passenger spring. The drivers spring pack had the 2 top leafs bent from the front end hit, so I had to take it apart and replace those 2 leafs. I had a set of front late model 800 springs with the 2 leafs that I needed. Being late model the eyelet was the larger diameter, good thing they had new bushings in them! I want to replace my springs with lift springs eventually, but these should work for now till I save up the cash. Got the d30 that I picked up in place and the springs remounted, I need to have new u-bolts made tomorrow since the d30 has larger tubes, and I still need to change the steering linkage over from the d27 along with the brake lines...tomorrow!

20160525_153933_zpsgf4euu8u.jpg


It was a loooooooong day, took forever to get the u-bolts bent and back to the shop. The d27 spring plates are a tad small for the d30, but I modified them to work for now till I make new ones or find some from an late 800. Didn't get the steering or brake lines done, maybe on Monday, then gotta get the brakes done and new bushings in the rear springs. It's taking longer than I wanted to get it back on the road but its close.

20160526_131521_zpsp4sgip56.jpg
 
Back
Top