Two Bent Pushrods

What type of sealant? Would 10w30 work? I know the book said to lube the head bolts with 10w30 before torquing them down. I just don't want to have to pull everything apart again and I do plan on making sure they oil after getting them back together, I've learned that lesson so far.
 
For "sealant" I use either permatex #2, or hylomar. It needs to be a "semi-hardening" type product. Use it sparingly also like you would loctite.

All the other torque callouts are denoted for "lubricated" threads using either engine oil, or some form of anti-seize (my preference).
 
One more quick silly question, I have the felpro gasket kit that has all the top end gaskets I should need, it has two pushrod cover gaskets, one is corkboard and the other is black rubber, do I use them both or just one or the other? Thanks again.
 
The lifter cover/pushrod cover gaskets should be a different size, one is more "narrow" and is for a 266/304 application. The wider one is for a 345/392 app.

Lay 'em out flat one of top of the other and you will see a noticable difference.

As for sealant used with those gaskets...I use permatex #97 on either and glue the gasket to the sheetmetal cover first and let it cure up. Then a thin coat on the opposite side of the gasket just before setting in place.

Permatex#97 issa medium viscosity "contact adhesive". 3m weatherstrip cement is the same thing in either black or yellow and works equally as well. The "versachem" brand version of this stuff is identical and much less dinero!!!
 
Thanks, I have most of it back together. This is what I got so far, here is the before and after.
Before....
img00197.jpg


After....
img00205.jpg
 
Okay, I might be fibbing a little bit, I do have one side back on and now for the other, I was told at the shop not to put anything on the head gaskets because they already had the sealant on them and that any kind of extra gasket material or anything foreign will not work properly, is this true?
 
Yes it is. Where'd you source those bling-bling valve covers?

Wait a minute. That's 2nd pic isn't even an IH motor is it?
 
Okay, heads are back on, valve covers and tappet cover, pushrods and rocker assemblies back in, next is the intake manifold, do I need gasket maker for this and I cannot find in the book the torque specs, should the mani be torqued or just tightened?
 
All composite head gaskets go on dry! They are teflon impregnated and do not need to be re-torqued after a break-in.

See this thread regarding intake manifold installation:

http://www.forums.IHPartsAmerica.com/gas-engine-tech/3397-intake-manifold-bolts.html

The intake gaskets must be oriented the correct way, I treat 'em with two tack coats of k&w coppercoat or equivalent and allow to "dry". Then one real wet coat just before placing on the heads,...that sticks 'em in place really well if you lower the intake manifold straight down and don't allow it to slide around.

By the way, that prestolite electronic distributor in your pic has the wrong cap on it. That cap is for a Holley 1500 series distributor and does not fit the prestolite correctly and the terminals are indexed about 5 degrees off from where they should be. And the actual cap indexes to the body flange in a completely different manner.
 
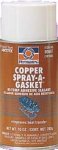
Use copper coat spray if you have the steel embossed intake gaskets. Other wise they go on dry.

Looks like a short spray paint can by permatex... See below.

Intake manifold bolt torque falls under the standard bolt tq for a 3/8-16 bolt 25-30 ft/lb.

Apply the copper coating to both sides of the gaskets , 2 medium coats each side allowing to dry for 10 minutes after final coat. I also spray the mating faces on the heads lightly allowing them to tack off then assemble. The 3 little tabs on the top of each gasket can be bent 90 degrees toward the head side to allow easy location by hanging on the head. After assembly straighten for ease of locating the valve cover gaskets. You'll see what I mean when you start.
 

Attachments

  • 80697.jpg
    80697.jpg
    7.2 KB · Views: 419
Mayben, that makes twice in one day that we agree and post moments from each other. You gota camera on my puter???:cornut: . Whats next I'll agree with our obamanation leader. not. (shamless injection of my opinion):icon_xd:
 
Last edited:
By the way, that prestolite electronic distributor in your pic has the wrong cap on it. That cap is for a Holley 1500 series distributor and does not fit the prestolite correctly and the terminals are indexed about 5 degrees off from where they should be. And the actual cap indexes to the body flange in a completely different manner.

I do not have a clue how that got on there then, that is the one that was on there when I got the Scout, and it was running, is it possible that someone offset the distributor to make up for that 5 degrees? The cap you are talking about has male studs on top probably right?
 
Won't effect timing but will effect rotor/cap phasing. When the coil fires the cap electrode will be off and subject to flash over/ carbon tracking as a result.
 
won't effect timing but will effect rotor/cap phasing. When the coil fires the cap electrode will be off and subject to flash over/ carbon tracking as a result.

Correctomundo roberto!

Our dsl is down, I won't be around here until later tonite unless I can git it figgrd out. This cell phone-as-a-modem is way too slow to use.
 
Just fyi, here is my current before and after (the real one)
before...
100_3806.jpg


After...
100_3899.jpg


I know the distributor cap is wrong, I will change it out when I can, I still need to pre-oil, and finish up a couple more things, so far I hop it looks correct, I followed all directions to a tee, but, my oil is leaking out of the drain plug, this happened before, I guess I need to use either silicone or get a new plug, I have torqued everything like the book has said and used thread sealant, I hope I'm not missing anything, other than I forgot to put the thermostat in when I put the housing on, I will have to fix that also. Thanks for all the help, and I'm still working on her.

 
just fyi, here is my current before and after (the real one)
before...
100_3806.jpg


After...
100_3899.jpg


I know the distributor cap is wrong, I will change it out when I can, I still need to pre-oil, and finish up a couple more things, so far I hop it looks correct, I followed all directions to a tee, but, my oil is leaking out of the drain plug, this happened before, I guess I need to use either silicone or get a new plug, I have torqued everything like the book has said and used thread sealant, I hope I'm not missing anything, other than I forgot to put the thermostat in when I put the housing on, I will have to fix that also. Thanks for all the help, and I'm still working on her.


Looks nice!

Do not use silicone (rtv) anywhere near that motor!!!!

The drain plug simply needs the proper gasket! Either a crushable copper or a fiber gasket (either type come in full engine or "conversion" gasket sets), not a nylon gasket. Those are universal items available at any parts house!
 
looks nice!

Do not use silicone (rtv) anywhere near that motor!!!!

The drain plug simply needs the proper gasket! Either a crushable copper or a fiber gasket (either type come in full engine or "conversion" gasket sets), not a nylon gasket. Those are universal items available at any parts house!


Thanks very much sir. I will pick up a new gasket today. I have a lot to do still but I know I'll more questions.
 
thanks very much sir. I will pick up a new gasket today. I have a lot to do still but I know I'll more questions.

Sorry, I forgot to give you the dimension for the oem drain plug,...it is 1/2" thread diameter, a very common size with replacements hanging on the wall!
 
Am I missing something? I got her all put back together and tried to crank her and she's not running, I wired the coil up properly from when I took it off, there is a slight whistle coming from the carb when I try to crank but that goes away if I step on the pedal a little, my battery was a little low but I wouldn't think too low to start her. The alternator is not hooked up but that shouldn't matter, I have the main wire going in but the person before me wired it wrong so I have to figure out where the brown and white wire is supposed to go, but I wouldn't think that would matter.
100_3907.jpg

100_3908.jpg

100_3909.jpg

100_3910.jpg

100_3911.jpg

100_3912.jpg
 
grim, have you verified spark and fuel at the plugs?

I have verified spark, I have not verified fuel, the carb only set for three weeks since the machine ran last so I was hoping it wasn't the carb, I did do a bad thing while testing and used a small shot of ether to just see if it would catch and it didn't, I think I'm leaning towards fuel at the moment. Thanks for the help and keep the ideas coming if anyone has any
 
Nothing wrong with a squirt of ether. Odd that it didn't catch fire at least briefly with that. It's very possible that the fuel system lost it's prime during the down time.
 
I emptied out the gas tank b/c of the bad gas and dumped the carb a while back, if the system just isn't primed do I just need to turn it over and let the fuel get back up to the carb? I'm going to give it a shot of ether in the morning with a fresh battery and give it one more go, if that doesn't work I guess I'll have to pull the carb again and put that rebuild kit on it. I don't really know what else to do, I know it's getting air and spark and it is kinda weird it didn't at least burp when I shot the either but I didn't use much and the butterfly was almost shut, it's cold and dark now so I'll have to try in the morning. Thanks again.
 
Grim, steal your wifes turkey baster syringe or something similar, remove the breather. Theres a round tube sticking up over the bowl on the carb its the vent for the carb. Fill up the baster or whatever and fill up the bowl on the carb it only takes about 4 or 5 ounces to do this so dont squirt a bunch down it. Pump the throttle til you get squirter action and hit the switch it should fire off without working the starter to death.
We do this on race engines all the time after a jet change makes things simple.
 
Back
Top