Holley 22XX Series Carb Stuff

Buzter, I can't be real accurate since this is a dodge, but since you have a brake and carb prob, I am going to assume it has a vacumm booster on the brakes. You might try to pull the vacumm hose off the bb and plug it to see if your carb issue goes away. Your brake booster could be bad causing a vacumm leak.

Ron
 
Nice detail buzter!

First off, the best thing you can do for this rig right now is introduce it to a dose of "stabil" marine formula fuel conditioner. That will be the "blue package, not the red one we've used forever!

This stuff is not snakeoil, but neither will it work miracles! But, it's your only defense against this shit e10 fuel we have now and to add some long-term stability to fuel that is consumed on only an intermittent basis. I'm saying out loud here, the "shelf-life of e10 is about two weeks if kept in a non-vented container where air can't enter and create the oxidation issue". And fuel hydrocarbon evaporation and oxidation is exactly what starts to occur inside the vented fuel bowl of any carburetor as soon as the engine is shut down.

Once the volatility of the fuel is degraded, then it simply won't light off in the cylinder when mixed with air!

Your dodge version of the 22xx has four slots for the accel pump link to possibly seat in, correct?? Depending upon where ya now have it, I'd put the link in the second from the top slot...and then bend the rod so that the instant the throttle arm even looks like it's going to move off the idle position, the accel pump begins the squirt. Pay no attention to the kit instructions regarding all this schnizz...just make yours work!

If you can post a pic of your carb setup on the throttle side, I can possibly see some other issue also.

And...the idle mixtures must be set perfectly (a bit to the Rich side) in order to achieve best "tip-in" performance like you describe which is imperative for accurate plow work!

Also...are you certain that ya did install the "accel pump check needle" in it's correct location??? If not, then the pump shot won't be for shit! The pump shooter on this carb is cast in the body and not removable like on other Holley mixers, make certain that it's nozzles are clean. The pump shot you get when ya jack the throttle on these carbs must be extremely strong and "focused"...not like a fog/drool/dribble, or appear to be air-entrained.

As for the brakes...have you rigged a vacuum gauge on a manifold vacuum port and read the level?? If the carb is ratty, manifold vacuum will be low/erratic which will certainly affect the brakes. Also make sure the vacuum check valve in your brake booster is functional, those a dirt cheep to replace!

If your diagnosis of the booster checks out, then ya might consider that the master cylinder is bypassing, that means replacement. Hydraulics would rather be active, just like carbs! They don't take well to sitting around not working!

Make certain that the fuel in the rig right now is fresh! If it's leftover from last season, ya can't even use the crap for starting a burn pile!
 
I know some of the details dont pertain..but you never know...I have added seafoam..but not the marine formula. The gas in it is new, and not the ethanol shit...I know that can screw it up big time...especially for using it only a few times a year.

I will take some pictures and get them posted

I will have to check on the accel pump check needle...but when I hit the throttle at the carb, it is a good strong spray into the carb.

I need to get the book out and do some messin with the idle mixtures.....relearn..my old dog brain on that,

will do a few more checks on the booster...found the ol vac gauge last night...and will do some tests..

And I hear ya on the gas...cheaper...anything you can make cheaper...and they want to put 15% now into the ethanol...these old rigs are not made to run on that shit..at all..

Thanks so much for some starters...I knew after going thru your thread, the guys here would have some ideas..
 
Mike,

I have a 76' Scout II with a 304 v8. I have a rebuilt holly 2210 that is pouring fuel into my engine. How can I go about upgrading to the 2300 set up?

Thanks,

dan p.
 
Thanks for hooking up with ihon dan!

Alotta folks get frustrated with the 22xx mixers...including myself! There was a time when I would not mess with 'em since a decent kit was near impossible to source. But...that's not the case right now (May be in the future though!).

And like any other mechanical device, these carbs have many nuances to make 'em play nice, it's not sufficient to just throw a kit at it and hope it sticks. Every one I do I find something "wrong" about it, and learn a new method for keeping 'em working. I'm no smarter than anyone else, just more experienced in having scruud up much stuff over the last 50 years! And if ya think every carb I do is perfect first time, then ya need to come spend a week here at binder u. And see how my world fails too! But...in the end we always win and no customer gets a pile in return for their expenditure!

That said, have you considered having your carb "built" by someone that knows the score??? Or, use it as a core on an exchange for one that is ready-to-play? If so, then please post the list number stamped into the fuel bowl and I'll see what we can do...and a few pics will really tell me if you'd be better off to go with some other mixer.

This pic shows a new Holley 2300 centerhung "kit" which we custom assemble and jet for each customer order. If interested, then ya need to call Jeff and discuss this and he can price it out for ya. And on occasion, we have some in stock that are either Holley-done "remans" that have been set up the same as ya see in the pic...or even one that I might have reconditioned set up also and then placed on the shelf in the store.

I will say...if you should chose to have us rebuild your carb for ya...you will receive complete documentation of any issues/corrections, along with pics of the mixer running on an engine. You will be 100% satisfied with the results!

Either way ya go, we want your business!
 

Attachments

  • Kit Contents Shot.jpg
    Kit Contents Shot.jpg
    78.7 KB · Views: 1,029
I think it would be best to just upgrade to the 2300. I do not know what wire hooks up to the choke? Below are the two wires that could hook up to an electric choke. The first is coming out of the engine wiring harness, the second is directly off the fire wall. What do you think?

harness.jpg


firewall1.jpg
 
Last edited:
Simple to find out!

What ya need for an electric choke switched b+ feed May actually be inside the wire loom that travels down the top of the intake manifold/valve cover on the passenger side.

Caution...do not connect the choke positive terminal to any wire that has anything to do with the ignition system. Most especially, do not connect it to the ignition coil positive terminal.

Your harness, inside the corrugated loom, May have one or two wire runs that are not connected to anything, one May be a spade connector onna black wire, the other May be either black or green with a termination like you show in your pic. If your rig is a "California" emissions rig, then one of those wires is there to connect to the thermo-control for the divorced choke, that wire is switched b+ from the ignition switch and is a perfect feed that looks like oem! You will also more than likely find a kind of "beige" color wire wrapped with a fiberglas braid not connected...do not connect to that wire as the item is actually a 1.8ohm resistor and ya can never heat the choke if you connect to that wire!!

But to determine which wire might be "hot" when the key switch is "on", ya need to verify with either a voltmeter or a test light.

The electric choke on a converted 2300 has it's "ground" or negative terminal pre-terminated and grounded to the carburetor body. When you bolt the carb to the manifold, that completes the ground path for the electric choke "heater".

You will soon learn that depending upon "which" version of a Scout II/traveler/terra ya might have, there are many original wires that "deadhead". That is because one engine bay harness was used for many configurations...therefore some terminations are not connected to anything.

Then...ya have the issue of the "po virus" where someone has added wire runs or loads in a haphazard fashion with no regards for proper installation practices! That's the kind of stuff that needs to be removed once ya figger out why it's there and what it does (or does not!) do!

I promise ya...IH did not use lampcord, 12/2 romex, coathanger, cat5e cable, or laser beams to move the electrons around!
 
Michael...from your orignal ideas to me on 12-22-09 I have some answers..pictures..etc

why use the stabil marine formula?

The accel pump has 4- slots..I will change to slot 2 and adjust accordingly..see what happens

I have attached some pictures of the carb

I have not done anything with the idle mixtures have to get back into the book to refresh myself on those

accel pump needle should be good

brakes...I have 18-19" of vaccum at the booster...took check valve off, and I can not blow thru valve...but can suck back so I am also thinking booster...going today to get one and try it out also put on new rear wheel cyl as one was leaking...and had to put on new brake lines...so front and back have new brake lines...etc...

Took awhile to get back to ya..but we got socked in with 19" of snow....
 

Attachments

  • IMG_8092.jpg
    IMG_8092.jpg
    97.5 KB · Views: 755
  • IMG_8095.jpg
    IMG_8095.jpg
    100.9 KB · Views: 565
  • IMG_8112.jpg
    IMG_8112.jpg
    89.7 KB · Views: 985
  • IMG_8114.jpg
    IMG_8114.jpg
    99.8 KB · Views: 987
  • IMG_8117.jpg
    IMG_8117.jpg
    97.8 KB · Views: 1,064
Stabil marine formula is the product used to combat the negative effects of this shitgas the government has forced on us referred to a e10. And it's highly concentrated. This is not some kinda snakeoil "lead in a bottle" or octane enhancer, this is for stabilizing fuel supplies in long-term storage (more than 2 weeks) and if used per the instructions will ward off the negative effects of the alcohol. The old standby stabil "red" is great stuff for a fuel stabilizer, but won't do anything regarding fighting alcohol.

Your carb was/is originally a commercial reman, I can see the two mylar labels, one is the dot on the fuel bowl cover, the other is the label on the front of the fuel bowl. That adds to the problems encountered when a novice then tries to rebuild em'! Who knows how it was done in the past...I have no use for commercial remans nowadays!

Are you certain that all gaskets you used from the kit are identical to the gaskets that you removed??

And...when you open the throttle lever quickly without the engine running, do you get a heavy/forceful discharge from both accel pump nozzles down into the venturis?

Set each idle mixture screw to two turns out from seated for a starting point. Only after the engine is fully up to temp...then adjust each screw alternately for best idle quality/highest manifold vacuum level, while doing that, you must keep the idle speed at the correct setpoint which for that engine is most likely 650>700rpm.

If the brake booster is leaking internally, the idle quality will be real shitty! That check valve is a one way item and needs to be replaced on a regular basis as a maintenance item.
 
Sounds good on the stabil...I hear ya on the shitty gas...I only run straight in her...but will thow a bottle in

not for sure where to find a good rebuilt carb in my area...ideas...maybe that is my major problem...I do have the original also that came with the truck..but I thought there were some major problems with that one...

I am pretty darn sure I got all the same gaskets in place...I am human...pretty good human...with lots of mistakes..ha...so there is a chance one is incorrect..I will check into that..

When I hit the throttle the gas is pretty strong...and it is alot better than it once was...alot...so I am going to play with the timing...and mixture screws...see if I can get it better dialed in

as for the power booster...I think I found the problem...got another booster...took mine off...laid it down..turned it over to put the bolts back on..and brake fluid came out of it...uggg...so didn't know if it was the recent master cyl...got a new master cyl...put it on...then found a leak in the main line going back to the rears...will replace that today...hopin the ol girl will be ready to go...

I do appreciate all your great help...I hope you have a great new year..
 
Hello Mike,
a few quick questions about the install for my new 2300 carb:
1) I have an engine speed sensor and solenoid vacuum valve unit on the firewall. This has both a and b vacuum hoses. I am hooking up the a hose (side) to the base of the 2300? Or leave this plugged at the carb? The b hose (bottom) went to the throttle modulator on my old 2210, do I plug this too? Am I just removeing this entire sensor unit?
2) the 2210 had a carb port-to-low temp vacuum valve (egr system) hose. Do I plug this? The other egr hose just connects to a recirculation valve. Leave this one alone?
3) there is a large breather hose off the driver side valve cover. This was attached to my air cleaner. Do I put some sort of breathable plug on this?
Thanks,
dan
 
Just saw your email dan, but I'll respond here so others May benefit...

When I communicated about this carb with Jeff, he asked if the "one on the shelf" was the one I recommended for you"? I told him yes, so I assume that is the carb yawl settled on?? If so, that is a 2300 "aftermarket" unit as we'd previously hashed about. It's very fresh (and tested) and was put in inventory the third week of October.

Short answers using your bullet points:

1) if you want to connect the dtm stuff, then use a reducer "tee" and connect to that 3/8" manifold vacuum port on the rear of the carb throttle body. Your pcv system should still be plumbed to the separate tube which enters the manifold plenum directly below the rear portion of the carb. However...since that smog stuff is now kinda superfluous, I'd simply leave the dtm guapo disco'd and capped to keep bugs out.

2) if you want a functional egr system, then put a "tee" fitting in the side-exit vacuum nipple on the passenger side of the metering block. Run one side into the thermoswitch port, run the other side to the distributor vacuum advance can.

3) since you need an air cleaner base with a different diameter opening as compared to the 22xx air cleaner, the easiest way to do this is simply use a 10" aftermarket air cleaner with a flat base (not a drop base), those will all have an opening of 5-1/8", an industry standard. Then you add a nipple to a knockout in the air cleaner base and attach a hose from the flame arrestor in your valve cover to that point. That is the clean air intake for the engine internals, air must go in, to allow the pcv system to operate correctly.

You can use an aftermarket 14" air cleaner (no thicker than 2") if you use one with an "offset" base and turn the long side to the rear, otherwise it will interfere with the water neck.

An alternative to connecting the air inlet to the air cleaner base, is to simply remove the flame arrestor and add an aftermarket "breather/filter" to that port, the thread in the valve cover is 3/8" npt. That converts the pcv system to an "open" type design.

I simply can't locate the pics of that carb you have! I photo-document everything I do, I have well over 1,000 carb pics in my archive! I either filed the pics where I can't find 'em...or I erased 'em out of the camera without transferring to the hd...if ya have more questions regarding the vacuum connections, post a pic of the ports and I'll talk ya through it!

Thanks for selecting ihon for your purchase, we'll make certain you are satisfied with the results!
 
Will post some more when I research and tinker a little more.

77' Scout traveler, bone stock, 345 with all of the California emissions equipment and 2210c. Rig sat for over 20 years, just bought it a little over a month ago, 133,000 miles, really clean body and a nice rig in that it has not been fooled with, just the typical damage from sitting in the trees.

The bad... Since it sat for 20+ years, over the last month I've been tinkering a bit on the weekends trying to get this thing to run, or better yet run somewhat right and be able to pass California emissions with a little bit of tweaking.

Things replaced so far...
Plugs, wires, cap, rotor, fuel filter.

Work done so far...
Carburator disassembled, dipped, and re assembled with napa 2210 kit. Made the rookie mistake of not counting turns on the idle needles. Currently they are set at about 1 turn (seem to be turned in more than what others are running). Timing set at 5 degrees btdc (what was called for in the IH service manual for a California 345).

How it runs right now...
1) always starts when cold and runs ok (30-50 degrees outside).
2) sometimes falls flat off of idle (seems a little better now since I tweaked the accelerator pump linkage).
3) seems to be running Rich (keep it in mind that I can only get it to run cold).
4) will die, and not restart when engine gets "almost" warm.

What I think May be wrong...
1) could I have damaged the power valve installing it with a large standard screwdriver?
2) could the power valve actuator be sticking, or mis-operating somehow?
3) I have the float level at 3/16", should I go with 3/8"?
4) the float pivot is not stock, it was replaced some time in the past with a cut off finish nail, seems ok, but could it be a problem?
5) what do you think is causing the "sudden death"? I think I May have a vacuum leak that gets opened up when the low temp vacuum control valve opens (maybe the egr?).

I'm willing to give the Scout about another month of a few hours each weekend before I just give up and sell it to someone in oregon (then go buy a pre-smog Scout)

thanks for your time!
Peter
 
What I think May be wrong...

...

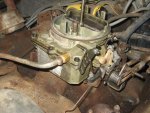
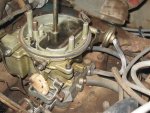
2) could the power valve actuator be sticking, or mis-operating somehow ?

...

5) what do you think is causing the "sudden death"? I think I May have a vacuum leak that gets opened up when the low temp vacuum control valve opens (maybe the egr?).


first things off: find out if it is your egr killing the vehicle! Get it started and running, and see if you can't press up on the egr valve and cause the same death you experience "almost warm." if your death happens very quickly I doubt it's the egr, but by verifying that it isn't stuck open and that it isn't killing your vehicle when you want it to, you can verify it isn't the issue.


in response to #5:
Now, depending on the kind of ignition you have... You could be experiencing Holley ignition module failure, especially if the "death" happens when you're moving slowly/stopping (and thus allowing heat to build up in the engine bay.) in the center of your firewall, there May or May not be a little ignition module box with some connectors leading to your main harness collection, and out to your motor's front end. If it's puking some black rubberish guts out, it May be a module on its way to, or currently at failure, usa.

What I'm talking about does not have any vacuum lines run to it, that's the deceleration module (also emissions, meant to gradually decrease throttle as you let off the pedal) that May be puking out black stuff as well, and failing to cut off vacuum to the dashpot. For me, this specific scenario resulted in a dashpot that increased throttle, which increased vacuum, which increased how hard the dashpot pushed on the throttle, which increased throttle... Etc.

I remember being the one chasing some crazy issue by getting a new cap, replacing plugs and wires, messing with timing so much that the vac advance can has a little greasy spot just for me... I was trying to figure out why, during the warmer summer months, my '77 Scout was simply dying and misfiring, losing power and becoming completely undrivable... Next day it's fine, until the underhood temps climb enough to scare the ignition module into submission!

My specific issue was that the "gold box" ignition module went the way it did in every other Scout II: it heated up on the firewall. I was told to relocate it, maybe mount it on radiating fins, but it was too late. I had to switch to pertronix.

Of course, I could be getting you worked up about absolutely nothing, but it would be ideal if you could examine and verify a seamless ignition setup before messing with a carburetor (michael mayben learnt me on that one.) it would make the whole process a lot easier, and if you know it's not your ignition module or spark setup affecting your situation, you can then point the finger at the carb.

I would highly recommend going over to the ignition side of the forum, read up, maybe try to 'power time' the vehicle and see what number is indicated afterwards - it might surprise you, and it might make an honest difference in how it runs, until it mysteriously dies.


in response to #2:
You've had the carburetor apart. When you reinstalled the power valve actuator, did it go in fairly easily? Mine did, and I thought nothing of it until I realized what it was doing. Mine was actually a pretty sloppy fit.

Now I May be wrong here, but I -think- the "power valve" is set up like this: the heavy actuator, at high manifold vacuum, is drawn up and away from the power valve. When you mash the pedal (and vacuum drops like hell) this actuator's weight overcomes, drops down on the power valve, and enrichens the afr in accordance with your desire for more power!

It really helps to have a vacuum gauge, especially when messing with this type of carburetor in particular. A mity-vac could serve the purpose and then some, and also assist you with brake servicing. The mity-vac would also allow you to apply vacuum to the specific port on your carburetor with the whole shebang still assembled. You can then see how long the actuator holds this vacuum signal... It should, indefinitely.

From my own previously sloppy fit, I'm assuming my actuator was useless, and it even seemed to be from another series of carburetor!

Aside from all that, if you're experiencing a power valve held wide open, it would make sense that it is dumping fuel via that circuit and you'd still run with the idle bleeds turned way down.


As for "falling flat off idle," with my 2210c setup (which I need to ship to mayben just so he can have something else in his collection!) I never found the point where I had full-coverage response upon standstill takeoffs. I'm sure it had to do with more than just the accel pump, but no earthly amount of tinkering with the accel pump linkage got me anywhere... Only some places seemed "better."


now, a couple other things... Float first: I figure if the finish nail fills the holes well enough to be tight, it should work for the float - if I remember correctly, it only has room for a bit of overhang before the bowl body stops it from leaving its position. It's not like this is the first time one of these rigs was backwoods-serviced, and it's surely not as harmful as some shadetree "fixes."

as for the fuel bowl, there is really no good provision for figuring out which setting provides the best bowl full of fuel, but the precursory setpoint I've recognized is this:

- float top face parallel with the bowl cover when fully floated & closed
- float bottom face parallel with the bowl cover when fully dropped & open


peter, to tell you the truth, I don't want you to get rid of this vehicle! You're in the perfect place for learning how to fiddle with these things, and if you can interact with the forum accordingly, we can all work towards finding solutions for one another.

So stay with us, and stay with IH! Good luck!
 
Nice response kyle! You stay with this one and see what yawl can do, I'll jump in if ya git stuck!

My only comment right now...the "napa" kit. I'd definitely need to see the kit contents and the carb in pieces...I never use napa carb kits on anything..we know what works and what doesn't as far as "correct" components!
 
michael,

what kits would you recommend?

Go back to the beginning of this sub-forum and start at post #23. You will see how we determined (thanks to ron!) what kits to use for which 22xx variation.

If your carb has the "short" power valve, the standard hygrade 929a kit is correct as it has gaskets for both the chrysler and the ihc version of the 22xx. And it includes the correct power valve replacement item which is imperative! It also includes both correct carb-to-manifold insulator-type base gaskets, the small rectangular base for the chrysler, and the larger base with the "heat dam" for the IH application. Those gaskets alone sell for $10>$16 separately!
 
is there a way to print this whole thread without going to each page?

You can go into the user control panel under your log-in and set the display for the maximum number of posts to display per "page" that number would be 40.

Afaik, there is no way to spool all posts into a single print document, though some of the real pooterhaids around here May have a workaround.

You could do a very time-consuming cut and paste of each post into a single text doc using whatever word processor app you use, I use open office after abandoning as much microsuk crapware as possible years ago.
 
Ok,
got two vacuum gauges from a friends shop today. So far the best I could get at idle was about 15". It seems to be jumpy at idle until it warms up a little bit.

Kyle, could you describe how to actuate the egr a little better? When I reach under it I feel a rubber diaphragm, do I push on that? I don't want too get crazy destroy it.

As for ignition module problems, it seems to be fine. I've got the timing light hooked up, and even when I have my "sudden death" problem and I can't get it restarted it still has a spark flashing the timing light. I think the Holley gold box was replaced some time before I got it, since a stock IH gold box was sitting on the passenger seat.

As for Mike's concern about the napa kit it seems to have all the correct parts, it came with both the "right" and "wrong" heat insulator gaskets like the ones shown in post #27. I had bought the kit before I ran into the ihonlynorth forum.

I'm going to pull the carb back apart this week or weekend and really clean up the power valve actuator. When I tore the carburetor apart a month ago I really had no idea what it was or what it did, and also did not pull it apart. I just want to eliminate it as a problem before I move onto other things.

Anyway,
I hope to get into it more this week / weekend and I'll post what I find.


Peter
 
Back
Top