Pete's Buildup '73 Scout II

235frog

Member
Well I had someone say that I should post up with what I have done so far to my Scout in a build-up thread, so I figure I might as well get around to it.
I bought the Scout in May of 2007 from a guy who basically mislead me about a lot of things, but oh well. It was a round peg and I have been busy smashing it into a square hole. So far its been working.
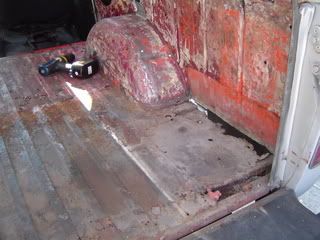
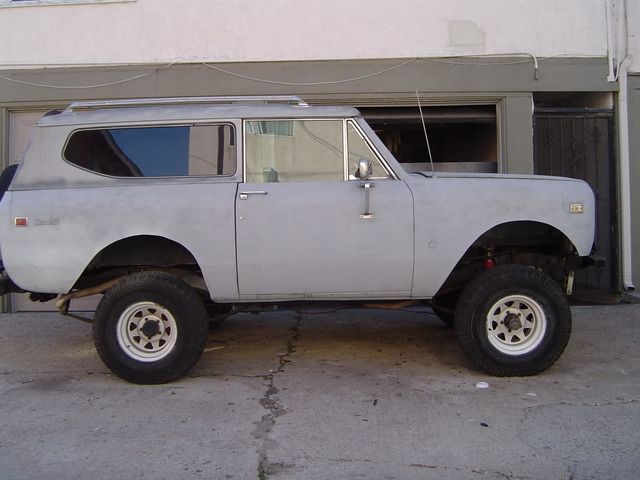
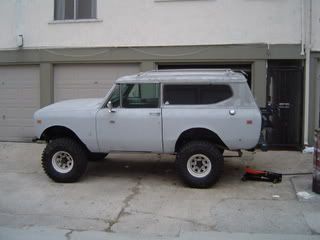
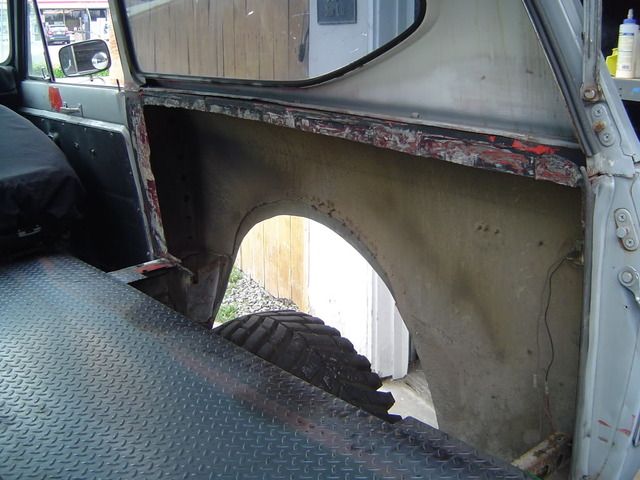
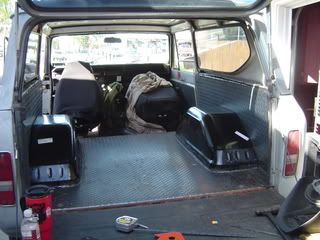
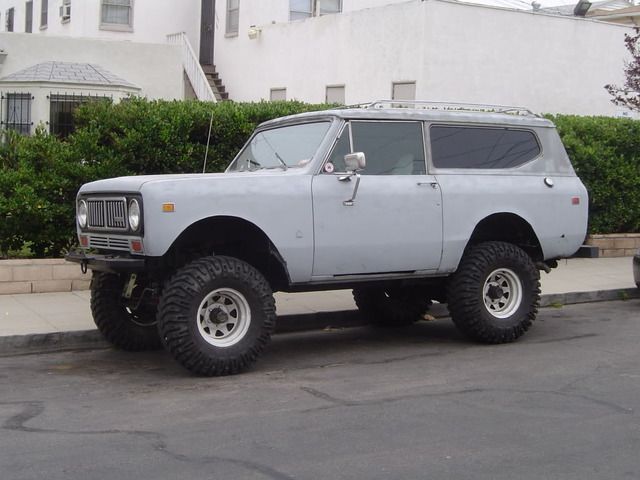
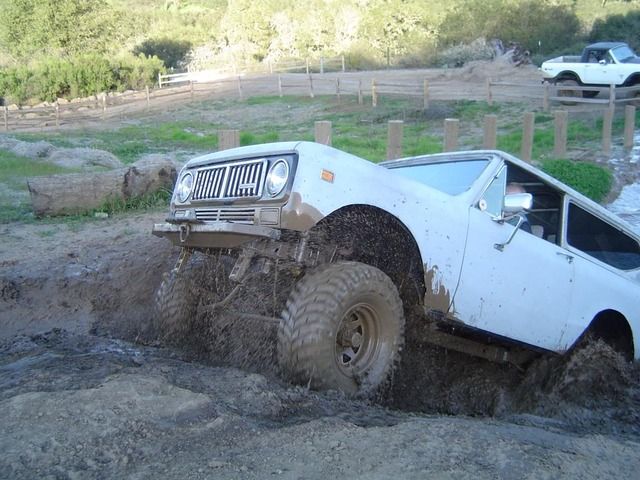
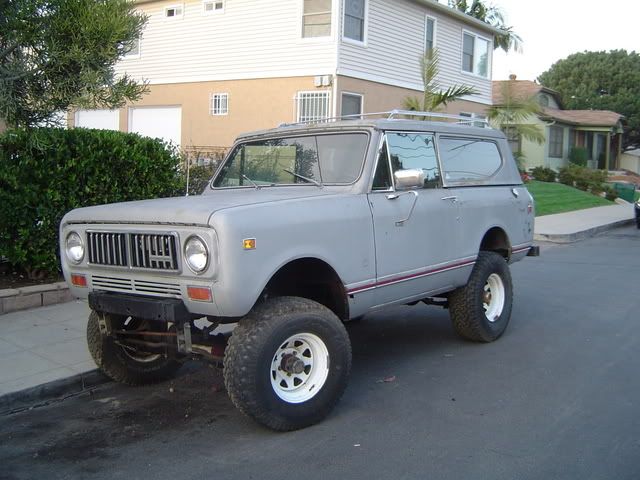
This is the first picture I have of it after I hauled it home. 1973 Scout II 345, tf 727, Dana 20, Dana 44 front and rear, 4 " SUA lift, 32" BFG's. It wasn't running and didn't have a current registration soo when I went outside the following morning I had a meter maid trying to get it towed. What a wonderful start to my Monday morning. Luckily I didn't have a problem going to the dmv and registering it that same day.
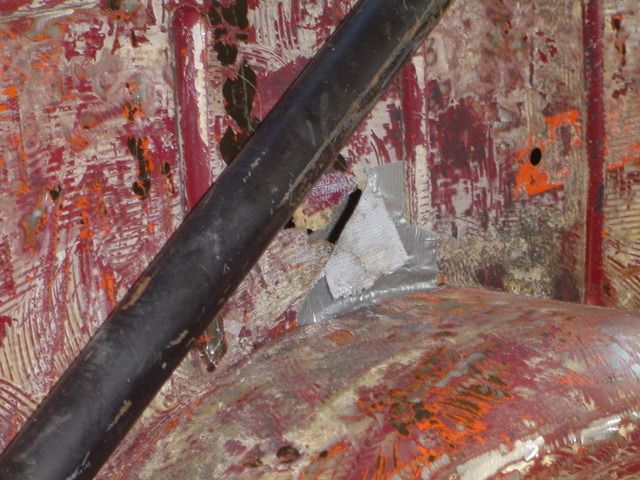
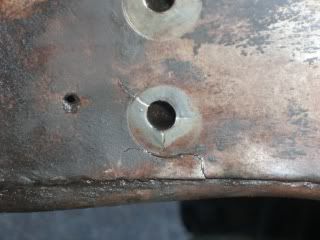
DSC01895.jpg

And this is why.
DSC01897.jpg


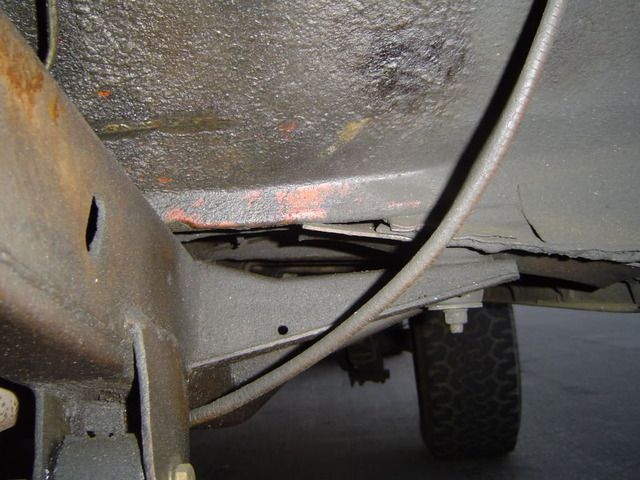
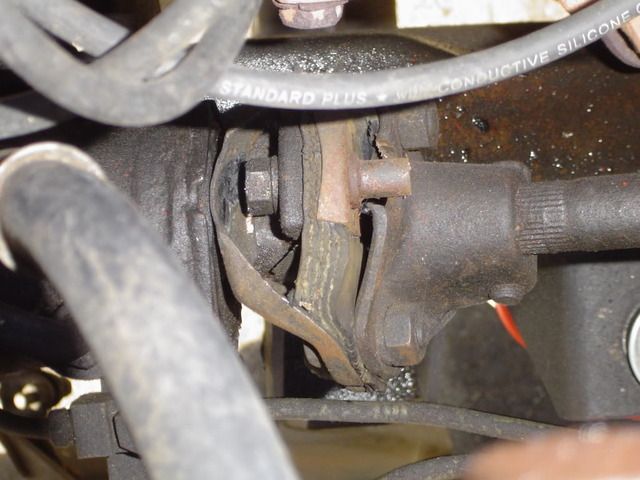
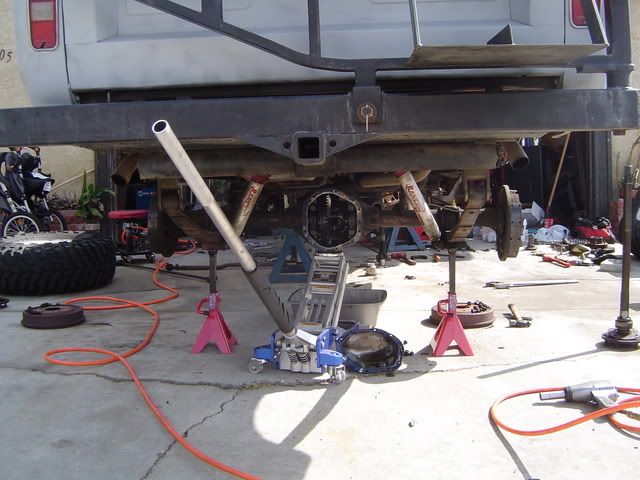
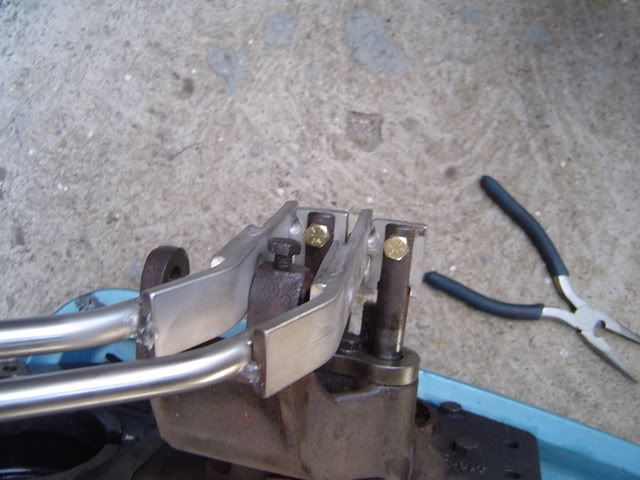
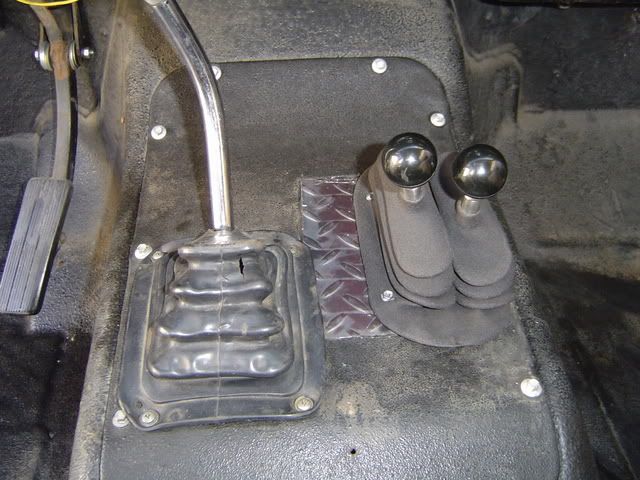
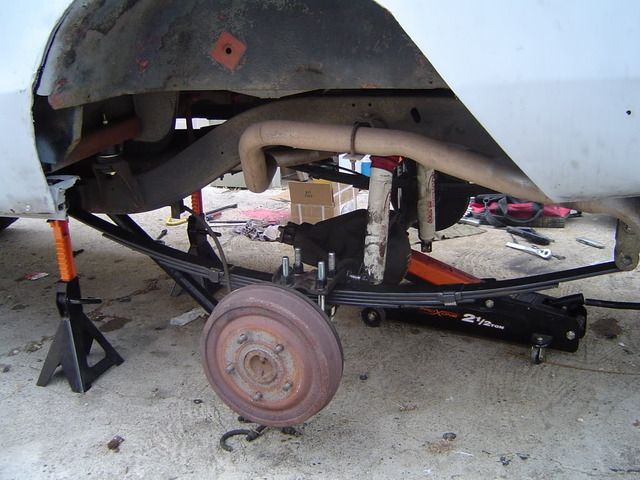
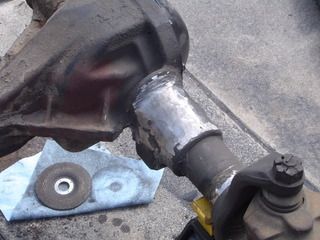
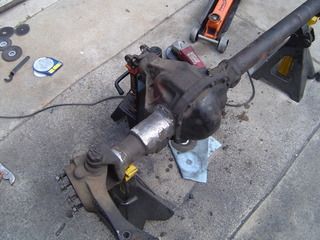
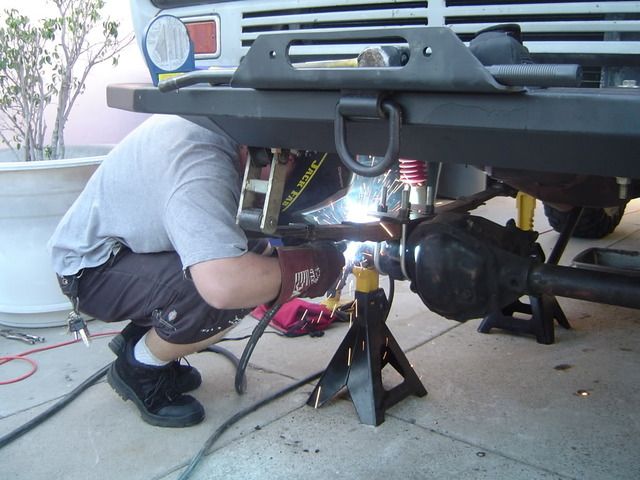
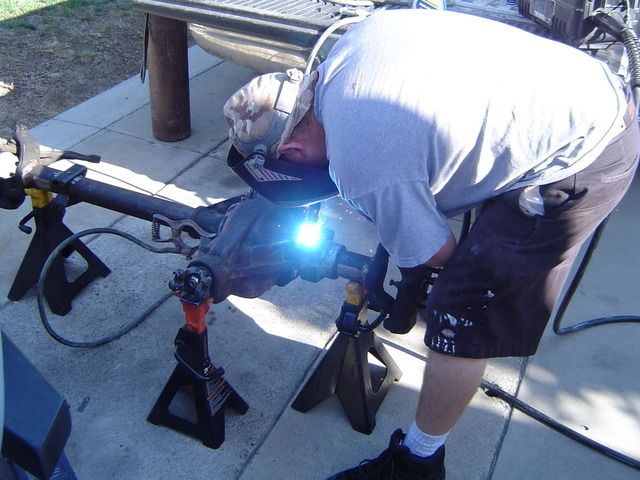
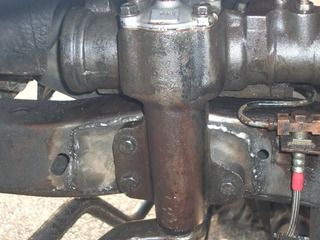
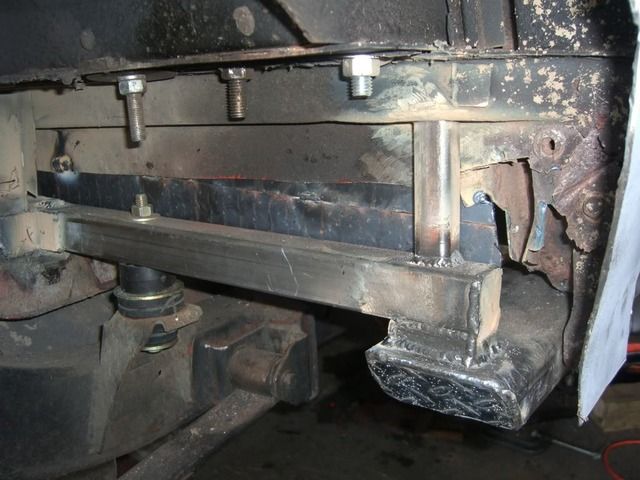
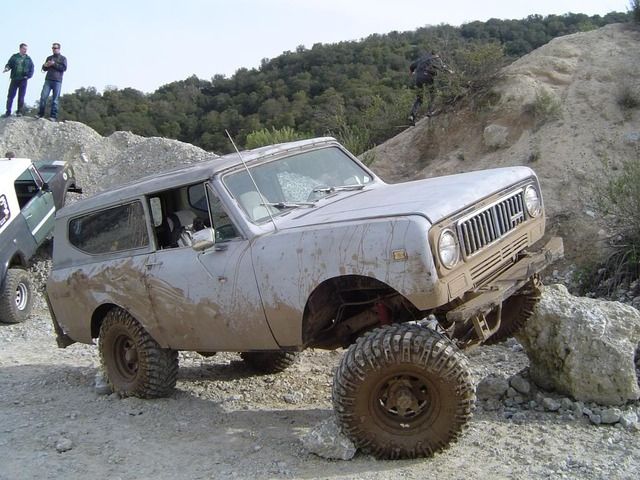
The po apparently took a turn too wide hit a curb and caused the transfer case to snap an ear off of the tailhousing, as well as tear the rear front springer hanger off the frame.
 
Last edited:
First up was replacing the tailhousing and installing the transfer case. After this was done I realized that although I could drive it around, park didn't engage. (it took me a couple of years to figure out I installed a piece backwards in the tailhousing). Then since I could drive it around a little I had vacuum leaks out the wazoo and the vacuum advance didn't function, oh yeah and the carb needed a rebuild since it started pouring gas out of the secondaries (q-jet). I took it into a carb. Shop (horrible decision) who replaced the distributor and put on another q-jet.
I swapped a pertronix at the same time. Happy days! I could drive it around!
 
Next on the list of things to do was put a 1" body lift on. At this point I thought I might as well stay SUA since a SOA conversion seemed to complicated for me. Problems with the current body mounts though.


DSC01946.jpg


DSC01945.jpg


But idiot that I was, I did it anyways.
 
Last edited:
That wasn't the worst of it though. When I started removing the carriage bolts for the 2 rear-most body mounts I had to cut away a little of the bed liner the po put in. What was underneath was horrible. He placed some sheet metal over a very rusty bed and proceeded to screw it down into the gas tank!!! I replaced the steel gas tank with a poly 19 gallon tank and I replaced all of the fuel lines at the same time.
DSC01964.jpg


I finished the body lift, and realized the problem with the screws later. The body lift did kill my ragjoint. So...
DSC01955.jpg


DSC01959.jpg
 
Last edited:
Here's what's under the bedliner. It looked so solid before I started removing the liner. :icon_cry:
DSC01971.jpg

And my favorite: the duct tape patch covered by bed liner.
DSC01970.jpg

Since I was busy cutting everything else out I cut some of the fenders out too.
DSC01996.jpg
 
Last edited:
This is after I finished trimming the fenders, still with 32"s
DSC02000.jpg


While I was waiting to finish cutting out the rest of the bed to replace it, Christmas came and I got some 4.56's, and aussie lockers to help out with some 35" baja claws I picked up from a friend. :icon_cool:
regearing and adding lockers:
DSC02016.jpg


DSC02018.jpg

DSC02021.jpg

DSC02023.jpg

More info and pictures in this install thread.
gears and aussie locker install - binder planet forums
 
Last edited:
Next up on the list was installing a twin stick kit from jb fab.
DSC02042.jpg

Simple to do, but easier when there are two people to help dealing with the t-case.
DSC02043.jpg

DSC02044.jpg

DSC02052.jpg

I didn't end up removing the interlock pills (?) from inside the case. I now have front 2 low, rear 2 lo, etc. The only combo I can't get is front 2 high. No biggy. So far it works well for me, except that the rear axle likes to pop out of gear when in low at the most inopportune times. The solution so far has to get a chain and an eyebolt. :icon_wink:
here's a thread when I actually installed the twin stick conversion and has more details of what I did:
jb fabrication d-20 twin stick install - binder planet forums
 
Last edited:
At some point in the Scout's history it was SOA, or at least the rear axle was. So I decided to try out the rear SOA on stock springs and the front with the 4" lift springs.
DSC02055.jpg

This is how it turned out.
DSC02056.jpg

DSC02077.jpg

The shocks stayed disconnected for about 8 months or so. No this was never my daily driver. And I still hadn't taken it offroad yet.
 
Last edited:
Next on the list was to finally get the bed re-drone. A friend agreed to help and handle the welding and I provided the dumb brute strength and did all of the prep work of grinding and cutting out the old metal. I also got to use a plasma cutter for the 1st time and that makes everything go so much faster than a sawzall and cutoff wheel on the grinder

DSC02078.jpg

DSC02085.jpg

This was my first attempt at welding and it was trying to weld 20 gage to 14 gage. It was well beyond my means to do cleanly, so I won't show off my booger welding skills :icon_rolleyes:
I ended up using some mid-80's GM wheel wells that were much bigger than the stock Scout ones to allow larger tires. This is the finished effort on the bed.
DSC02094.jpg

It took about 2 full days to get it all done. It was a huge pain, but I am so glad that I did it. The old floor was worthless.
 
Last edited:
Since I was going to be leaving the military (after 8.5 years) and moving I decided I better do all the things that I could to the Scout that I needed friends to help me with. I decided to do the front SOA. This took a few days and since I didn't have a garage or driveway to do it in, I went to a friends house that let me store it there for a while. I think it took about 3 days of work. It goes slower when you have to do things by yourself because everyone else is working :ciappa:
DSC02103.jpg

DSC02102.jpg

DSC02101.jpg

I followed bill-usn-1's thread SOA-the build up continues! Part 2 - binder bench
To help build my confidence. I had a professional do the welding though. It cost me like $150 or so since I had him bring a portable unit to the house and he helped me move the axle housing around to make sure I had the perches where I wanted them and to set the pinion angle/caster angle.
DSC02106.jpg
 
Last edited:
DSC02104.jpg

And the "finished" SOA.
DSC02110.jpg

DSC02111.jpg


After I moved I ended up taking it on its first wheeling trip. It was horrible. The steering box started leaking like a sieve and was twisting on the frame.
CIMG0891.jpg

I welded up the fame and added a plate with a little 120v welder I bought. And rebuilt the steering box. It was just the input seal that was really leaking bad, but it became a learning experience as I had to put all those worm gear ball bearings back.
CIMG0946.jpg

I later added a straight steer brace. It has helped immensely!
 
Last edited:
At this point it was around Christmas of 2008 and no one was planning any wheeling trips. So I thought "hey I have a welder now, maybe I should fix my body mounts."
passenger side (after I ripped out the bed liner)
CIMG0956.jpg

I found another infamous duct tape patch job.
CIMG0953.jpg

I ended up tearing out the whole passenger side floor pan and its supports, and chopped the rocker since I could literally push my finger through it.
CIMG0959-1.jpg
 
Last edited:
I left the doglegs intact, and replaced the rocker with 2x4 3/16's box tube. I capped the ends with some 14 gage diamond sheet metal I had left over from the rear bed.
CIMG0972.jpg

I used 1.5" box tube 13 gage for the floor supports and for the front body mount I used 3 sections of 1" 1/8 box tube welded together.
CIMG0976.jpg

I know there are a ton of booger welding skills here, but everything was welder way more than it needed to be, so I know it will hold up. I used 14 gage diamond sheet metal to replace the floor pans.
CIMG0973.jpg

And the other body mounts I replaced.
CIMG0974.jpg
 
Last edited:
And then I finally was able to take it to hollister and get dirty :ihih:

DSC02164.jpg


DSC02224.jpg


After taking it through the jungle I found the rear springs were starting to get a little negative arch so I added another full length stock main leaf with the eyes cut off as well as a shorter add-a-leaf. So far it has held up well.
 
Last edited:
And now the latest is:
DSC02284.jpg

And these:
DSC02282.jpg

Putting them together took a full 5 hours or so and left me tired and sore.
DSC02285.jpg

Now I picked up a rear Dana 70hd with 4.56 gears
DSC02227.jpg

The thing is huge!
I later picked up a front full width d44 with 4.56 gears to match the rear. The rear carrier is welded, and I will transfer one of my aussie lockers from the the Scout axles to the full width Dana 44. Still waiting on $$$ for the swap though.
I ended up putting fatmat sound insulation in the hard top, but I stopped taking pictures of stuff for a while now. Details will follow with the axle swap.
 
Last edited:
Well progress is slow,, but it is happening. I have all the parts for the rear end swap now, and cut out some spring perches. I found that no one makes a spring perch for a Dana 70hd. They have 4" axle tubes so finding ubolts and plates was a pain as well.
DSC02402.jpg

I used 2.5" box tube with .25"wall for the perches. I made them 10" long to help with the spring wrap and started drilling out 3 different holes for the spring centering pins before I realized that I only needed two holes since I won't want to ever shorten the wheelbase.
DSC02401.jpg

I measured where I needed the spring perches and the angle I wanted for the pinion and tacked the perches on. Now I am just waiting to have them burned in.
DSC02400.jpg

Hopefully the whole swap (front and rear) will be done by mid-January.
 
Last edited:
Since I am going to swap out the rear axle and May have to deal with changing the driveshaft length I decided to swap over to a cv style. So, I went to the pick-and-pull yard today and grabbed a front driveshaft off of a '97 xj to get the cv joint.
DSC02404.jpg

Following the directions from here:driveshaft shortening 101 - pirate4x4.com bulletin board
I began to cut the shaft:
DSC02405.jpg

After smacking it a bit the joint popped out
DSC02406.jpg

And here are the two pieces
DSC02407.jpg

Once I get the rear axle under the Scout in the next couple of weeks I'll work on measuring out the driveshaft and attaching the cv.
 
Last edited:
Well I had the perches burned in over the weekend and the tubes welded to the carrier so I don't have to worry about the 30-year old plug welds holding the tubes in place.
DSC02414.jpg

DSC02415.jpg

Today I finally found the motivation and time to start swapping out the rear end.
DSC02416.jpg

I tried to get both axles in the picture but the Dana 70hd is just too much of a pig to move around. So hopefully you can see the huge difference in size between the two axles, just look at the tubes.
DSC02417.jpg

And this is after I bolted the 70 in place. I still need to weld the shock tabs on, put the carrier back in and fill it up with oil, bleed the brakes, and get the rear driveshaft with a cv joint in. It started raining so I called it quits. Here is how it sits now.
DSC02418.jpg

DSC02419.jpg

It still has the Scout II Dana 44 in the front so it will be parked until I swap in the full-width 44.
 
Last edited:
Back
Top