Big Metal Pieces in Oil Pan

Hopefully I can sort those out!
 

Attachments

  • A1F05FD2-F05F-49CA-B4C4-40C43315573E.jpeg
    A1F05FD2-F05F-49CA-B4C4-40C43315573E.jpeg
    2.3 MB · Views: 218
I finished rebuilding the carburetor and I’m working on adjusting now.
All the videos I’ve seen show adjusting the air mixture screws in the metering block, but I don’t think my metering block ever had those screws. There isn’t even any threads for it, any ideas?

My second question might be the answer to the first.There are these two pointed brass spring loaded screws down below the throttle Venturi. What do those do and how should those be adjusted?

I’ve seen people online measuring vacuum while adjusting certain pieces, but I don’t seem to have any vacuum lines on my engine.

I’m also still not seeing the bowl fill properly. I’ve looses the need all the way out and it still doesn’t fill.I have a new bowl float, maybe it needs to be bent?
 

Attachments

  • C813ADAB-3171-4CC9-B3B4-69A1FF53FD14.jpeg
    C813ADAB-3171-4CC9-B3B4-69A1FF53FD14.jpeg
    4 MB · Views: 218
  • FF08869E-0EE6-45CF-9823-31DF01E2551F.jpeg
    FF08869E-0EE6-45CF-9823-31DF01E2551F.jpeg
    4.4 MB · Views: 193
That version does not have the air mixture screws in the metering block, hence why you can't turn them. The spring-loaded screws in the rear of the valve body are the air mixture screws. That's one of the main differences between the original equipment Holley model 2300 carbs and the present day, aftermarket versions. That metering block still looks pretty grimy to me. Might be the camera angle. I don't know. With carbs, getting as much of them as you can as close to being surgically sterile as you can is key for a successful rebuild outcome. Part of that includes removing those screws so they can be cleaned as well as the passage ways they reside in. Once everything is as anal retentively cleaned as humanly possible, then you can begin the reassembly process. Hopefully you retained the old gaskets for comparison against the replacement ones. The thing with today's rebuild kits is, they are a One Size Fits All approach to a crab model that has hundreds if not thousands of variations. The OSFA kits can't possibly cover every single possible nuance and difference. They can only cover most of them. So some minor gasket modification may be required in some cases. As for the mix screws, start by running them both in until gently seated and unable to turn further without going into gorilla mode. Don't go into gorilla mode to prove it! Then back them each out 2.5 turns. That's a decent start point which will require further fine tuning once the fully assembled unit is back on the manifold and the engine is running. Please post good pics of your intake manifold from a couple different angles.
 
Thanks for the detailed response! I adjusted those screws as you suggested. I also made sure to compare all the gaskets before installing and they all matched up. It always seems to work out ordering from IHPA

I striped the whole carb down to metal, boiled in vinegar and lemon juice for 45 minutes, then soaked in this thick black carb cleaner for 15 hours. Lots of pictures attached.

I’m still concerned my bowl isn’t filling up enough. The engine was able to idle, so it is getting fuel, but it just isn’t as high in the bowl as I’d like. Looking at it off the carb, the float wasn’t even hitting the needle and it still wasn’t filling correctly. My float hits a screw port at the top of the bowl if it doesnt hit the needle first. Probably intentional?
 

Attachments

  • 0BCB3DCE-A40A-479E-A585-7A9275F7757B.jpeg
    0BCB3DCE-A40A-479E-A585-7A9275F7757B.jpeg
    3.4 MB · Views: 209
  • DF57E1C0-6016-457F-BA17-EEC8BD4FDD7B.jpeg
    DF57E1C0-6016-457F-BA17-EEC8BD4FDD7B.jpeg
    3.1 MB · Views: 207
  • C8E3EE67-FD1A-45EF-814D-729C2A4E5D08.jpeg
    C8E3EE67-FD1A-45EF-814D-729C2A4E5D08.jpeg
    4.8 MB · Views: 211
  • 2CC517A4-032F-4316-9CB1-76B66005841E.jpeg
    2CC517A4-032F-4316-9CB1-76B66005841E.jpeg
    3.6 MB · Views: 212
  • A45D9C4B-09B6-4675-9AC4-B7F5914208F5.jpeg
    A45D9C4B-09B6-4675-9AC4-B7F5914208F5.jpeg
    2.8 MB · Views: 200
  • 89740F57-8831-432E-B2CB-77DAF5D23DDD.jpeg
    89740F57-8831-432E-B2CB-77DAF5D23DDD.jpeg
    3 MB · Views: 199
Thanks for the pics. What I see in that batch, carb-wise looks decent. What happens if you remove that screw which is limiting float travel? I've never seen that there before. The float arm has to be able to contact the needle to shut off fuel flow at some point. Otherwise the bowl will just overfill with fuel. It also looks like you might be missing a plastic retainer for the float arm spring. I'm going off memory from the last time I was in one of these carbs, which has been years, but that doesn't look right to me. Did you remove the brass sight plug from the side of the fuel bowl to observe fuel level while the engine was at curb idle and vehicle parked on a level surface? That is the proper method for viewing the level. Then if a needle adustment needs to be made in either direction, you shut off the engine and make the adjustment. Lather, rinse, repeat until the level is just at the very bottom of the plug hole with the slightest weep or dribble, but definitely not a gusher.
Your distributor vacuum advance is sourced from a manifold location. If you can get a secure hose attachment to the metal tube, you could use that for your vacuum gauge readout.
 
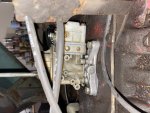
The screw definitely seems weird! Of course there’s no reasonable screwdriver that fits that head and is shorter than the bowl, it seems weird. Maybe a previous owner made a make-shift plug? Without it, of course there’s just a hole there, but it could help me troubleshoot. I’ll remove it tomorrow morning.

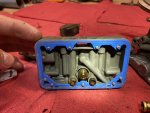
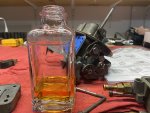
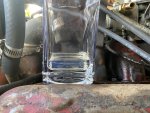
I didn’t wait long enough for the curb idle, but it still seemed to have a low level. With the need backed all the way off, the float never hits it, but the bowl didn’t overflow after ~3 minutes of idling. I am using the brass sight screw and I can’t even see any fuel. When I removed the bowl and dumped it out, there was hardly any fuel in there at all.

Great tip on the vacuum, I’ll look out for that. I haven’t ever dealt with timing before, so I have a lot of research to do. Just bought a timing light to read the RPM / set fast and curb idle. Excited to learn all about that once I get this carb dialed in!

Thanks again for your help, I’ll get back to it in the morning.
 
A hole in the bowl won't do of course, but still the float has to be able to do it's job, so something has to give there. Might even need to replace the bowl. It sounds to me like you could well have a fuel pump issue or a or a blockage in the line somewhere. It would be easy enough to verify pump output by unhooking the supply line from the carb and starter cranking for 30 seconds with the open line over a container to catch the discharge, if any.
 
I will do that first thing tomorrow morning.

I cleaned and repaired the rusted out fuel tank, replaced all the fuel lines (minus the metal one with I blew out) and replaced the fuel pump and filter. Of course I may have the wrong part or I could have installed it incorrectly. I bought most of my parts from Rock Auto before I knew IHPA existed. Lots of returns haha
 
Here’s 30 seconds of cranking. I would estimate maybe 5oz. I don’t have anything to measure that I’d want gasoline in.
Also not thrilled with the color. There shouldn’t be any rust in the tank at all, but I guess there must be if it’s Orange like this.
 

Attachments

  • 5F43DB1F-247E-4A38-9979-E32BE26C42E9.jpeg
    5F43DB1F-247E-4A38-9979-E32BE26C42E9.jpeg
    3 MB · Views: 199
I removed that screw in the vent hole and replaced it with a cork and rubber vent that came with the rebuild kit. Then I bent the bowl mount so it was parallel to the bowl when inverted. Curb idle and the level was perfect now.

It doesn’t like to be accelerated quickly, that may mean I need to adjust my accelerator pump. Seems to rev okay though! Better than it’s ever been.


Attachments

  • 816BE7E3-D2D3-464D-93FC-DDF03538A259.jpeg
    816BE7E3-D2D3-464D-93FC-DDF03538A259.jpeg
    3.4 MB · Views: 194
That fuel looks nasty! I would not be exposing a freshly cleaned carb to what looks like 1980's deck stain. I know you've mentioned several times the efforts you've made at cleaning the system, but that color don't lie. The other potential risk from running the engine on bad fuel is stuck valves and bent pushrods. Your idle sounds decent, but your pump shot is not happening. I suggest bypassing your onboard tank and run it off of a temporary tank. If you wanted to get fancy, you could set up a boat tank with an electric fuel pump regulated to delivery no more than 6psi as verified by an inline pressure gauge.
Feed that to the carb and then plumb the mechanical pump discharge into at least a gallon or larger, clear-ish, container for visual color monitoring and idle the engine. Keep adding small amounts of fresh fuel to the main tank as needed until what you see coming out of the mech pump discharge looks more like fresh gas. Then you could go back to running off the main tank. That's a good way of flushing out a tank in place. You just have to be able to capture a couple gallons of contaminated fuel. That's a hassle. It shouldn't take too many though.
 
Even if I flush out all the bad fuel, I’m sure this gas tank will just foul up the fresh fuel. I must not have cleaned it out thoroughly enough.

I know the previous owner ran a tank out of the bed, I guess I might have to do that too.
 
I found a polyurethane tank (out of stock on IHPA) made for the 1969 version of my truck. I think I can make it fit. Shame I spent so much time and money on this old tank!

I’ll drain the fuel, hopefully fit the new tank and get back to adjusting the carburetor then timing. Back on hold for a while.

Thanks again for your help, @Scoutboy74 it’s invaluable!
 
You're welcome. Do you have any radiator shops near where you live? If so, you might see what they'd charge to boil and line your tank. I'm fortunate to have a good shop local to me that does nice radiator and fuel tank refurbs for reasonable prices. I don't have any personal experience with the poly fuel tanks, but the reviews I've heard seem to be mixed. If your steel tank is still in good shape, no leaks, or thin spots, it's worth having professionally cleaned if you can find a reputable place to do it.
 
I’ll call my local radiator place and see what they have to say, that would be easier than messing with a 1969 model tank.

Here’s the engine accelerating after I adjusted the accelerator pump lever (last time it will run with the bad gas, promise)
 
Also, I pumped out more fuel and it actually looks okay? Or much better somehow?
 

Attachments

  • C307153A-600F-4DEA-9AB2-66F48498D150.jpeg
    C307153A-600F-4DEA-9AB2-66F48498D150.jpeg
    3.1 MB · Views: 190
Yeah, that fuel looks fine now. IDK. I see you have a clear inline fuel filter ahead of the carb. If there's any lingering color in your fuel, it will show up in that filter. If the filter stays clear, then we can only conclude the worst is gone and you should be good to forge ahead. Keep a weather eye on it. Accel is better. Probably good enough to drive. The real test is to blip it as fast as you can when the engine is warm. Get yourself a mechanical oil pressure gauge when you can. They typically come with a vinyl tube that you plumb into one of the small, oil gallery plug locations on the side of the engine block not far above the oil pan on the driver side. Those tubes are very delicate. Great care must be taken in how they are routed and handled. Keeping them away from heat and jagged edges is paramount. Best bet, is to discard it and run a length of copper tubing instead. The copper is much more expensive, but far more durable and lasting. Those vinyl tubes have a nasty habit of failing while you're driving in the dark, so of course you have no idea that your engine is pissing oil onto the roadway until you wind up pumping your engine dry and the thing goes into seizure mode. Even with the copper, you still need to exercise some common sense. The line will probably be longer than what you need to make the run. Be sure not to cut it off too short. Leaving yourself plenty of slack at both ends in gentle coils is a good call.
 
Thanks, I’ll keep an eye on it, hopefully it stays clear. Just ordered a mechanical oil pressure gauge and the copper line. Hopefully I can fit it in the same spot as the electric gauge.
 
You probably can. But, if you wanted to have both, you could remove one of the small, square head plugs very near where the OP sender is and plumb you hard line in there. That way you could get an idea about how trustworthy or not your faktree gauge is. If you do that, keep the pipe plug somewhere handy in the truck. That way, if you're out driving sometime and the unthinkable happens to your copper line, all you gotta do is pop the line out and run the plug back in and you're back in business. Just a little insurance policy against something that's not likely to happen if you do a good job on your tube install.
 
Back
Top