78 Maryland Binder

codeman

Member
I've been trying to get this thread started for a while but couldn't post pictures??? Finally, my buddy showed me the files were to big!!!! So, here goes!!! This is my 3rd Scout, but the first I'll be truly "building"!!!

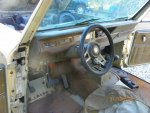
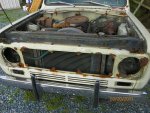
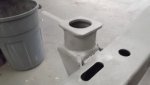
A friend of mine found a 78 Scout II in a back yard and bought it. I soon talked him in to selling it to me. I've had it for about a year and a half, mostly sitting and waiting. The truck was sold new in hanover,pa. From the condition it's in, I think it was garaged for most of it's life!! Some one had started some metal replacement (rockers & floor) and not done a very good job. That's all coming out. It's a 304/727, d-20 w/d-44's, bench seats, no a/c. The truck is pretty much all there.

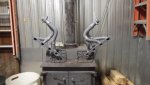
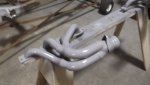
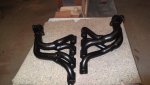
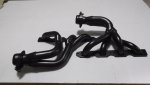
I've found a fresh '75 casting 392 to go in it!! This engine was built by a 42 yr. IH diesel engine mechanic to put in a t-all for pulling events. Got a nice cam, all new internals & a tq for go juice. I've got a close ratio 4-spd. To go behind it.

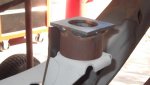
Build plans include 4" rc springs w/SOA, reverse shackle, 2" body lift. I haven't figured out the steering yet, but I got time. I found a 79 s II donor (rust bucket) including the parts for the auto to manual conversion, bucket seats, all good glass and a bunch of other stuff.

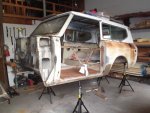
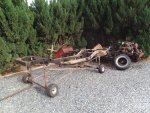
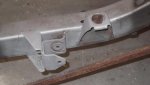
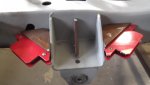
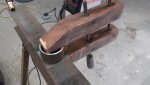
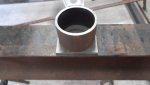
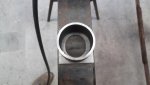
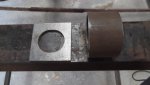
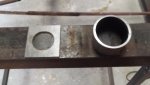
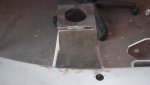
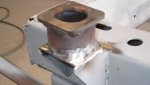
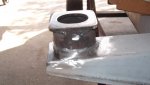
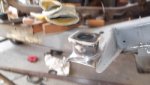
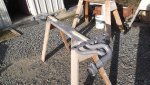
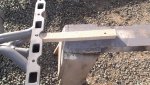
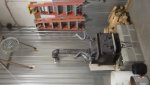
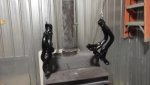
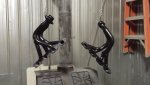
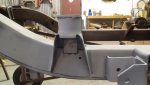
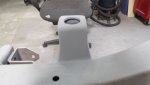
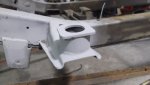
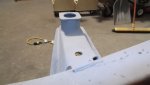
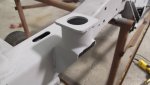
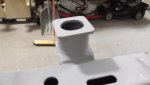
Currently, the truck is completely disassembled: body off frame, both on carts ready for fab. Being a woodworker/cabinet maker for 20+ yrs., I'm slowly converting my shop from wood to metal!!! Working on this Scout is another reason to buy more tools!!!
 

Attachments

  • body off frame 5 13 12 (6).JPG
    body off frame 5 13 12 (6).JPG
    370.8 KB · Views: 518
  • body off frame 5 13 12 (2).JPG
    body off frame 5 13 12 (2).JPG
    104.1 KB · Views: 617
  • Scout int resz.JPG
    Scout int resz.JPG
    256.3 KB · Views: 542
  • Scout films 034.JPG
    Scout films 034.JPG
    312.3 KB · Views: 578
  • Scout frt resz.JPG
    Scout frt resz.JPG
    204.6 KB · Views: 586
Looks like you are well under way, solid looking Scout to start with. Wish I had that much room to work with! Are you staying with the stock color? Can't wait to see your progress, you are getting to the make it pretty stage.
 
I haven't really "finalized" the lift, but thanks for doing the math!!!!! I'm not sure about the 4" springs at this point. A couple of you guys that know much more about this have provided a ton of info & I really appreciate it!!! I'm 6'-8" tall and I'm tired of folding up to get in and out of vehicles. I'm definately going SOA, rev. Shackle and some Spring lift. Originally, I was thinking I would "need" 4", but that doesn't seem reasonable with what I know now. As I understand things now, most SOA's stay stock sprung. I've spoken with a couple custom spring shops b/c I want a nice ride. This is going to be a road cruiser/beach rider, nothing nasty, muddy or rocky. I did that when I was much younger and stupid!!!!

I'm very open to suggestions as I want the proportions to be good.
 
Thanks Mark!!! I do have a good size shop but it has alot of woodworking equipment in it. I've been moving some of that around and putting some on moblie bases. You know, you never have enough room!!!

The truck was sold in hanover pa originally. It has a sticker from another dealership in that area on it now. I guess it was traded there at some point in time?? I just have to guess, but from the condition, I think it was garage kept. The clock only shows 67,000 and I have no reason to think it's not the actual mileage. It is pretty solid and was all there. I do have some cancer to deal with but not as bad as I've seen. Another good reason to buy more tools!!!

As for color, it won't be anything stock. I'm lookiing at a white over blue combo of some sort. I like the pearl white on the new subaru's and Ford has a nice deep, pearly blue. I think its called "kona" blue??? Thinking about 5 or 6 inch wide "racing stripes" with those colors in the contrasting areas sorta like the mustangs??? Still a long way from that!!!!
 
I am by no means an expert in wheeling or truck building but for what you want to do it seems like 35's or 33's make the most sense. Personally I like the stance of 35's better better if done right. SOA alone would clear those just fine. Maybe a small body lift for added fender clearance. I would also think some longer and wider front springs would ride nicer than the stock width/length springs that are on Scout II's. I'm sure plenty more qualified people will chime in but that is my 2 cents. You definitely have a great platform to start with.
 
The SOA will net you roughly 5" to 6" inches of life alone without changing springs. I currently own a 73 beastly Scout II that sits on 35" shoes(tires) and SOA and what seems to be 2", maybe 2.5", lift leaf springs I May have photos of it in my build thread. I also have a 72 Scout II that has 2", maybe 4" idk, lift springs and still sprung under and sitting on 33" shoes. I stand 5' 11"

the 73 is a bit of a climb to get in. Almost need scaffolding to get in. Getting into the 72, prety much just slide right in.

What ever combination of lift you finalize with, factor in doing a cut and turn on the c's. Lots of good info lurking around here on how to do that.
 
Thanks a ton for the good input tahoedonner & scooter!!! I'm thinking 35 - 36" tires and definitely doing the cut & turn. A good bud is an excellent welder/fab man and we're both looking forward to the c&t. The spring issue is why I'm looking into the custom pieces. I've contacted alcan with good results. I also tried deaver and got no reply. Another factor coming into play will be gearing. Now, the axles are 3.07's. To turn that much tire I know I'll need 4.10 +/-. I'll have plenty of power with the 392/t-19 combo. The 392 was built to put in a travellall to do pulling events, should be alot of fun!!!

And, I don't care about gas mileage!!!!!!!! I have a size 18 foot and cant wait to mash the pedal!!!!!!
 
Please post your progress pics of the cut and turn and SOA!! I'm planning to do that s well. Seems like a smoother ride is to be had that way, as well as some savings if I keep my stock springs. More of a labor investment than a $ investment. Ok by me, after all its a labor of love!
 
Well, after long last, I have really begun to put this thing back together!!! I began blasting the frame Saturday,just cleaning the areas necessary to begin the SOA, c & t, new lift springs and any other frame work necessary. I'll do a complete blast when I'm ready for paint. So far, everything looks pretty good!!! The only real "wear" I see on the frame, bracketry, etc. Is at the driver's side, inboard of the front rear spring mount. Hopefully it can be seen in the picture? I'm going to fill teh wear with a mig bead. Opinions?

More frame pictures. I have parts in fab for a 1 1/2" body lift. I have reinforcements in the works for the spring hangers & body mount posts.
 

Attachments

  • blasted DS frt rear spg mnt.jpg
    blasted DS frt rear spg mnt.jpg
    36.1 KB · Views: 370
  • Frame fab work Jan 13 010.jpg
    Frame fab work Jan 13 010.jpg
    44.4 KB · Views: 398
  • PS rear spg mnt trussing (1).jpg
    PS rear spg mnt trussing (1).jpg
    30.1 KB · Views: 387
  • PS rear spg mnt trussing (2).jpg
    PS rear spg mnt trussing (2).jpg
    27.3 KB · Views: 389
I've heard you should drill a small hole at each end of the crack first, then v out the crack with a grinder for maximum penetration.
Your mig will do a great job as long as the amps are up enough for the thicker frame steel. If you are worried about metal fatigue you could overlay a plate after grinding the repair weld smooth.
As long as it doesn't interfere with anything you will be good to go!
 
The spring rub on the hanger is about 1/16" deep with no visible crack. Since I'm installing new alcan's, I don't want them to "take a set" from the stock springs. I plan on welding in short passes so as to prevent overheating then grinding/filing the surface flat.
I do have one more issue on the frame to address. I have to replace the rear crossmember with one from my donor. Apparently, the Scout took a slight hit in the rear or backed into something. The bumper was bent as is the crossmember. I had to cut notches in it to reach the gas tank bolts. I'm going to pick up some grinding wheels today and get on that tonight. More to come................
 
With the expert help of drt steelworks, we fabbed up my body lift parts last weekend. The new mounts are 3/16" plate with an identical oval hole as stock. They are welded to a piece of 2" id welded pipe that rests perfectly flat at each mounting point. The new Energy Suspension body bushings from IHPA fit inside the pipe with a small amount of "wiggle room". I like this set up as the bottom of the bushing and the bolt/nut are protected. I have to "round out" the original oval bushing holes in the frame to insert the new bushings from the bottom. I began final location of the new mounts tonight. Once oriented, I am indexing and marking the position of each. I will grind the square corners down before attaching.
 

Attachments

  • Body lift weldments (1).JPG
    Body lift weldments (1).JPG
    144 KB · Views: 378
  • Body lift weldments (7).JPG
    Body lift weldments (7).JPG
    159 KB · Views: 367
  • Body lift weldments (6).JPG
    Body lift weldments (6).JPG
    152 KB · Views: 379
  • Body lift weldments (5).JPG
    Body lift weldments (5).JPG
    159.6 KB · Views: 358
  • Body lift weldments (4).JPG
    Body lift weldments (4).JPG
    145.4 KB · Views: 351
  • Body lift weldments (3).JPG
    Body lift weldments (3).JPG
    144.4 KB · Views: 348
  • Body lift weldments (2).JPG
    Body lift weldments (2).JPG
    151.3 KB · Views: 382
I now have 6 of 8 new body mounts in place. I have to r&r the rear frame crossmember before I can do the rears. My donor has a good one, just got to get to it.

Because I'm changing the suspension geometry and center of gravity, I'm reinforcing mounts and brackets as can. The new mounts as shown, with the new bushings from IHPA provide right on 2.5" of lift. That said, I'm "thinking" about the "paul harvey" #aka - the rest of the story# concerinng mounting things "body" related.

The weather was so nice here today, I had to do some blastin' and see how much more work I needed to do. All I can say is - flap wheel
 

Attachments

  • Body lift fab 3 10 13 (1).JPG
    Body lift fab 3 10 13 (1).JPG
    148.1 KB · Views: 350
  • Body lift fab 3 10 13 (8).JPG
    Body lift fab 3 10 13 (8).JPG
    128.3 KB · Views: 324
  • Body lift fab 3 10 13 (6).JPG
    Body lift fab 3 10 13 (6).JPG
    144.1 KB · Views: 341
  • Body lift fab 3 10 13 (5).JPG
    Body lift fab 3 10 13 (5).JPG
    136.1 KB · Views: 342
  • Body lift fab 3 10 13 (2).JPG
    Body lift fab 3 10 13 (2).JPG
    162.1 KB · Views: 328
Since it was sooo nice today and I did have the blaster runnin', I cleaned up the stan's tri-y's from IHPA with a low pressure blast to prepare for finishing. The "blue" dissapeared quickly as did the marked "center line" of the tubing. The tubing and welds are beautiful after blasting & priming. They should finish up well. I have a plan to "bake on" my finish coats involving my winter shop heat source. Won't need heat much longer so gotta get this done.

A saw horse, couple scraps of wood and a few screws provided support for the headers, either side up. I used vht gray primer. After curing the primer, I will apply and cure several costs of john deere black muffler paint. From what I can figure, it's the stuff!!! We'll see??????????????/
 

Attachments

  • blasted header  3 10 13 (1).JPG
    blasted header 3 10 13 (1).JPG
    268.5 KB · Views: 360
  • raw header  3 10 13 (7).JPG
    raw header 3 10 13 (7).JPG
    265.6 KB · Views: 358
  • header finishing 3 10 13 (3).JPG
    header finishing 3 10 13 (3).JPG
    321.6 KB · Views: 348
  • header finishing set up 1 3 10 13 (2).JPG
    header finishing set up 1 3 10 13 (2).JPG
    315.7 KB · Views: 340
  • header finishing set up 2A 3 10 13 (6).JPG
    header finishing set up 2A 3 10 13 (6).JPG
    298.5 KB · Views: 335
  • header finishing set up 2 3 10 13 (5).JPG
    header finishing set up 2 3 10 13 (5).JPG
    312.2 KB · Views: 364
You do really good looking work codeman. Looks like everything is coming along nicely. I'm curious about your body lift though? Why did you choose to go the route you're going and how much lift will you achieve? Also, what size shoes are you going to put on her and are you looking to avoid modifying your fenders to avoid rub?
 
Thanks for the complement!!! I try hard to think things through, looking down the road to the end result. I guess that comes from years of home building and knowing what can happen if you don't!!!

I'm doing the lift this way b/c I don't like the design of the "standard" lift kits on the market. To me, a big block with a long bolt through it provides the opportunity for movement. Since the body is off the frame, the weldments can be attached and be very strong. Fortunately, drt steelworks has been a valuable resource for fabrication. We duplicated the oval holes in the frame body mounts on 3/16" plate, 2.5" by 2.5". The 2.5" square dimension is a perfect fit at all mounting points. It allows for very easy alignment of the weldments visually and with a straight edge. Then, we cut 2" id pipe to 1.6" long, trued one end on the lathe and finished the other to 1.5" overall length. The new mounts sit completely flat on the existing frame mounts and provide significant surface area for welding. With the new body bushings from IHPA, the total body lift is right at 2.5".

I"ll be going SOA, r/s, with new alcan springs providing an additional 2 - 3" of lift. So, I guess I'm looking at about 10 - 11" of lift at the rockers. As far as tires, I'm thinking a minimum of 35's??? Once I have the body back on the frame, I'll be able to determine actual clearance. Then I'll decide????
 
With rockwell axles yes? :winky:

just kiddin. Looking great man. Those poly body bushings from IHPA made a good replacment for the junk that came with my lift.

You're doing great fab work and I hope you enjoy the wee beastie
 
A week later and another coat of primer on the headers. The vht directions say to allow 1 week for curing if you can't com-lete the finishing in one operation. I hung them over my shop stove for a while before doing anything. Then, after they had cooled to ambient temperature, I scuffed the stan's up with scotch brite, wiped them down with a tack rag (previously used but still picked up alot of dust), recoated with primer and made my best attempt at "curring" the paint. Tomorrow, ill scuff again and apply the 1st coat of jd muffler paint.
 

Attachments

  • hdr scuffed 3 17 13 (1).JPG
    hdr scuffed 3 17 13 (1).JPG
    143.3 KB · Views: 334
  • hdr scuffed 3 17 13 (2).JPG
    hdr scuffed 3 17 13 (2).JPG
    153.7 KB · Views: 308
  • hdr scuf tak rag 3 17 13.JPG
    hdr scuf tak rag 3 17 13.JPG
    189.2 KB · Views: 322
  • hdr paint curing 3 17 13 (1).JPG
    hdr paint curing 3 17 13 (1).JPG
    190.7 KB · Views: 319
  • hdr paint curing 3 17 13 (2).JPG
    hdr paint curing 3 17 13 (2).JPG
    164.8 KB · Views: 312
My 4 1/2" grinder got so good to me last weekend, I ground through the cord!!! Thanks to home depot & a 2 wire replacement cord. Here's the pass. Front body mount with lift weldment. I've got a little more "smoovin'" to do, but this is where I'm going. It has been blasted not not finished with it. I've got the 5 remaining frame mounts almost there but still have to replace the rear cross member. Hopefully, the weather will cooperate next weekend?????
 

Attachments

  • body mnt grnd & blsted 3 17 13.JPG
    body mnt grnd & blsted 3 17 13.JPG
    118.6 KB · Views: 342
Back
Top