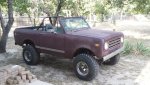
71 Scout II ignition issue

TTag06

New member
71 Scout II
345 with an automatic
holly points distributor
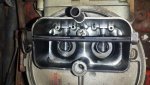
2 bbl holly carb looks to have been a rebuild
new coil/plugs from autozone (correct ones according to the monkey working the computer)

I've been reading a lot of these threads and haven't found one to iron out my current issues. I just bought a 71 Scout II with a 345. I fell for the ol' "it ran when I parked it last year"... After getting it back to the house I noticed he had put an after market electric fuel pump before the stock mech one. A quick dipstick check showed the motor was "making oil" or it was previously over filled (there was a gas smell to the oil though).

Day 1: picked up a new battery, drained the oil, and put some fresh lube in it. Re ran all the fuel lines and added a new electric fuel pump (4-7 psi unit). I bypassed the mech fuel pump just incase it was the culprit for the "gassy oil". Visual check of carb ( no carbon build up and gives a good squirt when working the throttle). Tried to crank it and couldn't get it to fire. I pulled a plug and checked it for spark with no luck. Checked coil and got some weird numbers. Shut down and drank beer.

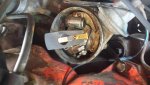
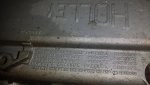
Day 2: picked up a new coil and installed it. I traced all the wires replacing the cracked out ones and put new connectors (including battery cables and grounds). Replaced spark plugs which all looked pretty fouled. Had to order new plug wires so I still have the stock ones. I'm now getting 12+ volts to the coil but falling flat from there. I popped the distributor cap and the rotor/cap looks like new. Best I can tell its a holly distributor with the "curved point set". The points didn't look bad but I May be missing something...

Day 3: came to work and read threads on here all day trying to find a fix...

Thanks for the help!
 
Reading one of the other threads I noticed something about a resistor wire going to the coil and its length being critical. There was one peculiar wire running from the starter solenoid to the coil that looked to be extra long and the original old style insulation.... I naturally cut it and replaced it with a shorter piece... There was also a capacitor/resistor mounted to the original coil which wasn't hooked up... Could this be playing a factor? Thanks
 
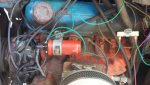
Originally, the resistor wire run is from the firewall bulkhead connector to the coil pos terminal. It is a cloth-wrapped wire with the excess length folded back against itself several times and secured with electrical tape. This feed is hot when the ignition is switched on. Its what allows the engine to continue running after it starts up and what stalls it when the key is switched off. Without seeing the wire you've described, one can only speculate. "original, old style insulation" is in the eye of the beholder. With a breaker points distributor, there should be a wire running from the solenoid 'r' terminal up to the coil pos terminal. This is the resistor bypass feed, but it is only hot while the switch is held in start position during starter cranking. So this wire shouldn't have any wild cloth insulation covering it as you would expect to see on the resistor wire as previously described. If it was the original bypass wire, it would be standard automotive wire with the same insulation consistency of nearly every other factory wire in the truck. The length would be sufficient to make the run up the backside of the engine and then down the length of the valve cover to the coil without being sloppy. The capacitor mounted to the coil bracket is for suppressing rf noise interference in your factory sound system generated by the ignition while the engine is running, aka "am radio buzz". Its a non-essential item.

The unknowns of this situation include: positive distributor identification...point gap/dwell angle setting...condition of points and condenser (aside from cursory visual)...correct circuitry runs to coil pos terminal consisting of a proper resistance feed from the ignition (either the unmolested stock wire or a replacement wire interrupted by a ballast resistor) and a resistor bypass feed from the solenoid 'r' terminal...correct coil for the application and ability of the coil to generate a spark...whether or not the distributor has been removed from the engine or its orientation otherwise altered since the engine last ran. This calls into question whether the timing is close enough to allow each cylinder to fire on time...correct routing of spark plug wires in accordance with cylinder firing sequence...what diagnostic/tuning aids you have at your disposal (ie multi-meter, timing light etc). Pictures are helpful and welcome.
 
Thanks for the help. The rig is being stored at my brothers right now until I get it running well enough to drive it up my steep driveway. I May take an afternoon off tomorrow to run out there and try a couple things. I'll check the wires as you have described and snap some pictures. Oh, and I have a decent pile of tools at my disposal. No timing light as of now. I'm in the oilfield so I'm sure I can fix this thing with a hammer and a 36" pipe wrench...
 
This May help to speed the process up. The cloth insulated wire went into the fire wall and is the one I cut and replaced. Reading some of your other responses I now know I need to do some adjusting with the ballast resistor on this. I haven't been able to trace it but I assume it goes to the "run" side of my ignition...

The original cloth insulated wire was attached to the pos (+) side of the coil along with a wire going from the r side of the solenoid. From the neg (-) side of the coil is a wire going inside the distributor to the points. In my brain this sounds correct... I am just looking for confirmation from a reliable source.

My other question is when I replaced the connector on the wire going into the distributor from the (-) side of the coil it seemed almost stringy (not like a traditional copper wire.) could this be hindering my power to the distributor?

Thanks again
 
That wire you describe sounds like the resistance wire. You will need to either add a ballast resistor to the system or now is a good time to ditch the points and install a pertronics ignitor electronic ignition.
 
I put in a couple hours on the hoopty again yesterday.... Update below...

71 Scout II
345 with an automatic
holly points distributor
2 bbl holly carb looks to have been a rebuild
new coil/plugs/wires/cap/rotor/points

I started with the most common problem of ohms... 1.6 ohms across the (+) & (-) on the coil. 1.8 ohms across the resistor I picked up. 3.4 ohms total. Gave it a crank and no fire. I pulled the lead from the coil to the distributor and tried to jump a spark with no luck.

I went ahead and changed the points and rotor on the inside of the distributor. While I was in there I pulled the condenser and cleaned the ground wire since it was a little corroded. I then replaced all the plug wires and checked to make sure they went to the correct cylinder.

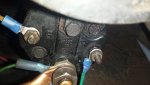
For fun I disconnected the "resistor leg" going to the coil and checked the voltage at the coil coming from the "r" terminal on the starter solenoid.. Only got 9 volts and some change while cranking. As I understand it shouldn't this be a solid 12 volts? The "hot" pole on the starter solenoid is reading 12 v from the battery.

Through all of this I have yet to be able to jump a spark from the coil lead. As I said I checked all grounds and connections under the hood... I'm starting to wonder if the problem is originating in the starter. As I crank, it rapidly gets weaker and the low voltage seems suspicious. Thoughts?

I've attached a few pictures if that helps. Thanks fellas
 

Attachments

  • 20140820_181758.jpg
    20140820_181758.jpg
    77.9 KB · Views: 844
  • 20140827_174954(0).jpg
    20140827_174954(0).jpg
    54.9 KB · Views: 2,973
  • 20140827_175115.jpg
    20140827_175115.jpg
    48.8 KB · Views: 986
  • 20140827_175503.jpg
    20140827_175503.jpg
    67.7 KB · Views: 743
  • 20140827_175520.jpg
    20140827_175520.jpg
    64.9 KB · Views: 680
  • 20140827_182355.jpg
    20140827_182355.jpg
    50.8 KB · Views: 1,091
Your ballast and coil primary resistance figures are good. What did you set your point gap to?
While a starter issue can't yet be ruled out, a weak or discharged battery is more likely. A fully charged and solid battery will display a surface charge of 12.x volts and will be capable of multiple, brief, diagnostic starter bursts before any noticeable drop in cranking speed occurs. That same battery surface charge should be seen at the big solenoid post also. If you are able, take a voltage reading at the battery just prior to, during and after a starter crank. Report the three readings in that sequence.
Another thing you can do is rig a temporary jump wire directly from battery pos to coil pos to see if that generates some spark. Even try replacing the coil to dizz lead and air gap a random plug wire to ground. Be sure to d/c that battery jumper right away as it is the same thing as leaving your key switched on with the engine stopped. If your battery voltage is dropping significantly during starter crank, the jumper wire won't make much, if any difference. The battery has to be up to the task, otherwise you're shooting yourself in the foot with your diagnostic efforts.
 
I tried the jumper method directly to the coil and still no juice. All tests yesterday were done using a new coil to dist lead, & this is a brand new battery with 8-10 attempts at cranking... I'm thinking I May be off Mark on the point gap... What do you recommend on it and is there any special steps when gapping (#8 on tdc? Ect.?). I haven't done a lot when it comes to timing so I'm pretty ignorant when it comes to dwell and the likes. Also, what do you recommend the spark plug gap being?
 
I'd still like to see battery voltage numbers. You need a gap feeler gauge to set point and spark plug gaps. One with a nice variety of thickness blades gradually stepped from say .010 to .045 with the ability to combine blades for setting custom gaps is handy.
What brand of spark plugs do you have? If they are bosch platinum, do not attempt to adjust the gap with a standard feeler gauge. The platinum electrode can be weakened or damaged in the process. A special gap tool is required for this brand of plugs.
A new point set should come with a little gel cap of rubbing block lube. Don't get any oil contamination, bodily or otherwise, on the point contact surface. You'll notice the circular cam that rotates inside the distributor has 8 ridges and 8 flat spots, one for each cylinder. The points open on the ridges and close on the flat spots. This cam should be lubed to prevent premature wearing of the point rubbing block. Bump the starter until the rubbing block is is resting on any of the ridges. Setting your point gap to .017 of an inch should get you close enough for now. Measuring dwell angle is the preferred method for precise tuning, but it requires a dwell meter and is best accomplished with a running engine. Set spark plug gap to .035 of an inch if they are anything other than a bosch platinum.
 
Got it. I have champions in it now gapped at .03. I'll verify the rest of the stuff next chance I have to run out there. Thanks again for the help.
 
If the problem is no spark and you've got 12v to the coil, I'd start by testing the coil. Put a plug wire into the coil with a good plug laying on the engine for a good ground. Remove the wire from the coil to the dizzy. With a short jumper wire and the ignition on ground and release the dizzy terminal on the coil. You should see a nice blue spark each time the coil is ungrounded. If not the coil is bad.
 
Quick update. Gapped the points and charged the bat. Now getting a weak (orange) spark on the #2 plug. When. I plugged straight into the new coil it gave me a blue spark... It'll crank but won't even attempt to turn over. Like I said all new plugs, wires, rotor, cap, points. Condenser is still the same. The battery is reading 12.8 to 13 volts.. A side note. I started cranking and the ballast resistor started smoking on me... I'm thinking that's a bad sign... Thoughts?
 
Well if you're getting a nice hot blue spark at the coil and a weak orange on the end of the plug wire, either the wires, cap or rotor is bad.
 
I'm thinking I May go ahead and upgrade to the electronic ignition. Is there a kit on here that is ready to go and recommended for the holly curve point dist.? Thanks
 
I've done the pertronx ignitor upgrade to both my IH's and john deere tractor. The work great and no issues in 15 years of use. You can order them here in the store.
 
Do you recommend the pertronix ignitor II or the older pertronix? I know sometimes the upgrade isn't always an upgrade...
 
.. A side note. I started cranking and the ballast resistor started smoking on me... I'm thinking that's a bad sign... Thoughts?

Its rarely a good thing when precious smoke escapes from any electrical component. The question is why and I don't have the answer. Resistance creates heat, but ballast resistors don't typically make like cheech and chong.
 
You say the condensor has not been changed. You can test them but I'd I install a new one. Buy an authentic standard ignition condensor. There are a lot of crap chinese ones out there that are doa.
 
I opted to order the pertronix II off of this fine website. I figure I might as well spend the extra jack to gain some reliability. I'm going to pick up a new ballast this week as well. I think its just due to autozone selling their normal junk. Does anyone have a recommendation on a disk brake upgrade kit? Once this thing has some go its going to need some whoa!
 
Pertronix II came in today. Reading the instructions it recommends ditching the ballast resistor. Do yall have a recommendation?
 
Back
Top