74 Scout II (running) project

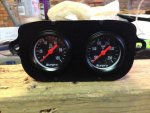
would you be horribly offended if I stole that idea buddy? Looks high and tight. Updated meets retro. Or you're welcome to come down to my neck of the woods and do it for me. Ive got an IH fridge full of 'International' beer and Scout parts to last you a lifetime as payment :winky:

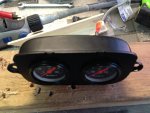
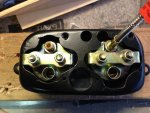
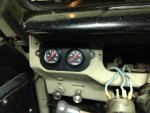
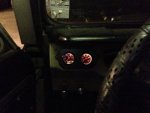
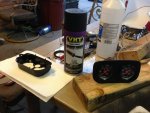
Not at all brotha! Have at it. If I could get out there to help out, I'd certainly take you up on that beer and maybe a part or two as well, lol. I used lexan for the face plate because it's light, the exact thickness needed and it's virtually indestructible.
 
Got a little ahead of myself last night. Thought I had the back of the gauge housing trimmed out enough so I painted everything up. Of course, when I went to put everything together it was a no-go. Finished trimming it out for fit and rounded all the edges and repainted the housing. Now I have to wait and let the paint cure again so I hope to have everything together and installed tomorrow.
 

Attachments

  • image.jpg
    image.jpg
    66 KB · Views: 514
Didn't bother painting the back side. May cut and glue another piece of lexan just to stiffen it up. Can't torque down on the mounting brackets due to flex.
 

Attachments

  • image.jpg
    image.jpg
    62.2 KB · Views: 504
Working on the electrical has cost me 2 broken battery cable lugs so with a little shopping around, I found these nifty little do-dads. I've never seen these before but, I think they'll cure what ails me.
 

Attachments

  • image.jpg
    image.jpg
    55.3 KB · Views: 543
love what you did with your gauge clusters. Looking forward to seeing it all installed. Nice work.

Thanks man! I'm looking forward to seeing it installed too, lol. I haven't even started on the other cluster yet. Waiting on the fuel gauge to get here. Just ordered it Tuesday.
 
Nice. :dita: 
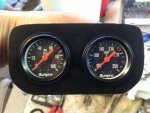
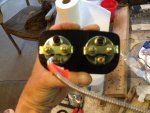
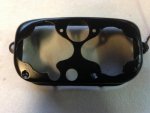
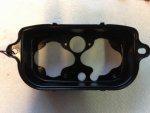
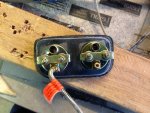
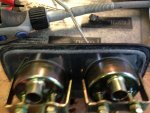
cool way to re-use the oem gauge pods. One other way is to make plate of thicker gauge that matches the face of the gauge pods, then hole saw openings for the two new round gauges.

Those battery quick disconnects do come in handy. I had one installed in my 73 beast. But that was only due to a major battery drain, and if not disconnected the battery will be dead the next day.
 
When I retrofitted the gauges on mine I cut off the back of the stock metal enclosure and welded the aftermarket gauge bracket (to the back of the pod) cutting it to fit the outline of the pod. That allowed leaving enough of the stock pod enclosure so that the gauges could sit behind the stock plastic lens cover.
 
when I retrofitted the gauges on mine I cut off the back of the stock metal enclosure and welded the aftermarket gauge bracket (to the back of the pod) cutting it to fit the outline of the pod. That allowed leaving enough of the stock pod enclosure so that the gauges could sit behind the stock plastic lens cover.

I thought about doing something similar but, not really going for the full finished look on this rig. Just going for the quick and dirty so I can get her on the road. She'll end up being a streetable toy. My 72 will get a lot more attention to detail as it's going to be my family oriented daily driver. Any chance you could post up some pics? I'd really like to see how that turned out. What size gauges did you end up using?
 
Got home tonight and received so good news via e-mail. My fuel gauge, calender, turn signal switch and body mounts shipped so I should have them by next Friday! Thanks to the guys at IHPA for all that you do.

With that in mind I quickly glued a backing piece of lexan to the gauge faceplate to stiffen it up. Then I started working on getting the oil and temp gauge installed. More to come when I get my goodies!
 

Attachments

  • image.jpg
    image.jpg
    86.2 KB · Views: 479
Not my best work but was ready to get it installed. You don't see the backside any ways, lol.
 

Attachments

  • image.jpg
    image.jpg
    63.4 KB · Views: 505
Now to get the other gauge pod in so I can put the cover plate back on.
 

Attachments

  • image.jpg
    image.jpg
    47.6 KB · Views: 666
For anyone curious, this is the best place to put the temp sensor probe on a mopar 318.
 

Attachments

  • image.jpg
    image.jpg
    77.2 KB · Views: 696
Back
Top