Jim's 1968 Scout 800

ihpartsjeff

Administrator & Owner
Staff member
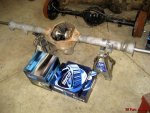
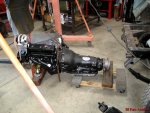
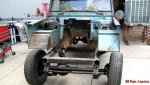
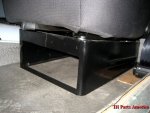
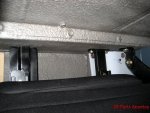
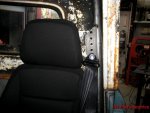
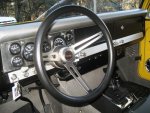
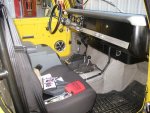
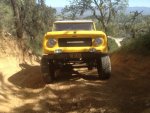
This build originally started as a mild drivetrain update to a 1962 Scout 80 to make it more suitable as a daily driver. The original plan was for our customer jim to bring up his already purchased Scout to our shop for a install of a set of modern axles he had purchased from a private party, swap out the 152 4cyl/3speed for a GM 4.3 v6 and 700r4 auto transmission and change out the Dana 18 transfer case for a Dana 300. For suspension a custom variation of our CPT Scout 80/800 suspension kits for some lift and a CPT reverse shackle kit for a smoother ride. While here jim also wanted a custom seatbelt bar fabricated for his half-cab so that shoulder belts could be used. To make things easier to stop and steer a Scout II power steering box and custom hydroboost. And last a modern update to the gauge package and rewire the electrical system.

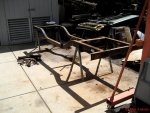
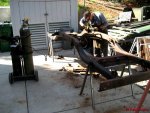
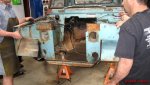
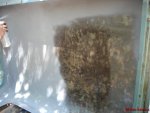
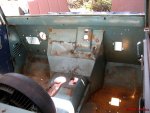
After the plan was finalized and a date scheduled jim brought up his Scout for us to begin work on it. Upon inspection of his Scout we found that it had a bent frame due to a previous auto accident and severe enough damage to the body itself(the driver door no longer closed properly, major inner fender damage, etc) was enough reason for us to recommend to not build up this Scout. Jim agreed so the search was on for a better Scout to start the project out with.

attachment.php


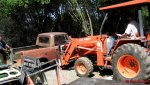
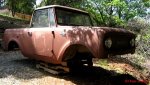
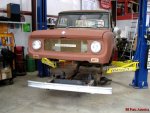
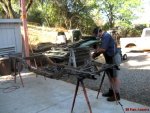
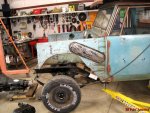
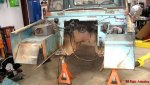
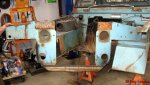
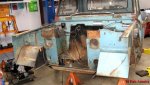
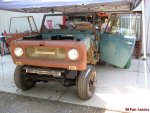
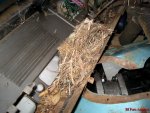
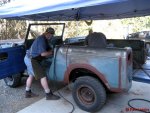
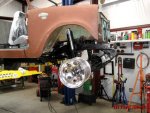
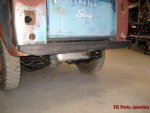
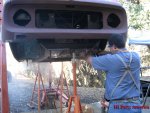
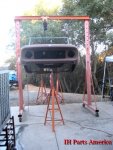
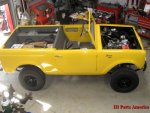
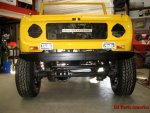
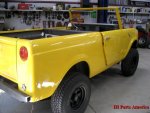
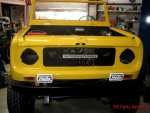
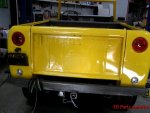
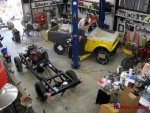
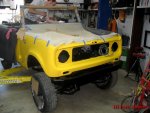
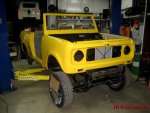
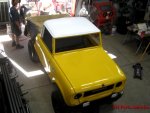
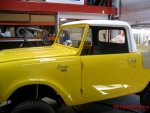
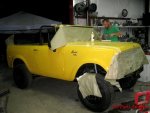
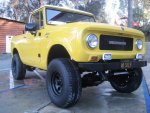
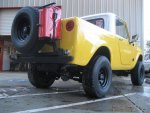
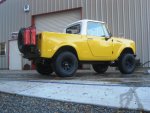
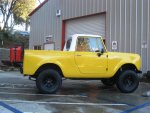
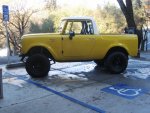
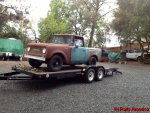
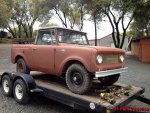
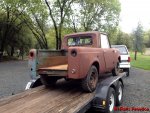
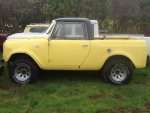
After checking around for several weeks(and picking up a few parts rigs along the way) we came upon this 1968 Scout 800 that had spent most of its life on a ranch and only had 19000 original miles. The body was in decent shape and overall was a real good Scout to start the build on.
attachment.php

attachment.php

attachment.php

attachment.php

attachment.php
 

Attachments

  • 024.JPG
    024.JPG
    94 KB · Views: 28,850
  • 025.JPG
    025.JPG
    83.3 KB · Views: 31,571
  • 026.JPG
    026.JPG
    83.1 KB · Views: 28,070
  • 028.JPG
    028.JPG
    41.4 KB · Views: 27,774
  • 029.JPG
    029.JPG
    67.3 KB · Views: 28,154
  • ORIGINALJIMSCOUT.JPG
    ORIGINALJIMSCOUT.JPG
    100.2 KB · Views: 42,927
Last edited:
Tear-down of the donor Scout began immediately.

attachment.php


attachment.php


We believe this is to be the original distributor cap as the odometer only showed 19000 miles.

attachment.php


With the bulk of the parts that we we're not going to use discarded and out of the way we were ready to begin the build up.

attachment.php


All brackets and such were cut off the frame that we were not going to be reusing.

attachment.php


attachment.php


The body was moved out back while work on the chassis began.

attachment.php


attachment.php
 

Attachments

  • 062.JPG
    062.JPG
    75.7 KB · Views: 27,726
  • 066.JPG
    066.JPG
    79.1 KB · Views: 27,243
  • 076.JPG
    076.JPG
    51 KB · Views: 26,934
  • 077.JPG
    077.JPG
    64.5 KB · Views: 27,184
  • 078.JPG
    078.JPG
    70.8 KB · Views: 26,883
  • 080.JPG
    080.JPG
    64.7 KB · Views: 27,068
  • 082.JPG
    082.JPG
    64.8 KB · Views: 1,028
  • 009.JPG
    009.JPG
    74.6 KB · Views: 26,678
  • 010.JPG
    010.JPG
    70 KB · Views: 26,892
We started out with three main components - a GM 4.3 v6 longblock, a B&M GM 700r4 transmission and a Jeep version of the Dana 300.

attachment.php


We ordered up an older version of the 4.3 with a mild cam and provisions for a mechanical fuel pump since we were going with a carburetor.

attachment.php


The 4.3 was dressed up with a set of shorty headers, edelbrock intake manifold and a Holley 390cfm 4bbl carb. Advanced adapters motor mounts were used for engine mounting.

attachment.php


A whole slew of parts was gathered up including new leafsprings for front and rear and a CPT reverse shackle kit.

attachment.php


The frame itself was going to need the front crossmember relocated forward so as to give the v6 engine room to fit nicely in the engine compartment.

attachment.php


attachment.php


With the frame back in the shop mock-up of the suspension began.

attachment.php


CPT Scout 80/800 springs from our suspension system were used in the rear of the Scout.

attachment.php


For the front suspension we used some Rough Country 2.5" lift Scout II front springs with a couple of the leafs removed since the GM v6 weighs considerably less than a IH v8 engine.

attachment.php


attachment.php
 

Attachments

  • 033.JPG
    033.JPG
    60.2 KB · Views: 27,788
  • 034.JPG
    034.JPG
    58.9 KB · Views: 27,121
  • 035.JPG
    035.JPG
    66.1 KB · Views: 28,492
  • 037.JPG
    037.JPG
    62.5 KB · Views: 27,631
  • 036.JPG
    036.JPG
    70.3 KB · Views: 26,681
  • 038.JPG
    038.JPG
    58.4 KB · Views: 26,342
  • 039.JPG
    039.JPG
    56 KB · Views: 31,110
  • 065.JPG
    065.JPG
    63.2 KB · Views: 30,620
  • 067.JPG
    067.JPG
    55.9 KB · Views: 27,882
  • 068.JPG
    068.JPG
    68.4 KB · Views: 30,523
Last edited:
With the mockup of the basic suspension complete we brought the body back in and removed the front fenders and grill.

attachment.php


Next the front radiator core support was carefully cut out.

attachment.php


attachment.php


Once complete the front support will be moved forward and reattached.

attachment.php


The body was then lowered back onto the rolling chassis.

attachment.php


The engine and transmission combination was readied for install.

attachment.php


attachment.php


attachment.php


attachment.php


attachment.php
 

Attachments

  • 001.JPG
    001.JPG
    54 KB · Views: 25,688
  • 002.JPG
    002.JPG
    54.6 KB · Views: 25,992
  • 003.JPG
    003.JPG
    53.5 KB · Views: 25,660
  • 004.JPG
    004.JPG
    50.3 KB · Views: 25,507
  • 006.JPG
    006.JPG
    55.8 KB · Views: 26,139
  • 077.JPG
    077.JPG
    63.9 KB · Views: 26,326
  • 080.JPG
    080.JPG
    77.6 KB · Views: 25,756
  • 081.JPG
    081.JPG
    63.7 KB · Views: 25,414
  • 082.JPG
    082.JPG
    69.1 KB · Views: 25,460
  • 085.JPG
    085.JPG
    75.1 KB · Views: 25,479
With the engine located the front radiator core support is put back in place.

attachment.php


The radiator got installed next.

attachment.php


With the radiator installed the electric fan can then be fitted to check for overall fan clearance.

attachment.php


Next up the interior was going to get refinished so removal of the dash was needed. Upon removal we found some critter had made the Scout home.

attachment.php


attachment.php


Both michael and Darren spent several hours sanding the Scout's interior.

attachment.php


attachment.php


All surfaces that were sanded were then sprayed with a metal primer.

attachment.php


attachment.php


The inner fenders then got sprayed with rubberized undercoating.

attachment.php


attachment.php
 

Attachments

  • 086.JPG
    086.JPG
    75.5 KB · Views: 26,305
  • 088.JPG
    088.JPG
    69.8 KB · Views: 25,378
  • 089.JPG
    089.JPG
    71.5 KB · Views: 26,819
  • 135.JPG
    135.JPG
    70 KB · Views: 25,085
  • 137.JPG
    137.JPG
    66.8 KB · Views: 25,089
  • 143.JPG
    143.JPG
    53.5 KB · Views: 26,153
  • 145.JPG
    145.JPG
    41.3 KB · Views: 24,918
  • 146.JPG
    146.JPG
    32.7 KB · Views: 24,823
  • 004.JPG
    004.JPG
    87 KB · Views: 25,618
  • 005.JPG
    005.JPG
    74.3 KB · Views: 25,709
  • 001.JPG
    001.JPG
    66.4 KB · Views: 905
  • 001a.JPG
    001a.JPG
    66.4 KB · Views: 28,018
Last edited:
The interior was also sprayed with primer after being sanded down.

attachment.php


Taped and all ready to be sprayed with a few layers of liner.

attachment.php


We like to use a product called lizard skin. There are two formulas, one for sound deadening and the other is a ceramic coating. You don't have to apply both but we like to for the best results.

attachment.php


Here you can see Darren applying one of several coats of lizard skin.

attachment.php


attachment.php


Last a top coat of grey paint is applied for the best in uv protection.

attachment.php


The inside of the fenders also get the same royal treatment. Sanding, primer and then undercoating.

attachment.php


attachment.php


Next up was the install of an electric wiper system. All Scout 80 and 800's came with vacuum wipers so this is a huge improvement over stock.

attachment.php


With the dash reinstalled there is ample room for the electric wiper kit.

attachment.php


A new gauge package was also installed to check for fit.

attachment.php
 

Attachments

  • 010.JPG
    010.JPG
    67 KB · Views: 24,888
  • 011.JPG
    011.JPG
    50.2 KB · Views: 24,967
  • 031.JPG
    031.JPG
    60.4 KB · Views: 25,624
  • 044.JPG
    044.JPG
    71.5 KB · Views: 24,830
  • 045.JPG
    045.JPG
    84 KB · Views: 24,885
  • 046.JPG
    046.JPG
    70.2 KB · Views: 27,570
  • 048.JPG
    048.JPG
    99.5 KB · Views: 24,578
  • 051.JPG
    051.JPG
    73.5 KB · Views: 28,976
  • 058.JPG
    058.JPG
    84.1 KB · Views: 25,290
  • 059.JPG
    059.JPG
    61.9 KB · Views: 26,709
  • 064.JPG
    064.JPG
    67.5 KB · Views: 24,856
The inside of the halfcab also received several layers of lizard skin.

attachment.php


Next up was dealing with the front shocks and steering.

attachment.php


attachment.php


To make room for a Scout II power steering box the front support had to be modified for extra clearance.

attachment.php


Same with the inner fender. Instead of leaving a gaping hole around the steering column Darren fabricated a nice cover to keep water and mud out of the engine compartment.

attachment.php


A set of bare wheels was installed to check for alignment and for tierod and draglink clearance.

attachment.php


attachment.php


One of the other upgrades jim wanted was a single fuel tank instead of the factory dual tanks that all Scout 80 and 800's had. For the filler it was decided to install it in the rear driver tail cap behind the license plate.

attachment.php


We used a 15 gallon fuel tank and mounted it in the rear of the Scout.

attachment.php


attachment.php
 

Attachments

  • 066.JPG
    066.JPG
    84.4 KB · Views: 24,760
  • 098.JPG
    098.JPG
    35.4 KB · Views: 24,543
  • 099.JPG
    099.JPG
    41 KB · Views: 25,539
  • 100.JPG
    100.JPG
    69.3 KB · Views: 28,757
  • 101.JPG
    101.JPG
    68.8 KB · Views: 24,566
  • 138.JPG
    138.JPG
    76.2 KB · Views: 25,289
  • 139.JPG
    139.JPG
    82.1 KB · Views: 24,702
  • 307.JPG
    307.JPG
    61.8 KB · Views: 25,417
  • 308.JPG
    308.JPG
    36.8 KB · Views: 25,123
  • 309.JPG
    309.JPG
    40 KB · Views: 24,678
More mockup's of various components continued. Center console, seat brackets, shifters, etc.

attachment.php


A Scout II throttle pedal assembly was modified and installed.

attachment.php


A B&M megashifter was installed to go with the B&M 700r4 transmission.

attachment.php


At the time of this build it seemed to be Scout 80/800 season around here with all the builds!

attachment.php


A simple yet effective front bumper was fabricated for the Scout.

attachment.php


attachment.php


attachment.php


A hydraulic btl hood strut kit from Isa's IH was installed.

attachment.php


Since the Scout had power steering it was decided to go with hydroboost for a very effective braking system.

attachment.php
 

Attachments

  • 310.JPG
    310.JPG
    55.1 KB · Views: 25,277
  • 311.JPG
    311.JPG
    54.5 KB · Views: 25,355
  • 312.JPG
    312.JPG
    72.1 KB · Views: 24,571
  • 357.JPG
    357.JPG
    44.4 KB · Views: 24,514
  • 397.JPG
    397.JPG
    67.5 KB · Views: 24,391
  • 398.JPG
    398.JPG
    54.6 KB · Views: 24,110
  • 399.JPG
    399.JPG
    50.3 KB · Views: 25,676
  • 401.JPG
    401.JPG
    45.4 KB · Views: 24,556
  • 402.JPG
    402.JPG
    76.5 KB · Views: 28,310
Darren fabricated a custom headbar that could also support the shoulder type seatbelts.

attachment.php


attachment.php


A multiple holed tab was made so that the overall height of the built could be adjusted if needed.

attachment.php


The stock Scout seat bases had to be modified in order to fit the corbeau seats. You can also see the other half of the seatbelt mounted to the floor.

attachment.php


attachment.php


The driver side seatbase was a little easier to modify due to the way its designed.

attachment.php


Darren fabricated a rear bumper to match the front.

attachment.php


A class 3 trailer hitch was incorporated into the rear bumper.

attachment.php


attachment.php


2" square 1/4" walled steel was mounted deep inside the frame rails for the ultimate in strength.

attachment.php
 

Attachments

  • 405.JPG
    405.JPG
    43.5 KB · Views: 23,969
  • 407.JPG
    407.JPG
    44.6 KB · Views: 23,738
  • 404.JPG
    404.JPG
    63.4 KB · Views: 23,863
  • 408.JPG
    408.JPG
    78.9 KB · Views: 24,479
  • 410.JPG
    410.JPG
    75.9 KB · Views: 24,677
  • 411.JPG
    411.JPG
    73.9 KB · Views: 23,651
  • 415.JPG
    415.JPG
    57.4 KB · Views: 25,418
  • 416.JPG
    416.JPG
    43.5 KB · Views: 23,872
  • 418.JPG
    418.JPG
    51.7 KB · Views: 23,937
  • 413.JPG
    413.JPG
    66.8 KB · Views: 23,623
Back to the shoulder bar with the halfcab removed you can see the additional mount to the bulkhead.

attachment.php


attachment.php


attachment.php


With the bulk of the fabrication done the body was removed one last time to finish up a few things on the chassis and get under the body to wash and undercoat it.

attachment.php


attachment.php


attachment.php


attachment.php


With that complete the Scout was loaded onto a trailer.

attachment.php


And hauled off for a fresh coat of paint.

attachment.php
 

Attachments

  • 423.JPG
    423.JPG
    73.2 KB · Views: 23,966
  • 424.JPG
    424.JPG
    33.1 KB · Views: 23,426
  • 425.JPG
    425.JPG
    77.6 KB · Views: 23,597
  • 426.JPG
    426.JPG
    81.1 KB · Views: 30,486
  • 427.JPG
    427.JPG
    70.2 KB · Views: 23,595
  • 428.JPG
    428.JPG
    53.9 KB · Views: 23,376
  • 429.JPG
    429.JPG
    73.5 KB · Views: 23,282
  • 446.JPG
    446.JPG
    90 KB · Views: 23,274
  • 447.JPG
    447.JPG
    74.5 KB · Views: 23,415
A short time later the Scout was back from paint.

attachment.php


Wiring was next on the Scout.

attachment.php


attachment.php


At this point lots of little things were being performed on the Scout.

attachment.php


attachment.php


The license plate bracket was a flip design that allowed access to the fuel tank filler.

attachment.php


With the front bumper powdercoated and installed with the hella lights things were really starting to come together.

attachment.php


The overall stance of the Scout looked real good with the new wheels and tires.

attachment.php


attachment.php


attachment.php
 

Attachments

  • 047.JPG
    047.JPG
    63.9 KB · Views: 23,514
  • 048.JPG
    048.JPG
    80.3 KB · Views: 23,327
  • 049.JPG
    049.JPG
    38.9 KB · Views: 23,114
  • 063.JPG
    063.JPG
    63.5 KB · Views: 23,270
  • 064.JPG
    064.JPG
    87.3 KB · Views: 23,064
  • 066.JPG
    066.JPG
    54.1 KB · Views: 23,066
  • 068.JPG
    068.JPG
    61.3 KB · Views: 23,227
  • 070.JPG
    070.JPG
    60 KB · Views: 22,914
  • 072.JPG
    072.JPG
    71.9 KB · Views: 23,120
  • 074.JPG
    074.JPG
    65.8 KB · Views: 23,951
First look with the Scout sporting its freshly painted halfcab.

attachment.php


Another view from up above. You can see the guys behind the Scout discussing the tire rack.

attachment.php


With hydroboost for brakes and a remote reservoir for the power steering pump there were quite a few hoses to make for this project.

attachment.php


To keep the hoses from getting baked by the exhaust Darren took the time to fabricate a heat shield.

attachment.php


attachment.php


Wiring, speedo cable, shifters, etc were finished up underneath.

attachment.php


attachment.php


With the shoulder bar freshly powder coated it was installed for the last time.

attachment.php


Speakers were installed into the doors as part of the sound system.

attachment.php


In the midst of stereo equipment being wired up and installed.

attachment.php


For the coldest of days seat heaters were installed and wired into the electrical system.

attachment.php
 

Attachments

  • 108.JPG
    108.JPG
    54.7 KB · Views: 23,081
  • 112.JPG
    112.JPG
    54.4 KB · Views: 22,939
  • 114.JPG
    114.JPG
    69.1 KB · Views: 23,066
  • 115.JPG
    115.JPG
    78 KB · Views: 22,720
  • 116.JPG
    116.JPG
    75.2 KB · Views: 22,843
  • 117.JPG
    117.JPG
    83.3 KB · Views: 22,829
  • 119.JPG
    119.JPG
    76.7 KB · Views: 22,771
  • 120.JPG
    120.JPG
    69.5 KB · Views: 22,706
  • 122.JPG
    122.JPG
    38.3 KB · Views: 22,672
  • 123.JPG
    123.JPG
    72.4 KB · Views: 22,598
  • 124.JPG
    124.JPG
    60.2 KB · Views: 22,714
The next few pictures show how the undercarriage came out once everything was installed.

attachment.php


attachment.php


attachment.php


attachment.php


attachment.php


attachment.php


Some final detail work was performed to give the paint its final polish and a protective wax coating.

attachment.php


Another up above picture of what was in the shop that day.

attachment.php


More wiring of the dash was yet to be completed.

attachment.php


A custom switch panel box was fabricated for the seat heater switch's.

attachment.php


Chad seen buttoning up the transmission shifter.

attachment.php


For easy access the stereo is mounted inside the center console.

attachment.php
 

Attachments

  • 128.JPG
    128.JPG
    82.3 KB · Views: 22,600
  • 129.JPG
    129.JPG
    79.3 KB · Views: 22,637
  • 130.JPG
    130.JPG
    83.4 KB · Views: 22,545
  • 131.JPG
    131.JPG
    74 KB · Views: 22,569
  • 132.JPG
    132.JPG
    86.9 KB · Views: 22,561
  • 133.JPG
    133.JPG
    76.8 KB · Views: 22,575
  • 134.JPG
    134.JPG
    54.6 KB · Views: 22,442
  • 135.JPG
    135.JPG
    44.9 KB · Views: 22,455
  • 136.JPG
    136.JPG
    83.2 KB · Views: 22,471
  • 148.JPG
    148.JPG
    79.2 KB · Views: 22,491
  • 149.JPG
    149.JPG
    75.6 KB · Views: 22,450
  • 150.JPG
    150.JPG
    71.5 KB · Views: 22,464
Stereo installed.

attachment.php


The gauge panel had a decent length pigtail made for easy access to behind the dash.

attachment.php


And with that jim's Scout was complete. Obviously there were countless hours of work performed that we did not show you but this hopefully gives you an inside look into what it takes to build a custom Scout.

attachment.php


attachment.php


attachment.php


attachment.php


attachment.php


attachment.php


attachment.php


attachment.php


attachment.php


attachment.php


attachment.php


attachment.php
 

Attachments

  • 151.JPG
    151.JPG
    62.3 KB · Views: 22,536
  • 153.JPG
    153.JPG
    77.4 KB · Views: 22,507
  • 364.jpg
    364.jpg
    85.4 KB · Views: 22,947
  • 366.jpg
    366.jpg
    72.8 KB · Views: 22,936
  • 370.jpg
    370.jpg
    72.5 KB · Views: 23,068
  • 371.jpg
    371.jpg
    69.4 KB · Views: 23,973
  • 372.jpg
    372.jpg
    87.1 KB · Views: 22,377
  • 373.jpg
    373.jpg
    85.3 KB · Views: 22,515
  • 382.jpg
    382.jpg
    69.1 KB · Views: 22,375
  • 383.jpg
    383.jpg
    82.7 KB · Views: 22,563
  • 384.jpg
    384.jpg
    74.4 KB · Views: 22,319
  • 385.jpg
    385.jpg
    68.9 KB · Views: 22,247
  • 386.jpg
    386.jpg
    74.5 KB · Views: 22,248
  • 388.jpg
    388.jpg
    66.6 KB · Views: 22,294
Great looking truck guys! I know its not IH, (or Ford) but I love the modern engine in the truck. What a great way to have a "brand new" 40+ y/o truck. The yellow looks great on this body style!

I do not like diesels, but I have been driving a tata pick up truck with a plucky little diesel in it and have been dreaming about putting one in an 80/800. I'm sure there is a better small diesel engine (Nissan perhaps in keeping with history) that would be better then whoever makes the tata (india it think?)

what do think Jeff? Someone out there must want a modern diesel Scout...
 
As a customer having a vintage Scout modernized by IH Parts America I could not be happier. As with all major projects, this vehicle rebuild ran into cost overruns and delivery delays. However, those are easily overlooked when you look at the quality of the final product. This Scout is a dream to own and drive. Every detail was attended to and handled by Jeff, Chad, Darren and the guys. Trust me there is nothing but the body on this vehicle that is not new and each item was replaced or refurbished down to the knobs on the dash. The 40 plus year old Scout was delivered in near to flawless condition. It was like picking up a new vehicle off the lot (only better). I would recommend the incredible staff at IH Parts America to do anything from changing oil to a 100% rebuild. All I did was give them my concept and some cash and they built and delivered my dream Scout. Thanks IH Parts America!
 
Jeff, Chad,
what fuel tank is that in jim's Scout?
Have you guys fit the the 19 gallon plastic Scout II tank on your site into an 80/800?
Damian
 
Jeff, Chad,
what fuel tank is that in jim's Scout?
Have you guys fit the the 19 gallon plastic Scout II tank on your site into an 80/800?
Damian

The fuel tank is out of a Jeep. What year and type I couldn't tell you as it was something we picked out of a catalog from one of our suppliers. We have not tried a Scout II 19 gallon in a Scout 80 or 800 so I can't give you any advice on that one.
 
This is a great looking Scout. Does IH parts sell the center console that is in there or where to find one?
 
this is a great looking Scout. Does IH parts sell the center console that is in there or where to find one?

Yes we do sell the center console seen in this build. We don't stock them as they do come in a couple different colors and sizes. Best to call our sales office with your particular needs and one of our staff will get you a current price.
 
Back
Top