Searching for vacuum & timing

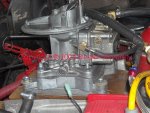
Today I got new Missouri plates for my green Scout II. I'm still trying to clean up the whole act, but two things still bother me about the setup .

1) my timing is reading 19* > 23* when running "best." This is based solely on drivability after countless trial "runs" of 10-15 miles trying to figure out where it liked the best. It will hardly run outside of this range, approx. 1/8th revolution "off" as far as degrees go.

I have loosened the distributor clamp and picked the body straight up and re stabbed, turning the rotor enough to notice a slight change in position once seated, compared top-down with a Mark for this purpose. I tried this twice at this point, but I guess I didn't get it right because I keep chasing the timing back into the same 19 > 23 range by rotating the body.

I guess it is also entirely possible that the pertronix unit I installed is somehow malfunctioning. I have mentioned in another post that the trigger's closest vertical face to the unit's magnet wheel seems to be far out of parallel with the shaft axis, and I have no dwell meter to try and figure if that's working properly.

I have used a timing light to look for changes across the entire set of wires at night, letting each one flash for a minute or so before changing. Nothing leaps out as inordinary.

2) manifold vacuum is impossible to read. Once I installed an IH-original 2bbl courtesy of the carb king, I had no carbureted passage to draw full vac from, which led to me trying a t-fitting in the brake booster hose. Instantly I saw huge fluctuations in the needle, as well as visibly cycling changes in needle action.

I have eliminated the possibility of the brake booster with a solid plug, and the fluctuation still seems to exist. For those who aren't enturely familiar, I'm thinking that the booster hose runs from the #8 intake runner, between the open plenum and head, and it's too cold to go look right now.

So, I'm not experienced with this sort of indication and don't know if this says something about my valve train, or perhaps just the particular flow of this intake, etc...


I just know that my Dad thinks it's 'missing' going down the road because of slight changes in speed, typically a burst of "decel" feeling. Much like a brief, but incomplete shift into neutral, which I guess could be the 727 that got rebuilt. Do the bands need readjustment after a break-in period after rebuilds?


I just want to be able to confidently drive the thing knowing I'm not causing long-term abuse by having it improperly tuned.
 
1)my timing is reading 19* > 23* when running "best." this is based solely on drivability after countless trial "runs" of 10-15 miles trying to figure out where it liked the best. It will hardly run outside of this range, approx. 1/8th revolution "off" as far as degrees go.

Are you timing off of #8? Is the vacuum advance disconnected?

I have loosened the distributor clamp and picked the body straight up and re stabbed, turning the rotor enough to notice a slight change in position once seated, compared top-down with a Mark for this purpose. I tried this twice at this point, but I guess I didn't get it right because I keep chasing the timing back into the same 19 > 23 range by rotating the body.

Re indexing the distributer won't change where your timing is ultimately set. As long as you can turn it sufficiently to adjust the timing and not physically interfere with other engine parts, leave it for now.

2) manifold vacuum is impossible to read. Once I installed an IH-original 2bbl courtesy of the carb king, I had no carbureted passage to draw full vac from, which led to me trying a t-fitting in the brake booster hose. Instantly I saw huge fluctuations in the needle, as well as visibly cycling changes in needle action.

The wild manifold vac. Fluctuation is a textbook indication of valve train problems. Sticking valve, leaking valve, bent/broken push rod etc. Most likely intake valve issues. Remote possibility of a flat cam also.

I suggest doing a compression check before going any further.

A good stabilized vacuum gauge reading at idle and in neutral is between 15-19inhg.

If you have a lot of throttle opening to maintain idle rpm, you are probably getting some amount of vacuum advance in your base timing reading that is why it seems so high. This is a by product of a bad valve system as I indicated above.


If you do the compression check, post back the results and we can go from there.
 
You should not be getting vacuum for the distributor from the vacuum source for the power brake booster. It should be for the power brake booster by itself.

You are getting vacuum all the time with the line connected to the booster -- if the vacuum advance is connected to the carb (correctly), you get enough vacuum to move the vacuum advance when you open the throttle (simplified explanation - depends on the "sensitivity" / setting of your vacuum advance canister).

I do not know who the "carb king" is...

If the carb is from ihon / michael mayben, I would assume that the vacuum ports on the carb were not plugged... And, I think michael maybe includes instructions on how to hook up / set up his carbs...

I do not know which carb you have -- and do not know much about IH 2bbl carbs, but there should be 1 - 2 vacuum ports on a carb... For a line to the the vacuum advance canister on the distributor.
 
Last edited:
I do not know who the "carb king" is...

wtf The carb king is...................................................................... None other than michael mayben his own self.:lol:

well it is a self imposed nick name so how could you know.:icon_domokun:
 
I didn't "impose" that "king" tag (iirc carl did!)...but yes, the carb came from the official ihon carb source and was test run onna motor before shipping to kyle!

And yes...kyle has had multiple issues going on related to gittin' hiz project motor going.

Kyle and I have had multiple contacts back and forth regarding the really scruud up (po virus) nature of his entire intake system and ignition issues which he's fought simultaneously from the beginning, that can be a wicked combo to sort through piece by piece! And most especially by a novice with no experience in dealing with this stuff...but he's stuck it out and won't give up!

This pic is kyle's carb under discussion, an oem 2300 with manual choke and is not an oem carb on a Scout II app but is set up correctly per kyle's instructions for his specific vehicle. The vacuum tap shown is connected to the distributor vacuum advance can and is a "ported" source. Since at idle speed there is no vacuum signal present at that port, there is no need to disconnect for verifying base timing. Kyle's carb is actually "running" in that picture, can't ya hear the extremely nice idle quality it has???? And that is with the mixer mounted onna "adapter" which is not a good thing to do regarding idle quality!!!

This whole "timing" thing has existed since the beginning...that is just too strange to disregard. But without having the distributor on the bench for diagnosis, I can't say what the issue is exactly though I'm pretty certain it needs some basic luv (they all do!). I have six Holley distributors on the bench now for reconditioning, four point units and two gold box units,...they all have badly botched guts with multiple problems that can be corrected.

All Robert kenney's comments regarding vacuum fluctuation diagnosis are correct...and we know for a fact regarding the very common stuck valve/flat cam/bent pushrod syndrome has root cause in a non-oiling valve train assembly. And it's certainly not out of the ordinary to see this onna motor that anyone is trying to bring back to life...probably the most common issue we deal with here on the forum. This issue is always accompanied by a clicking/rattling lifter since valve tip clearance is excessive (unless the pushrod has spit or broken completely).

Compression testing will point to the "flat cam" (actually a valve timing anomaly) but can only be verified by either actual measurement of lift or lobe height, or doing a "leakdown" test also and comparing actual cylinder data with compression numbers to determine root cause of a compression anomaly.

The first thing to test regarding the distributor is the action of the advance can...it's either a 5* unit or a 7* unit...that has not real bearing on what is going on. But...if the vacuum can is leaking or is "in-op", then it does contribute to the vacuum issue.

If the mechanical advance unit inside the distributor is partially/fully scruud up (normally "frozen" or sticking randomly), that that will create the weirdazz timing numbers we're seeing...and no doubt someone in the past May have tried to "fix" this by wiring the plug cables into the cap incorrectly.

The first thing to do right now kyle...is to again...verify proper firing order for the plug cables vs. Cylinder numbers. I really think from your description now, you have a dead cylinder which is possibly because the firing order of the cables is out of synch (maybe just two cables swapped). I see this constantly around here because folks that don't know IH sv engine practices try and set up the distributor/cables/timing, et al like they are chevs!

So don't keep scruuin' with the carb, unless it picked up trash from a nasty fuel/plumbing issue, it's perfect! And the carb has nothing to do with the strange ignition timing situation...we gotta fix that now!

If it works best for you...when you have time to deal with this, call me (you have the number) and I'll talk ya through this in real time while yore leanin' over the fender!
 

Attachments

  • Kyle 2300.jpg
    Kyle 2300.jpg
    94.3 KB · Views: 516
Last edited:
you should not be getting vacuum for the distributor from the vacuum source for the power brake booster. It should be for the power brake booster by itself.

I should have been clearer - I was trying to read manifold vac from the booster source on the #8 runner. The advance can is hooked up to a ported source.

I've checked and re checked my timing, but I'll go check it again. I've memorized the firing order by now, 1-8-4-3-6-5-7-2.

I could add this bit of info - I have verified vacuum advance works smoothly and repeatably well when I disconnect the vac hose and apply my own lung vacuum to the can. I was eyeing up a mity-vac in sears the other day, too.


I guess I'm going to run to town and try buying a compression tester. I'll be searching around for a good description on how to go about checking compression hot/cold/whatever. Is a leakdown just a test of compression loss over time? What's the normal time reference?

I'll be returning with a compression tester here soon.
 
A "leak down" tester reads a cylinders ability to hold air pressure. There are two types. Both really tell you the same information but go about it using two different mechanisms.

Basically compressed air from a pressure regulator (80 -100 psi) is blown into a spark plug hole (engine stationary) at a predetermined rate (through a calibrated orifice) and the pressure in the cylinder is measured on the supplied gauge. The gauge is calibrated at a predetermined pressure into percentage points. So your gauge if there is no leakage (impossible) for sake of argument will read 0% with 1-10% being preferred. The max I consider allowable on any engine is 10%. Most street applications call out 20% max.

You will probably be buying a traditional compression tester where the gauge is measuring a cylinders ability to pump pressure and reads the peak pressure.

Steps are below:

you must have a fully charged battery and I like to have the charger on and connected during testing. This helps maintain a consistent cranking speed from cylinder to cylinder.

I recommend a warm or hot engine but cold for you situation will work to find a bad valve etc.

1) disable your ignition so it will not generate spark. I like unplugging the distributer or removing the coil to points wire if equipped with a points type dizzy.

2) remove all spark plugs,

3) screw tester into #1 cylinder and with the assistance of a helper hold the throttle wide open and crank the engine while watching the gauge until the gauge peaks and climes no higher.

4) record that value and cylinder number.

5) remove and repeat for each of the 8 cylinders.

Compare all 8 values and if one is abnormally low like 20 psi lower that the others. Squirt a few teaspoons of engine oil into the low cylinder and retest that cylinder. This will indicate whether the problem is a bad valve (no improvement) or rings ( reading gets better or improves).

A stock 8.0-1 compression should yield 140-150 psi if close to new or in good condition. A worn high mileage one May only muster 115-130 psi and still run fine. The biggest issue is the difference highest to lowest value. If you got 130 across the board with exception of one reading at 90 or less.:incazzato:
problem.
 
Compression readings are in:

left bank:
1 - 122
3 - 120
5 - 130
7 - 129

right bank:
2 - 118
4 - 117
6 - 121
8 - 121


I started with #2 rb, ended on #7 lb. This is cold cranking numbers, and I also forgot wot. :sleep: but I do have a relay set up that just jumps the starter solenoid regardless of ignition, so I don't have to disconnect any ignition components / ground it out while testing.

I did make sure to get an extra 2-3 revolutions past the point where the needle stopped climbing, just to be sure.

I'll get in some hot readings tomorrow... I expect to see more variance concerning #5 and #7. It got too dark to drive around, heat up the motor, and do all that in my dimly-lit barn with such cool temperatures abounding.

I feel kinda bad about these readings, seeing as how this motor hasn't even logged 70,000 original miles. Of course, I'm becoming more and more equipped to diagnose internal issues before they become major problems... For a few $ here and there.
 
Well, I misunderstood your comment about the brake booster, but, a few more comments -- at the risk of getting "slammed" by michael / robertk

the compression numbers you post, do not indicate / match your vacuum test readings.

To me, the compression numbers are good for a "cold" engine...

A question -- which 70,000 miles does your engine have -- 70,000 miles on an engine completely rebuilt in 2000 (e.g.) or 70,000 miles on a 30+ year old engine? To me, there is a slight difference... But it is really immaterial to the problem...

Wot would be better - disconnect the throttle linkage and use the return spring to hold the butterfly open.

Even though you are using a jumper, I think you should "disable" the ignition system. I have never done a compression test on my t/a, but I have done a couple on my corvairs -- pulled the coil wire from the dist cap and grounded it against the frame.

Michael's reccomendations work, too - probably better as it is not as easy to ground the coil wire.

Re restabbing the dist -- if you actually "moved" the dist one tooth, the engine would run differently.

"where" are you getting the 19 - 23* reading -- digital timing light or crankshaft pulley??? I think the pulley on my t/a "has" 20* btdc and 5* after atdc...

When you pulled the spark plugs, did you "set them in order" (so you know which cylinder they were in)? Did any of them "look wet"?

So, we are back to michael's original recomendations --

are the igintion wires correctly installed in the dist cap versus cylinder?

And,

what is the actual physical condition of the dist?

If you have not already, it will probably be useful to supply micheal with pictures of the vacuum / etc line routings on your engine (no air cleaner).
 
compression readings are in:

left bank:
1 - 122
3 - 120
5 - 130
7 - 129

right bank:
2 - 118
4 - 117
6 - 121
8 - 121


I feel kinda bad about these readings, seeing as how this motor hasn't even logged 70,000 original miles. Of course, I'm becoming more and more equipped to diagnose internal issues before they become major problems... For a few $ here and there.

Don't feel bad.

Like robertc said they will likely improve some with wot.

Also when the engine was rebuilt it May have had decompressed pistons and thicker composite head gaskets installed lowering the cr to something like 7.5-1 so don't stress about it. They are fairly close.
 
As already posted, your compression numbers don't indicate an issue...nice work in supplying requested data! You will learn how to do all this stuff if ya stick with this project, it's great that one more yung'un is learning the old ways! And the gear you are acquiring will be with you forever if ya take care of it!

A leakdown test would be imperative if one or two cylinders appeared to be an issue, that is the second method we use to determine what a compression anomaly is caused by. So doing a leakdown sequence now would be wasted effort unless ya simply wanna learn how to do it and spend cash for another tool. I use the harbor freight leakdown tester which works perfectly and can normally be sourced for around $35.

As for engine warmup...in the bizz...we don't consider any liquid-cooled motor to be "warm" until the coolant and the oil (most important is oil temp) is at full operational temp...that is normally seen after about 30 minutes of runtime and can be achieved by simply running at idle. But you must watch engine coolant temp when doing so in case there are issues with the thermo-control fan clutch (if used), loose belts, missing fan shroud, etc. That can create a "false" engine temp elevation when running at idle (the ambient temp has nothing to do with this, it can occur at 20*f!!!!).

What you are doing now, is working through the diagnostic process we talk about so often around here...ya started off way back when with the shotgun approach, but since then you have learned stuff and now we will home in on the root of the issue!

Can santyclaws bring ya a mity-vac this year???? That is a very important tool to have in yore old iron tool arsenal! It would be a great aid in diagnosing this issue since you can actuate the vacuum advance with it and also use it for a diagnostic vacuum gauge for any use.

One last thing...is the timing light you are using a "dial-back" version (sometimes referred to as a "timing test light")?? If so, make certain that you have the knob set to zero when reading base timing.
 
"where" are you getting the 19 - 23* reading -- digital timing light or crankshaft pulley??? I think the pulley on my t/a "has" 20* btdc and 5* after atdc...

I was fairly sure I had one extra Mark in the scale past the 20 line. I am using a digital timing light on #8 cyl with absolutely no dialback.

When you pulled the spark plugs, did you "set them in order" (so you know which cylinder they were in)? Did any of them "look wet"?

All plugs looked very white, and the extended eletrode looked slightly discolored on each, but not severe. No visual difference in any plugs.


So, we are back to michael's original recomendations --

are the igintion wires correctly installed in the dist cap versus cylinder?

Yes, verified time and time again. I even undid my entire wire loom yesterday to completely re-set the ignition, verifying each wire as I went, and re-looming them in sets of four labeled with cylinder numbers.

And,

what is the actual physical condition of the dist?

I have not removed and inspected it thoroughly, mostly because my Dad would throw a wild fit if he found out, and because I have no means of obtaining a oilite bushing from inside a timing cover, if it came down to that.

don't feel bad.

Like robertc said they will likely improve some with wot.

Also when the engine was rebuilt it May have had decompressed pistons and thicker composite head gaskets installed lowering the cr to something like 7.5-1 so don't stress about it. They are fairly close.

The engine was not rebuilt, and has had three owners since it was originally sold - one guy in California who put ~50,000 on it, then a japanese guy named fumi, who went to school with my brother here in Missouri.

Between those two, 18,000 happened. I've barely gotten 2k on it, and I'm almost positive that the engine has never had the original pan gasket or head gaskets broken. Everything looks antiquated and the oil we found in it came out relatively clean, even when doing a hot oil change after an hour of initial running.

I need to drop the pan for the sake of knowing for sure, and perhaps I'll tap a second drain plug on the other half of the pan.

As for engine warmup...in the bizz...we don't consider any liquid-cooled motor to be "warm" until the coolant and the oil (most important is oil temp) is at full operational temp...that is normally seen after about 30 minutes of runtime and can be achieved by simply running at idle. But you must watch engine coolant temp when doing so in case there are issues with the thermo-control fan clutch (if used), loose belts, missing fan shroud, etc. That can create a "false" engine temp elevation when running at idle (the ambient temp has nothing to do with this, it can occur at 20*f!!!!).

I have a good little route planned before doing a hot compression test. It's about 20mi of driving with roughly 5 of it through steep little hills. If the oil and block ain't hot by then, I might jest drop in the 345 & t-19! :yikes:
 
I guess it is also entirely possible that the pertronix unit I installed is somehow malfunctioning. I have mentioned in another post that the trigger's closest vertical face to the unit's magnet wheel seems to be far out of parallel with the shaft axis, and I have no dwell meter to try and figure if that's working properly.[/b]

Take the dist cap off and take a picture of the pertronix / dist cam and post it.

Afaik, the trigger should be parallel with the distributor cam.

Michael should be able to tell if the dist plate is damaged.

The gap between the trigger and the dist cam is the important measurement.

A mechanic put a pertronix in my Holley dist 7 - 8 years ago, and I have never checked the dwell since.

Fyi dwell is important for a points distributor as the gap between the points when open is important. The gap can change over the life of the points. A plastic rubbing block runs on the dist cam and as this wears down, the opening / gap in the points closes - can affect how the engine runs. If the gap completely closes, there is no gap for the spark to jump and the engine will stop running.
 
The "dwell" of the primary side of any inductive ignition system is critical to engine performance. No matter if breaker point-triggered, hall effect electronic trigger (pertronix), or a magnetic trigger (Ford/chrysler/etc.).

With breaker points as Robert described, dwell will change continuously from the time the dwell is initially set due to wear inherent in a breaker point trigger system. That is why we used to have to do periodic "tune-ups" to restore proper engine performance.

With the various electronic trigger systems, once dwell is set in some manner (usually by using a non-magnetic thickness gauge of some sort during initial installation), dwell will not change (theoretically) since there are no moving parts to wear. But...a hall effect trigger system (pertronix) is affected by distributor wear, some versions much more-so than others depending upon how the magnet wheel is attached in relation to the position of the pickup. A delco distributor with a p-tron unit is completely different when compared to a Holley!

If your p-tron pickup is not parallel with the magnet wheel, then very carefully bend the bracket so that it is parallel. This is a common "quality" issue I see with the p-tron stuff in some versions. And...some versions of the p-tron for the Holley distributor do not have any provision for adjusting the "air gap" (which actually sets the dwell factor). If yours had the 0.030" clear acrylic strip included in the packaging, then ya must set the air gap accordingly. It's much more likely that the misalignment you see is caused by a breaker plate assembly that is basically trashed! And with that condition there is no way top achieve any kind of stable ignition timing, it will vary continuously. I repair those breaker assemblies since there are no service parts still available to do so...and my repair is much more durable than the oem stuff!

But...dwell is not your issue currently...dwell which is considerably out of spec will affect ignition system/engine performance, primarily above 2000rpm. Unless...the p-tron was assembled incorrectly...or is a wrong p/n for the application, then dwell will certainly be in the ballpark.

Don't sweat the lower distributor bushing deal! I always point that out as an inspection point, most especially for folks who have no idea what they are doing with this stuff and are simply bringing deadawgs back to life from po abuse.

But...we must verify the overall condition of your distributor, I can think of at least four points internally which May creating this issue but it simply needs to be disassembled and carefully inspected/reconditioned. Then it needs to be tested for proper operation before going back in your engine!

Discuss this with your pop...I have an absolutely beautiful Holley points distributor that is much better than a new one. It's carefully wrapped and boxed and kept in my truck box for a backup for either myself or others I May be with in case of an electronic distributor failure.

I have your address on file...I'll be more than happy to ship this to you to install in your engine, the points/dwell are set, endplay is tight/adjusted, it's ready to run. Stick it in, power-time it, and then report back. If it corrects your issue, then keep it in the hole and send my the problematic unit which I will recondition and then test with verified results you can see on the oscilloscope (p-tron dwell spec shows onna 'scope or dwell meter just exactly like a breaker point set). Once it's done, I'll ship back to ya for installation. If you are happy with everything, then ya can settle up, I promise, we won't bend ya over...you know how we do bizz around here already!

There is no upfront charge for this, it will arrive at yore door free of any cost, I pay the shipping your direction. This is the next best thing to having the ride in the shop here for diagnosis.

I'm offering to do this because you have certainly shown the ability to stick with this deal and learn stuff!
 
Mm:
I apologize for the delayed reply, but I really can't afford to take you up on this offer just because I -know- I won't be able to afford to send in my unit and pay for it to get repaired.

I definitely appreciate the offer and the gesture itself, though, and I will get in touch with you as soon as I can afford to start really getting things done. I have mentioned it to my Dad, but my current priority is a vehicle that will do 80+ miles per day for college, and after I've got payments established I'll be available to pay attention to the more important vehicle!

Progress thusfar:

hot compression readings
Code:
1- 137   2- 134

3- 145   4- 156

5- 142   6- 140

7- 140   8- 141

I chased my plug threads quite a bit this afternoon while taking these numbers, mostly trying to fool the #4 reading. I tested each cylinder at least three times at first, and just averaged out what I was seeing and recorded close to the highest number - these spreads never became great, I think one cylinder saw a 6psi difference across 3 readings.

All plugs had a bright-white insulators, a chalky/bright white looking ground strap, and the electrode tip itself usually had slightly noticable discoloration, but nothing looked significant.

I had the throttle wide open, and cranked for 10-15 seconds on each in most cases (the needle still kept bumping up slowly the last 4-5 revolutions) and recorded. To refresh the abused battery, I drove it again in a smaller circle with a lot longer road, and managed to acquire a significantly higher road speed in pursuit of changing the readings.

Needless to say, I got back home a lot quicker that second time around, and I tried to fool the previous compression readings. I did one more test on all cylinders, and got basically zero change. Then I did five or six tests on #4 :crazy: and the readings still basically convinced me that 154-156 is what it pumps.

Drove it again to refresh the battery, did a double check, got home, picked up my oil fill cap out of the driveway (I guess I knocked it off while re-wiring) and felt stupid for a bit.

Good news: base timing reading 22-23* results in perfect 1400rpm cold-weather startup. No odd exhaust noise either, sounds terrifyingly smooth, and it is idling very well.

Any other timing position doesn't cold start well at all, sounding rough and stumbly in the 1200-1600 range I was given for "factory." it takes more like 1800-2000 to "smooth out" if I so much as take the timing as far as 20* or 25*, so I picked about middle. And that's a dead-cold-for-days cold start, mind you, for Missouri.

So... That's about all the info I've got at this point. It's still going, and I'm still going on about it... At least I'm in the right place!
 
Great update kyle!

The offer regarding the distributor holds for any time ya decide ya wanna try it! I have those fresh sparkers on hand continuously.

So you really have a ton of data now regarding your project...and as you have determined, there is really no issue regarding internal conditions even though #1 and #2 are bit "down".

The May be a significant carbon accumulation in #4 combustion chamber...don't sweat that! It causes no problem and most likely once you get this ride in service as a dd, if it is carbon, it will gradually erode causing no issues. Do not be tempted to "seafoam" the motor though or put any other chemical treatment down the intake. If the carbon is well "stuck", then who cares if it's there??

Far more damage is caused to engines that have been neglected for years by doing the seafoam deal, or pouring atf down the carb while running than if simply left alone and handled during a top-end rebuild or a major overhaul.

As for the spark plug "color"...that carb is jetted #53 as you can see by what I wrote on the fuel bowl. If...the jetting is significantly "lean" at cruise...then the engine will exhibit a noticeable surge, as if it's running out of gas. It also has a #75 power valve installed...that would tend to mask a lean cruise condition once manifold vacuum goes below 8"hg, so when doing a plug color check, keep the manifold vacuum "up".

If you want to play with this jetting deal, then snake a pair of #56 jets at any parts house that has Holley stuff on the wall. If ya can't find 'em, then let me know and I'll send ya an assortment of jet pairs to try. To swap the jets, remove the carb, then remove the fuel bowl screws and bowl..the gasket should be reusable. The jets will be looking right at ya in the bottom of the metering block. When ya change 'em, they must be real tight!!!

Anytime jetting is changed, you must re-set the idle mixture screws after warmup..all fuel for all circuits (except accel pump and power valve) is pulled through the main jet feeds....and any main jet change affects the idle mixes also.

I can't explain away the timing readings though...I'd have to have my eyes on the distributor in order to determine what's going on...this is real strange!
 

Attachments

  • Kylecarb.jpg
    Kylecarb.jpg
    80.6 KB · Views: 322
Good to hear it is running satisfactorily.

Some time down the road when you can find the time you could check the intake valve lift on #4 and compare it to one of the other cylinders on that bank with a lower compression reading. A worn cam lobe will give you a higher cranking compression due to the reduced duration.
 
Back
Top