

R-100 4X4

Got the idea to get a replacement bezel with one for the VDO tach .. That was a bit of a hunt to come across ..
Did find one and is on it's way to me ..

View attachment 38860

Most likely will be a chore to swap the bezels out .. We will soon see what can of worms I will be opening up .. ??

Well Poo ...
That didn't work out so well ...
After explaining to the sales rep what I was wanting to do with the og tach bezel he said he has them ..
Ordered it, came in on the Opps truck ..


Well Sir ... Guess I wasn't very clear on what part of the VDO tach I was wanting ..


1699573240517.png


This trim ring goes over the VDO bezel ...
I don't have a need for it. will be sending it back ..


Back to the hunt ..

1699573489133.png


Above photo shows the Pontiac manifold vacuum gauge having the mismatch bezel ...
I'm wanting it to look like the tach bezel to net somewhat of a matching look ..

BTW ... That overdrive pull/push cable is only along for the ride ..
Been on the truck since the 80's .. I had it replated ..
Thoughts was to hook it up to work something, but never did find a use for it ..


1699573817575.png


Think I've nailed down the elusive VDO bezel ..

Called a lot of shops that does repairs on gauges, even a few shops in Cali. seems like it wasn't to be found ..
Was thinking of buying another tach just to scalp the bezel off of it ..
Had a few more shops to call, and what do ya know ??
Found one here in my backyard .. :icon_cool:
South Florida shop said they have one and will get it shipped out tomorrow ..

Hopping it's the right critter this time around .. Soon to see ??

Getting the gauge prepped ...

402103516_10228625597163464_2760583521464912254_n.jpg


401630596_10228629598743501_2523362814228176688_n.jpg


^^ That's what I'm talking about ..

401636726_10228629610463794_1566572603238634053_n.jpg


Need a thinner glass ... Most likely will need to be custom made .. !!

Well, do want the dash to look pretty dag-gum slick since it's always right in front of me, the more I eyeball the new to me bezel the more I'm wanting to have it replated ...
Did plate the og IH bezels years back and they still look like they was done yesterday .. The used VDO bezel don't look near as good ....
Soooooo .. Going to get it in the hands of the platers ... Hopping it will get back to me looking as good as the IH bezels do ..
Odds are it will be like Christmas Morning when I open the box up ... (Reason for saying this is the chrome shop I'm going to use has been an old friend for over forty + years, I worked in his shop for a few of those years)
BTY; all the chrome you see on the truck (And my Harley) was done in this shop .. He almost talked me into chroming the front bumper ...

He's coming out of retirement to do this small job for me .. !! (Hell of a fellow)

Here's a photo of the Harley ..

280270_227150037326782_7834021_o.jpg


The Black & Blue one ... The other one behind it is a bad-boy 96" Turbo 48 Look-a-Like that I spun together ... Man that thing would haul ass ... Cop said I left 20 foot of rubber back there, I told him he had to be wrong, more like 30 or 40' ...
That was one of those times that I should had kelp my pie hole shut !!

My buddy Will (RIP) wrote a book that has that story in it ..
He was riding his bike and saw the whole ordeal go down ..

1700190513667.png


The Man on a Tractor is still at it ...

401662514_10228613103171122_145236134735887246_n.jpg


Kind of a rough paint job, but once I start in on doing the dash it will be seeing better paint laid down on it ...

 
Last edited:
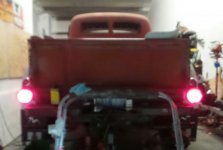
Whoa ...

401675152_10228622013873884_3037256096907697653_n.jpg


This is only the tail light lit up ..

Hopping it don't give the Mud Flap Girl a sunburn ?!?

Or melt the lens !!

401650495_10228622014913910_4311131669534250104_n.jpg


International Parts America .... You boys rock ...

Just for a comparison I took this photo (Below) showing the quartz tail light and the standard 1157 ...

401546015_10228622174317895_3565101155393485508_n.jpg


Sometime back I already installed quartz bulbs in the backup lights ... They have a glass lens which is a huge plus running these hot bulbs ...

401524930_10228622383443123_428276935048596500_n.jpg


Both Hot Bulbs installed ... Ray Charles should be able to see these .. !?!

401664985_10228622658930010_1565215808798719452_n.jpg


Dang, new looks good back there ..

Soon to pull off the 908-B bumper and sand blast it .. (Not a job I'm fond of doing)
Going to Two Tone it .. (This should be a good look for it ??)
 

Attachments

  • 401524930_10228622383443123_428276935048596500_n.jpg
    401524930_10228622383443123_428276935048596500_n.jpg
    69 KB · Views: 205
Last edited:
I just had to see ..

1700099844611.png


Was in the mode of reshooting one of the bullets (Dang Fish Eyes) and thought to myself, self how would the pasties look polished .. ??

What do y'all think ??
Go with the polish or keep the machined look ??

It's not likely the ol' Binder will be seeing much off-road action ..
More of a street-rod than a balls to the wall rock climber ..
Must say, do like the shinny shi errrrrrr stuff .. !

I do value others opinions ... So don't be shy, say sumthin ....

( Good place for a poll )

401676079_10228634107936228_7274721261342121449_n.jpg


401683824_10228634106976204_2391850694643920619_n.jpg


Ok, alright since there was a overwhelming response to what y'all thought looked the best, I took it on myself on what I thought would ... Going with the polished nip errrr pasties ...
 
Last edited:
Findlay got tired of cleaning the two fuel filters and taking the carb apart ..
Took a bore scope to the gas tank many moons ago and sure as shi* stinks didn't like seeing what I was looking at ..

Been putting this job off way to long so now I'm getting around to doing the cure !

1701365701680.png


Mega RUST ..

1701365828355.png


Even ate up the sending unit !!

1701365894009.png


Knew I was going to need a new unit, had it sitting in a box ready to be installed when I did get around to doing the work.

Here's the story why the tank got so rusty ..

Thieves needed some gas, this was at my shop in Vegas, had the truck parked in front of the shop (Which was in a complex) doing some work on it ..
They came by in the dead of the night and tore the locking gas cap off the tank mutilating the filler neck ...
( The tank was pretty much empty cause I was running off the 30 gallon auxiliary tank that was in the bed of the truck at the time, they didn't hit it, it was also locked )

331988615_705311474405549_7481516977482800762_n.jpg


So here came the cut up coke can that covered the fill neck ..
Went on the hunt for another tank to saw the neck off and weld to my tank ..
Years went by before I found one ..
In the meantime I ran off the aug. tank and didn't use the og tank ..

Was hopping to find a good tank and do a swap, that didn't happen but did come up with a super rusty tank that had a good neck and did the weld to mine ..
Dang tank must of had Alien blood in it ..


So now the game plan is to Por-15 the tank and get it back in service ..

1701367457217.png


1701382235590.png


Getting it ready for the Por-15 treatment ..

1701391218243.png


407350214_10228698208858711_1951510592207064090_n.jpg


The tank liner stuff came in .. Working with it now as I'm typing this ...

First part of the procedure is using the Cleaner Degreaser ...
It's mixed with hot water..

Then the metal perp, after that a few rinses with hot water, dried the tank with a heat gun and ready for the sealant ..
All of that took bout two days to do .. Sealant requires 96 hours to cure ...

Very pleased with the finish results ...

1701713628651.png


Wil be treating the bed tank with the Por 15 too just for future rust protection ..
 
Last edited:
Been on the hunt for a right side tank ..
Those seems to be long gone, wasn't that many made since they was a option ..
Not needed all that much, I have the original left side tank back on line and the 30 gallon auxiliary, in bed, tank..
With nailing down the dash fuel switch be really nice to see it work in all three modes of operations (Left, Center and Right)

My thoughts for a Oem right side has shifted from locating one to finding another left side and do some slice & dicing ..
(Been known to do that on occasions)
-------------------------------------------------------

Gearing up to work the dash ..
Wasn't all that fond of the headlight switch ... ( Used the starter switch hole )
It stood out from all the other dash switches ...
Needed some og IH parts to rework the switch ...

401636726_10228629610463794_1566572603238634053_n.jpg


My plan is to weld in a plug for the og starter switch hole ( Reducing the hole size ) and use a nut that's the same as the other dash switches ..

Capturen.PNG


Attaining these parts is just a step closer to getting the dash completed to the required finish look that .pleases my eye ..
May have the og nut plated to match the others that was dipped years back ..
It may polish up ok, be here in a few days .. We'll see how it goes ??

About those "Peek" mirrors ....
Sure going to miss the West Coast mirrors since I can't see much out of the tiny Peek mirrors ...

... BUT ...


410348539_10228739004878586_5790555307565630399_n.jpg


I may have come up with a solution .. ??
 
Last edited:
Sand blasting is a job that I'm NOT fond of doing ..

411541889_10228757050089705_3809536753240966656_n.jpg


Got most of the old paint off using a DA ..
The places that the DA couldn't get into will be blasted ..

(Dang sand finds every crack on my body to get into !!) :rolleyes:

Found some rust under some Bondo ..

1703379220273.png


Cut back to good metal and made a patch to weld in ....

1703379342377.png
 
Last edited:
Back to the dash ..

Found the Oem bezel and headlight switch nut ..
Not going to be plug & play due the the GM switch uses a larger thread in the switch ...

1703286807674.png


Could machine out a new nut to have the needed threads on both sides ..
Or modify the GM switch to have the smaller IH thread ..
Not sure what I'm going to do just yet ..

I'm sure that the new to me bezel will be rechromed to match the other bezels that has been dipped ..

1703287129558.png


Did a super light polish job on it and broke though the chrome that it had ..
The idea behind all this work is to have all the dash knobs to look the same .. All are 1954 IH Oem ..
Soon to have the dash out of the truck for a world of prep work ..
 
Last edited:
I believe the original IH switch was a Delco D1537, GM 1995041. They can still be found new. You would probably have to use the knob and shaft from the IH, but that's just a matter of pushing the button and pulling it out.
 
I used the wiring harness from the donor 75 GMC truck that the frame came from ...
It had glass fuses. got a new upgrade harness for the same year and model GM truck .. It uses the plastic type fuses ..

357725410_10227729796128998_696068019182197800_n.jpg


Headlight switch is also 1975 GM (It's a new Delco)
The gig I have going on is to marry the IH bezel and knob to the GM switch ..

1703365208774.png
 
Last edited:
Working the dash is next to do ..
Do think I've acquired all the parts needed ...

Fuel gauge switch sure was a PITA to nail down ...

thumbnail.jpg


That's done and over with now ...
I'm looking at this find as the same as finding a piece of the holy grail .. !
Do have the 54 knob and bezel (Been plated) to replace the plastic and nut the switch came with ...

398988257_10228603950102301_1352871905990580723_n2.jpg


Mounting the switch in the lower center under the cigarette lighter ...

All the knobs on the dash will match but for the AC knobs mounted under the dash in it's own pod ..

341877475_545745690972997_168984338343869582_n.jpg


The AC control knobs have built-in lights ... Should net a nice look at night ...
 
Hummmmmm

Found a good left side tank that's not rottened away ..
Being I had absolutely no luck findings the Oem aux. right side tank, going to put plan "B" on the table ..

Lets see what can of worms I'll be getting my fat ass into moving the filler neck ?!?
Already been giving a lot of thought on how to make this modification happen ...
Got a few ideas in mind, nothing solid just yet ..

Be awhile waiting for the tank to show up, it's in the frozen North at the moment ...

1705407626335.png
 
Drivers side running board is almost ready to see color ...

419634798_10228899088520577_3867045898349942046_n.jpg


Right side board is still on the truck.
Soon to be working it, got a aux. fuel tank to install that will add a bit more work to the job ..

Since a factory optionable aux right side tank is nowhere to be found I decided to modify a left side tank by moving the filler neck ..
Found a solid tank to work with ... Tank number three on the truck soon to happen.
 
Last edited:
Headlight switch is done ..
A bit of work went down to pull this mod off ...

1705598508418.png


Took a fender washer and made up the hole reducer .. The hole that the switch will be going in was the IH starter switch hole.
It will be welded in once I get around to working the dash ...

1705598724685.png


Boogered up the bezel a bit, got another one that's got chrome on it coming ..

But that part of the doing is completed ..

Back to body work .. Going to wait till I build and fit the aux. gas tank .. Shoot both boards in one shot ..
 
Last edited:
Needed to replace the Borgeson u-joint that's on the steering box .. Found a small amount of lost motion, been in service over 25 years time to tighten up ...

Since I'll be doing some work on the box thought was to beef up a known weak area ...

1705666718775.png


These reinforcement weld in plates adds some beef to the frame rail where the box mounts .
The frame has been known to crack under the box, fortunately my frame has not and with the plates welded on for additional support most likely won't ..

This additional work is overkill cause I don't beat on the Binder ...
But, ya never know when that situation might arise ... ??
Ounce of prevention, pound of Cure type thing.
 
Last edited:
Got a little busy today fixing a look that was somewhat annoying to me ..

Every since I did the fenders, the huge gap over the rear tires was bugging me ..
Today I decided to try my hand at fixing that look ...

Not all that fond of using blocks to lift with, this will be temporary until I'm sure of the look, then higher arch springs will take the place of the blocks.

1706231057102.png


Took a set tall blocks for the rear and chopped them down to two inches ..

1706231201908.png


The before look ^^

1706231258078.png


Truck had a bit of a downhill rake to it, now it's sitting pretty much level ..

Thought about lowering the rear, but didn't want to mess with it cause it's been dialed in .. Lowered the transfer case mounts in the frame to net a better driveshaft angle ... (Dang short wheelbase, lifted trucks) and the pinion angle was set when the 3/4 ton Corporation axle was installed .. Really didn't want to undo all that past work ..

Also didn't want to redo the bodywork on those wide body fenders .. Eek !!

Could go up a little higher to have a better match of the gaps ...
But do think it would screw up the looks by having it look like it's always going uphill ... Don't want that ..
Best to leave it where it's at .. Tis much better than it was ..

Tomorrow I should have the new longer U bolts in place ..
 
Last edited:
Got the drivers side running board ready to shoot ..

1706751810842.png


The board will be painted gloss black like the bumper ..
Step part of the board will see bed liner applied ... Using the "Raptor" brand ...
____________________________________________________________________________

1706812946458.png


First coat of the gloss black ..


Yeah Buddy ...
If I can get the bed liner shi errrrrrr stuff to lay down nice, just might be grinning like Al E. Gator !!

1706814735701.png


1706831371222.png
 
Last edited:
1706818015363.png


Wasn't going to use the slip additive but being the Binder's step board is so high up, climbing in the truck with a foot on the board and a hand on the grab handle is almost a chore, thought it would be a wise thing to do ... (Dang lifted truck) !!

Well I'll be ... Found a set of used ele running boards ...
Asked a gear head friend to keep an eye open and he did !!

Don't really need them but sure would make climbing in a heck of a lot easier ...
------------------------------------------------------------------

Think I'm going to top coat the Raptor with 2K clear ...
All that shiny black needs more shiny around it ...

1706905347137.png


Prep work is going well ...
Giving the bed liner a 150 grit to lock onto ...

425341034_10228978989598054_4103823656982341833_n.jpg


Hoping it doesn't flake off in the future, a good foot might keep that from occurring ..
 
Last edited:
Ready to shoot the Raptor ....
But don't have the time to work on the Binder right now ...
Got 7 Harley motor builds to do, all 7 are Hot-Rod builds ...

These two have been keeping me very busy and away from working on the truck ....

425010988_10228980395993213_1610363605957020454_n.jpg


1969 Shovel, Big Bore and Stroked to 96 cubes ....

426692656_10229010727751488_6680704178724833492_n.jpg


1957 Panhead also sporting 96 cubes ...
This puppy has NOS parts that hasn't seen the light of day in 40+ years ..

Gotta pay bills and buy parts for the Binder, ya know ...
 
Last edited:
Ok, I got a left side tank in route to me .... Had no luck whatsoever finding a Oem right side ..
Going to make a right side aux. tank using a left tank ...

This chore will be a job to net a stock look on the tank ...
If it does turn out nice the bed corner will need to be modified to fit the tank ..

428653715_10229088318331204_8714720447992624940_n.jpg


428646763_10229088318851217_3467854369384576157_n.jpg


Will not be trimming on the bed till I see the end results of the modified tank ..
Just may "forgetaboutit" .. We'll soon be jumping into doing the work ...

Be fairly trick if I can pull it off !

1708972447746.png


That hump in the bottom of the tank may need to see some modifications to be used on the right side ..
Do believe it's there for the drop of the sending unit's arm/float ..
Will know more when I get into doing the work ..

428656256_10229107313806079_8033150764388979710_n (1).jpg


Got it at Harbor Freight on sale ... Going to come in handy as tits on a milk cow when I work the bottom bump ..
One end of the bump will need to be shorten, the other made longer ... This has to do with the running board brackets and sending unit's arm/float ...
 
Last edited:
Backing up on the 47 Ford hood ornament ...

1709243488021.png


I don't like ... It's a og, from back in the day .. Had bad pitting, sanded most all of the bad off of it and polished .
Spent a bunch of time working on it, was looking really nice till I powder coated clear ... Dulled it out ! .. Bummer

1709243870673.png


The LED lights was my doing ...
Thought it might help with being seen at night ..

As far as the ornament goes, got a repop on the way ...
Just a wee bit of backing up (And a few more bucks) to net a much better look ...

1709266097228.png
 
Last edited:
431331178_10229139980462725_8110722925534323286_n.jpg


Cleaned up the NP 203 ... Getting all the ducks in a row to install the 4L80/85E trans ...

431304805_10229140344231819_2435126730404776186_n.jpg


Plug & Play it's not .. !!
Here's the gig ..

First off is the cross member mounting plate that came off the TH 400 trans ..
Won't bolt up to the 4L80. The case is made a bit different back there ..
No biggie .. Needs about .070" machined off of the O. D. of the lip that engages the tranny and take the height down some ..
That will allow the mounting plate to bolt on ....

430030007_10229144065124839_4745573089630423007_n.jpg


Ok, after that machine work is done and over another problem stuck it's ugly head up ...
The output shaft is to long ...
Now this problem is a biggie ... !!

What to do about that ??

When I built the 4L80 I changed out the shaft to a 4x4 shaft ..
Was told by another Transmission builder it would be plug & play .... Wrong !
If I cut the shaft down won't have much spline working in the input gear of the 203 ... Don't want that ..

The cure ....

1709830478693.png


Soon to see how these mods will work out ??

Do want the swap to be Heavy-Duty, already snapped one output shaft, years ago, playing hard with the TH 400 trans ...

Might have a new plan of attack ...

1709834083403.png


This bad-boy is the mount that the 4L80 used on 4x4's ..
Being much fatter than the TH 400 used would allow for big time spline foot contact in the 203 ...
 
Last edited:
Back
Top