


Dealbreaker74
Member
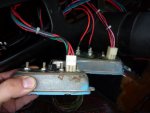
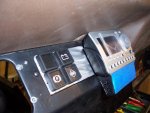
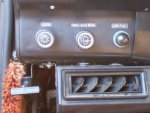
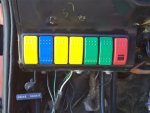
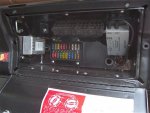
This is a sort of follow-up to mjolnir's "gauge conversion wiring" post. Where he used old (stock) wiring to control new gauges, I have done the opposite. I kept the stock gear, but replaced the wiring with a kwik wire 14 circuit kit from ihon. Its a good kit, but there are some circuits that get overlooked. Namely, the e-brake applied light in the speedo cluster, and the 4wd light. I also kept the stock ammeter gauge in line. Some May scoff at this, but I like knowing what's happening there. Plus, its just an easy jumper if the thing ever goes paws up.
The pdf shows how I adapted the kwik wire kit to the stock gauges. I bought the de-installer tool for the connectors, and more female pins (molex 0.093") same as mjolnir. I have a good electronic store in my hood, but digikey and allied are also good sources. You could also butt splice the new circuits onto the old wires, but that seemed like a messy work around. I didn't want to do this again.
The rig is a 1979. I looked as far back as 1974, and the pinouts stay consistent. But just because it worked for me doesn't mean jack. Double check all of your work. Trust no one, not even yourself. I chased around a couple times before I realized I did something stupid. If things aren't working out, walk away for a while. Or throw something. Either way.
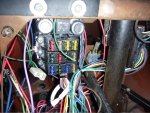
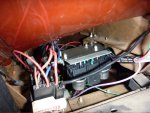
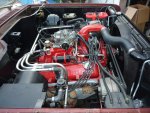
This is a new (rebuilt) 345 with a comp cams cam. I went with a 700r4 + adapter and np241 xfr case. That necessitated new wires for the torque converter clutch cancel, and also custom switches for the 4wd engage light and the neutral safety/back-up lights. If you are using the 727/d-20 combo, then these switches are in each box. You'll just need to run your own wires from the switches.
I'll follow up with more pics as I get things done. Even with new stuff, it still looks messy! I'll comb it all out better before it gets tie-wrapped for good.
The pdf shows how I adapted the kwik wire kit to the stock gauges. I bought the de-installer tool for the connectors, and more female pins (molex 0.093") same as mjolnir. I have a good electronic store in my hood, but digikey and allied are also good sources. You could also butt splice the new circuits onto the old wires, but that seemed like a messy work around. I didn't want to do this again.
The rig is a 1979. I looked as far back as 1974, and the pinouts stay consistent. But just because it worked for me doesn't mean jack. Double check all of your work. Trust no one, not even yourself. I chased around a couple times before I realized I did something stupid. If things aren't working out, walk away for a while. Or throw something. Either way.
This is a new (rebuilt) 345 with a comp cams cam. I went with a 700r4 + adapter and np241 xfr case. That necessitated new wires for the torque converter clutch cancel, and also custom switches for the 4wd engage light and the neutral safety/back-up lights. If you are using the 727/d-20 combo, then these switches are in each box. You'll just need to run your own wires from the switches.
I'll follow up with more pics as I get things done. Even with new stuff, it still looks messy! I'll comb it all out better before it gets tie-wrapped for good.
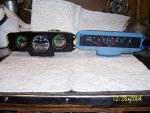
 I wanted to use my stock gauges so bad but didnt know how to do this and I finished building my custom dash with new aftermarket east to wire gauges yesterday! Well im glad I found this...just a few days too late I guess. But my new dash is still pretty cool and I guess ill just use it haha. But nice Scout btw