Scugly (for now anyway)

Realized I hadnt updated this thing in a long while, and after seeing a bunch of you guys this weekend, figured I would post up where I am at. Im newly motivated after this weekend. Cut and posted from some other site I am on.

So nothing exciting, but lots of time invested, mesauring, leveling, remeaswuring, welding, cutting, leveling, measuring, you get the picture. A master welder I am clearly not, so :flipoff2:


started by overbuilding the shit out of the frame rails. Flat plate with holes every 6 or so inches on center *I forget, its been going on for a few months). Stole this idea from iho! The expectation is I will have to cut for 205 clearance, and dont want to sacrifice any strength as I play with 4/3 links, etc. I still have to weld all the factory seams, as they look like they were welded by my 4 year old.

Ran lots of crossbars to keep from warping the frame

img_0264.jpg


Kind of hard to see, but the top piece (actually the bottom of the rail) has several small holes in it, with nuts welded onto the backside. Figured I use those holes for the belly pan and boatside mounts.

img_0265.jpg


I had wanted to run rear radius arms or links in the back, but just dont have the money, knowledge r time right now. I want this thing running for next spring. Im gonna use 64" chevies I have. Looking at stretching the rear axle back 8 inches to go along with the body stretch. Actually ends up with the front mount 1" forward from stock.

img_0268.jpg
 
I extended the frame with some 2x4x.188 wall rec. Tube. These are the first round of inner gussets, with more bracing to come. Gained 2 and 3/8 inche clearance for rear fuel tank with changing the tube. I cut 28" off the factory horns, and added 37" of 2x4

pb030538.jpg


Can see how the outside of the tube comes up the stock frame about 10" or so. Can also see the rest of the frame and new front body mounts

pb030539.jpg


Better shot of the front body mount. Built with a 2" body lift into it. I will cut the square tube flush with the outside of the frame rail once I trial fit everything. A single lower gusset and a single lateral, should be enough.

pb030540.jpg


pb030545.jpg


pb030542.jpg


Where the cage radius arms mouns will end up with a 5" forward push. May bring these back another inch to end up with only 4 inches of front push.

pb030541.jpg


9 extra inches of frame ( I wish it was that easy:evil:) , and im still putting the rear shackle mount of the end of the axle. Its 59" back from the front hanger. This is based on my current, hevier rig, so I May have to push it forward an inch or so. I have a rear 2x2x.188 rear bumper/winch mount to put on there from the current rig, so the hangers wont just be sitting out there.

pb030543.jpg


pb030544.jpg
 
I was having some motor to firewall clearance issues. Found some block hugger headers. Made a huge difference, tho the pics dont show it well. Ford small block guys take note. These fit much better. Was able to pull the motor up and back, I think this is where I will stab it. Crank bolt appears to be at 35 at ride height, top tranny bolt is about 41

old header clearance

old-header.jpg


New header clearance didnt move the motor at all
newheaderclearance.jpg


Header comparo. These are summit cheapo headers on the bottom, smog leagal for the year with block hugger headers on top, non smog.

headercomparo.jpg


Link to headers, will work on 31 or 302
summit racing sum-g9063 - summit racing® block hugger headers - overview - summitracing.com

New height
motorheight.jpg


passnewheaders.jpg


Old height. Its not much higher, but further back by 2" or so

img_0280.jpg
 
Motor is mounted. Needs finish welding and some gussets. Ill have to trim the pass footwell just a little bit.

img_0294.jpg


Drivers side will have no cutting

img_0295.jpg


Motor is offset 1 7/8

img_0296.jpg


img_0297.jpg


img_0298.jpg


I figured cut once, fill later

img_0299.jpg


img_0300.jpg
 
Got another day in the man cave, worked on tranny mounts. Motor is tilted back about 3.8 degrees, I think factory is 5.0, so should be fine.

trannymount.jpg


trannymount2.jpg


A little under an inch clearance for the 205 to the bottom of the frame

205clearance.jpg


205clearance2.jpg


The weight of the motor brought the back down some, frame is now just under 25"
newrideheight.jpg
 
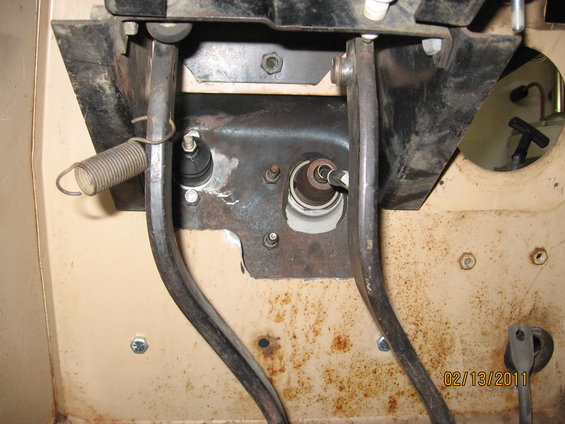
Turns out my neighbor has a machine shop, and he helped me drill out my brake/clutch bracket to fit my shtuff.

Heres what I cam up with

img_0320.jpg


img_0321.jpg


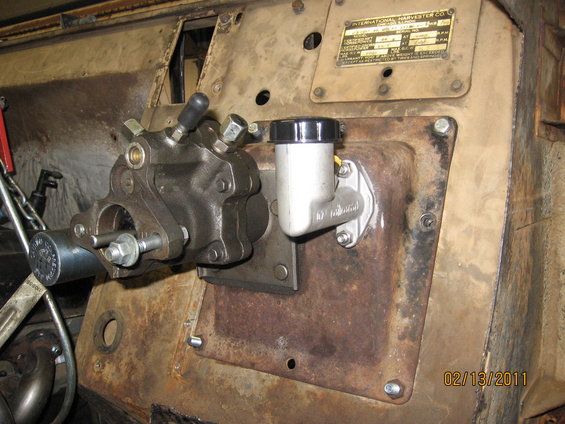
I hadto drillout the clutch mc a 1/16th to fit the wilwood m/c

img_0322.jpg


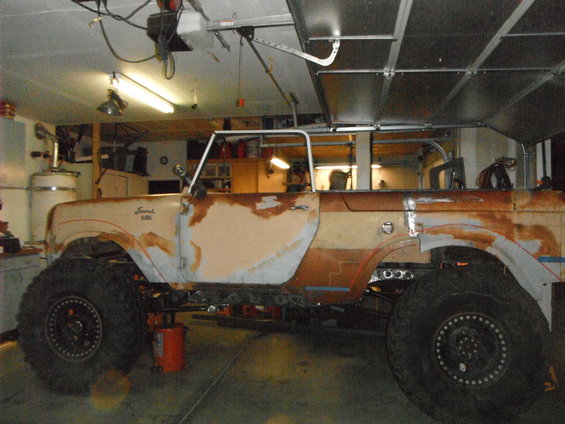
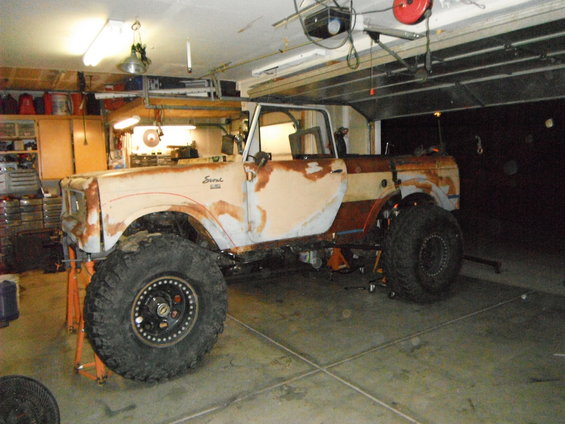
So I had about 4 hours this afternoon, and have to work all weekend. Here is a few pics of shtuff I have been tinkering with here and there.

A full day or more was spent chipping this tarry crap off. It came off easy enuf with a harbor freight air chisel.

innerscraped.jpg


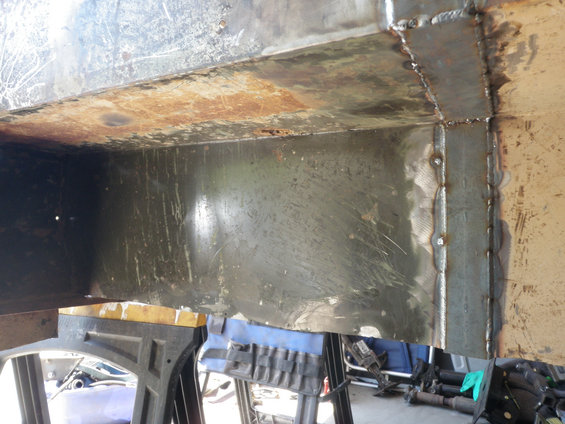
Th white crap, seam sealer I imagine, is a pita to get off. I used an air hammer with as flat a blade as I had. It still sucked.
dfloorscraped.jpg


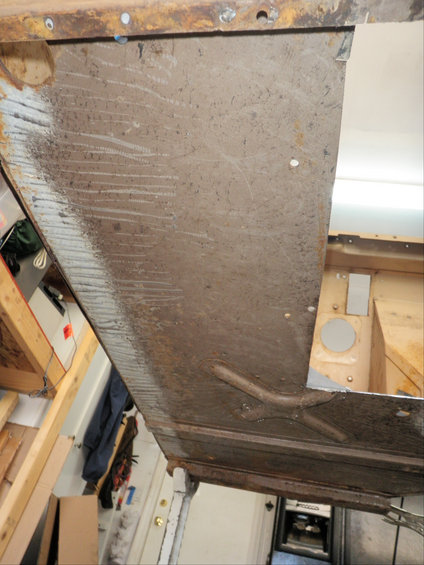
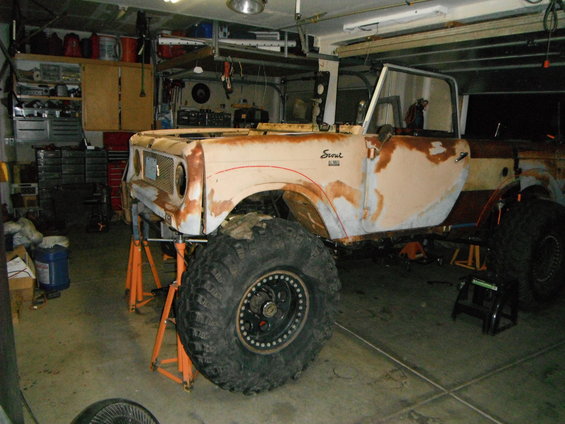
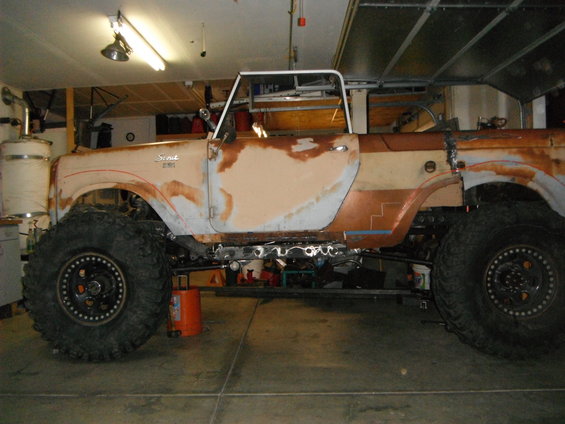
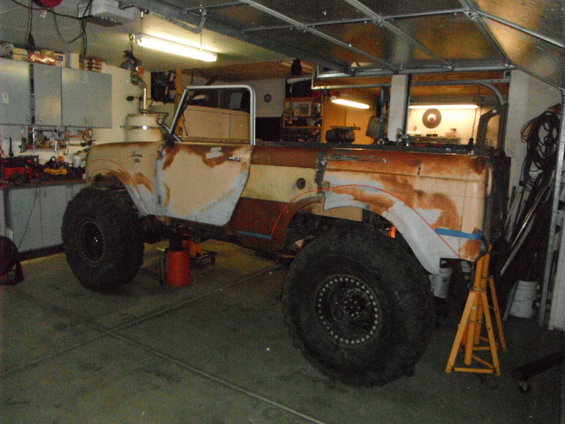
Here is the pass side, which I plan to cut and replace for extra leg room for the wife/kids.
Luckily the factory heat shield kept too much "glue" off the bottom, even though I am leaving it on this side till I cut it out.

passscraped.jpg


Ended up with 4 piles, all bigger than this
scrapedpile.jpg


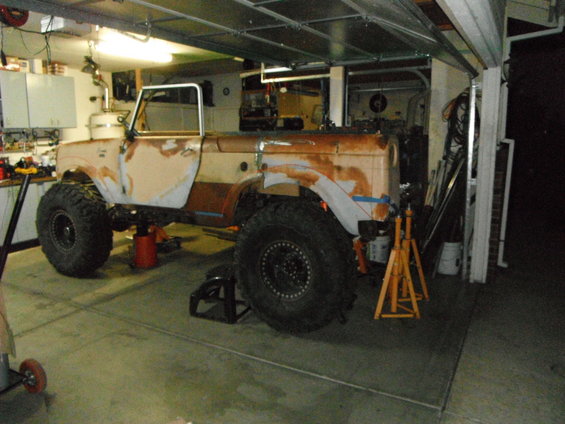
The tub is ready for sand blasting, sheet metal work.new firewall and floors, and bed liner/insulation


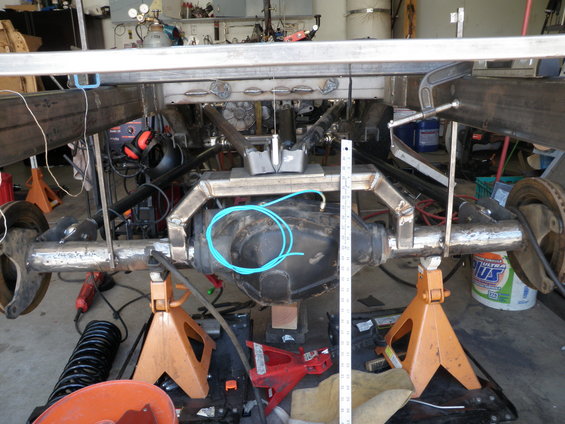
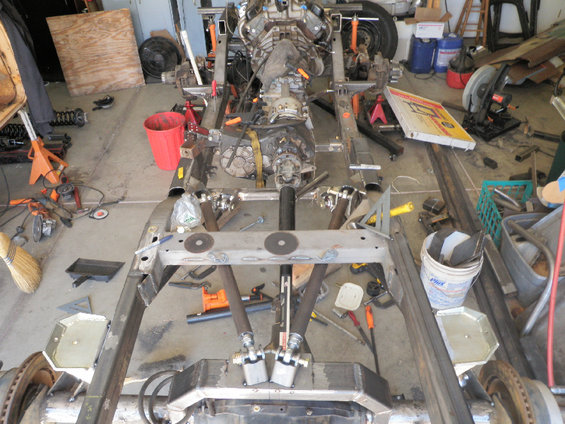
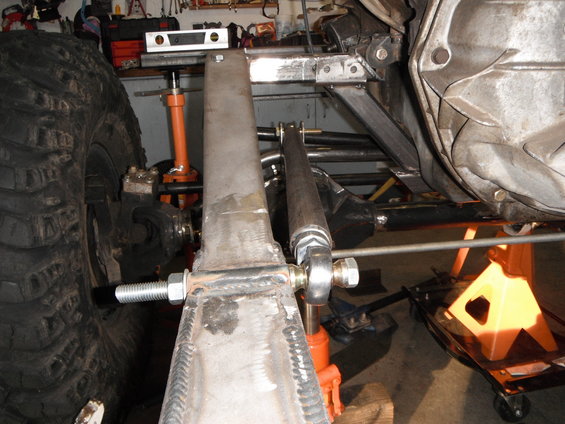
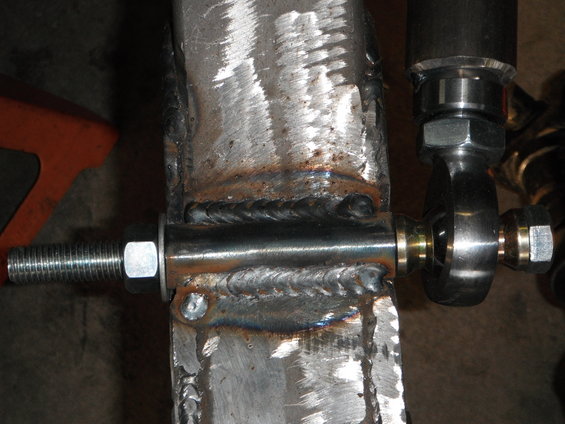
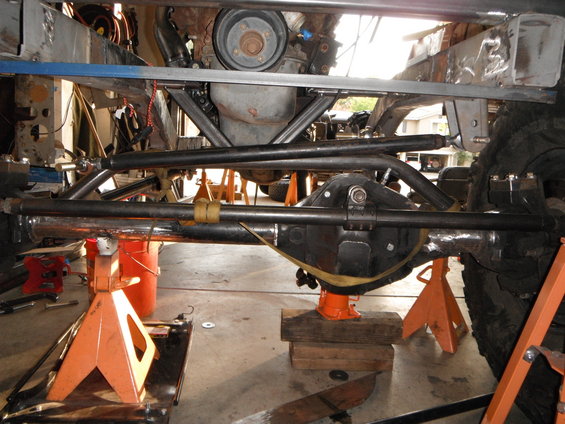
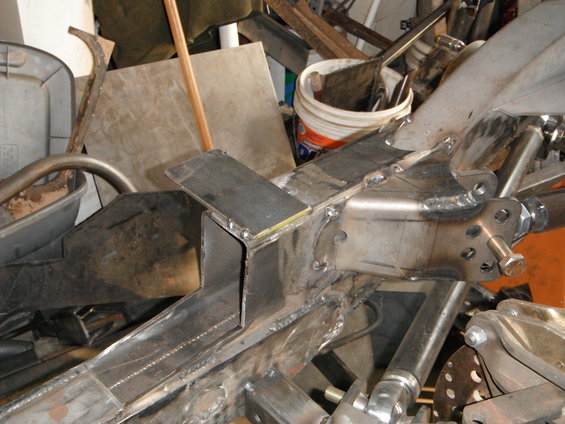
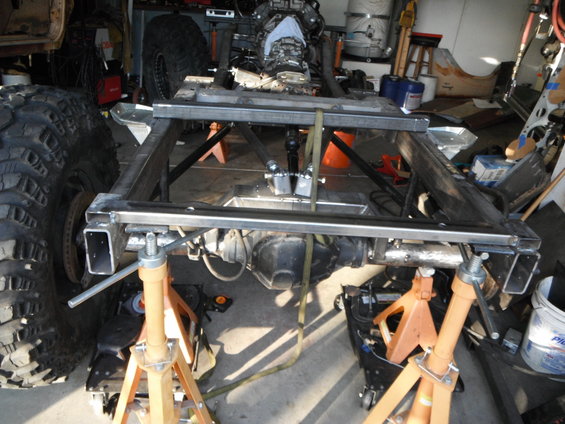
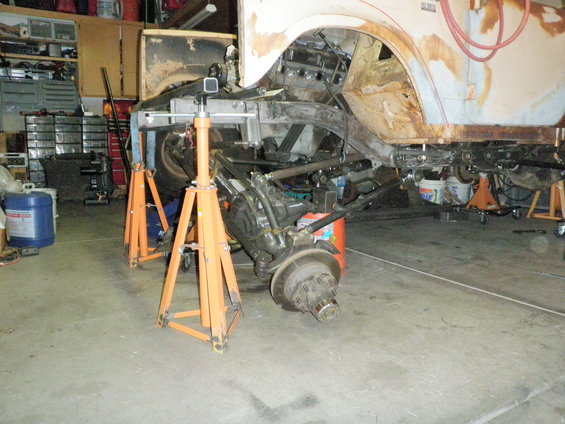
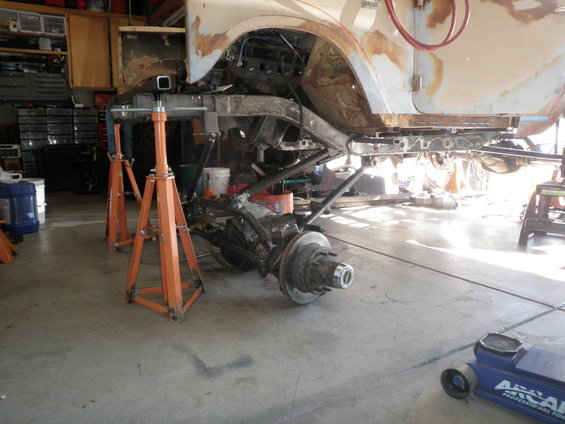
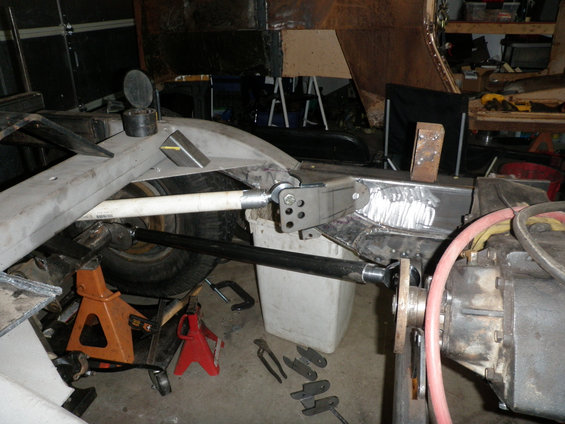
also been working a little more on the rear links

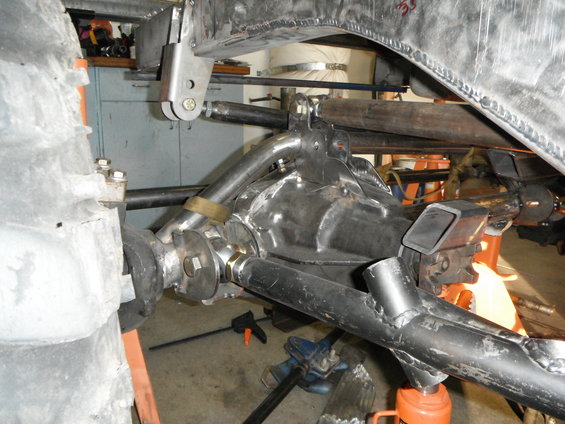
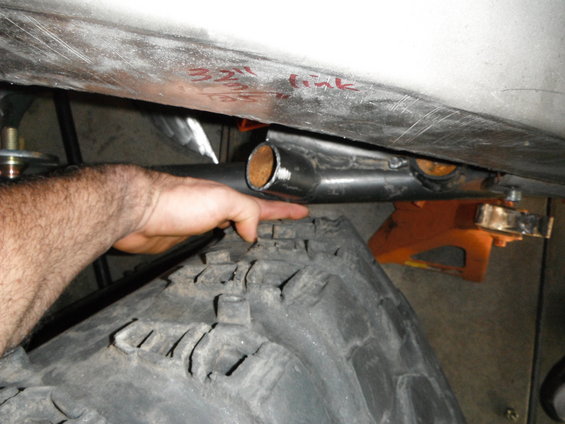
I needed to raise the upper links as mentioned before. I plasma'd the bulk off, and the neighbor owns a machine shop with a nice 6" belt sander. That sander helped a lot. I plan to cut on the yellow line to clear the body. The piece on top is the middle factory body mount, which I will weld back onto the body, and use this piece as a upper link mount and body mount. Its cut from 3x5x3/16

framepiece.jpg


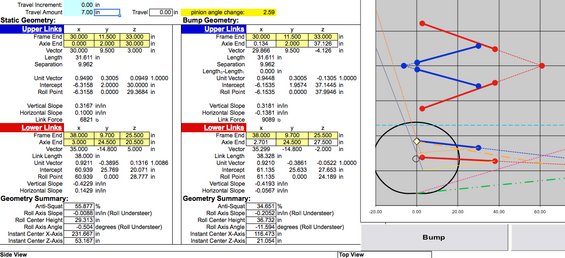
Still just mocking and punching numbers through the calculator
upper.jpg


upper2.jpg
 
Minor progress in the rear link set up. Most things are tacked in place, and I think final. Still waiting for someone to tell me that my numbers look good.:d

p7010074.jpg


p7010073.jpg


p7010072.jpg


p7010071.jpg


p7010070.jpg


I can not figure out how to make these damn screen shots bigger.

finalstuff.jpg


finalstatic.jpg


finaldroop.jpg
 
A few more link pics.

I ended up lowering the tcase and raising the motor, soim at 5 degrees lean back now. I get 5" of droop at the pinion. Im just gonna live with it.

Im also gonna ditch the radius arms and 3 link the front.

topview.jpg


reardroop.jpg


Still need to cut the factory rear crossmember out, as the links hit. Was gonna wait till the coils were on to see how much up travel I will actually get though

rearstuff2.jpg


rearstuff.jpg


rearflex.jpg


Well, Christmas came early. The wife took the boys to oregon for 10 days, and I actually got two 3 day spats of working in the garage without interuption......so 72 plus man hours later I have accomplished the following.

Stripped the 60 of all the radius arm wedges,built a truss, cut a web (not pictured), tacked all brackets aside from the track bar and hydro assist, built a new upper link mount, etc, etc.


Upper link mount, I still need to weld the end and gring smooth, and then make an inner bracket to put it into 'double' shear.

dscf0001.jpg


dscf0002.jpg


Upper link mount and gusset to the top of the housing
dscf0003.jpg


1.75 188 wall truss, slightly angled down for clearance
dscf0005.jpg


Finger worth of clearance at ride height
dscf0006.jpg


New middle body mount
dscf0009.jpg


Rear mounts.
dscf0010.jpg
 
Lowered the body down 1". The body is twisted up pretty bad, and the doors wont align, so that will require some work. The sill plates are at 33.5" now with a 24.5" belly height. Should be 6" up travel front. Oh, I also pulled the front stretch back 2" to a total of 4 front and 8 rear.

dscf0024.jpg


dscf0023.jpg


dscf0019.jpg


dscf0017.jpg


dscf0012.jpg


dscf0015.jpg
 
Looks like flexing the front 3 link gives me what I need. Still lots of stuff on both sides, the lowers are hitting the old leaf mounts. Pinion angle appears pretty good through travel also, so its time to start burning things on for final.


p8160300.jpg


p8160304.jpg


p8160303.jpg


p8160302.jpg
 
Glad we could motivate you!

We'll be down there again in a year, think it'll be done by then?
 
Back
Top