I still haven't received the samples from Steele rubber so I decided to take a road trip with the Comanche and drive to Stockton Auto Glass in Lodi, Ca. My buddy and I made it down there with no problems and the guy in the shop was super nice. He ended up giving me some rubber and some "sticky felt" as he called it. He had a huge roll of it and just held the roll up to the side of the Comanche and started pulling loops off his roll. I asked if I could buy it and he said no, he is giving it to me!!
I got home and decided to tackle this saturday morning.
I removed the 18 or so screws going all around the inside. I also pulled my new window out of the box finally and realized it already has rubber all the way around...WTH??? I had no idea it already had it, so that was another huge bonus!!
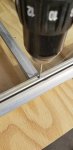
So I removed the 2 screws holding the joint together and I was not able to separate the frame and get the sliding window out. That's when it hit me I needed to remove the rivets holding the center piece in place. So I drilled those out with a 3/16" bit.
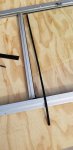
I found the sliding window channel was only real bad on the bottom, where the sun was hitting it. The upper channel looked good enough to keep using. I pulled all the lower rubber and cleaned the grooves really good with a small wire brush and then wiped with brake clean.
I needed to replace the thin piece of felt that goes in the vertical frame in between the 2 pieces of glass but had nothing of the sort. I remembered my wife has rolls of velcro, so I raided her sewing room and got a piece of the fuzzy side. I laid it on the workbench and cut it in a thin strip, basically just eyeballing it. I got some elephant snot (weatherstrip adhesive) and glued it in place. It looked perfect!!
I installed the stationary glass, using silicone spray on the rubber so it would slip in the frame. Then I carefully used some large squeeze clamps to get the frame tight around the glass.
Now I needed to install the sticky felt stuff that I was going to use for the slider channel. It's not easy getting it in the groove without sticking so we tried 2 tricks; first, we folded it in half lengthwise and slid it in the groove so it would go all the way in before sticking to the frame. then I also sprayed windex in the frame so the adhesive was slippery and would not stick until it dried. I tried some without the windex and found that was a mistake, so I went back to it for the rest of the job.
We used the piece of glass to push the felt into the groove and once it was smoothed out it looked great. I had to trim it in the area towards the middle of the window because you can't reach that part where the windows overlap. Once I got that done, I was able to get the window installed back in the scout and then finish trimming.
Before I could reinstall, I had to put the slider back in the frame, attach the splice piece on one end, and also reattach the vertical piece. I did not have any rivets that would work, but I found some sheet metal screws that were perfect for the job.
All in all this was a super rewarding fix. Driving with a window missing is no fun, and knowing that I was able to find a way to get it done makes me really happy. Here are a few pics... I will take more tomorrow showing the finished product.