prestolite advance question

Hey guys does anyone know if there is a curve kit available for the prestolite dist. W/ elec. Pick~up?
79 Scout 345.
Getting ready to install msd 6al, and blaster coil. I use the gr/ppl wires right to dist. Correct?
Thanks for any info.
 
I've never heard of curve kits for the prestolite distributors, I'd check with boat performance places since the prestolite common base dist was used in May marine applications.

To hook it up to the msd you must use the white wire for your trigger. The purple and green wires are for use with a variable reluctance style pickup, the prestolite and Holley use same pulse inductance style pickups.
 
Let's make this a bit simpler and explain some facts and why...

The prestolite distributors (as well as the Holley gold box) were emissions items and not supported for any "recurve" since that is technically an illegal process.

Any performance ignition shop can recurve any distributor for off-highway use only. They have a distributor machine for doing this along with a selection of mechanical advance components for mixing and matching parts used in developing the curve for a specific engine application. This is not a one size fitzall kinda deal!

However, the prestolite distributor (both points-type and electronic) use a totally different type mechanical advance system that is unlike any other common distributor system. Because there was/is no market for doing this, the parts would have to be jury-rigged/fabricated to modify the curve.

And...why would the curve need to be modded in the first place if no major changes in cam profile, cam timing, compression ratio, port work, etc. Were incorporated in the engine that would create a need for a custom curve in the distributor???

The only dedicated new/replacment distributor for an ihc-produced engine application is one of the units from mallory. And the mallory stuff is designed to be easily "curved" when run on a distributor machine once all engine specifications are determined/known.

A prestolite idn 4000 series distributor, like the Holley gold box,... Is a hall effect trigger/sensor unit that requires a second component known as the "amplifier". In the case of the idn prestolite, that amplifier is built into the distributor itself and is considered "self-contained". The hall effect sensor cannot operate in a stand-alone mode. However...the always popular "pertronix" conversion is also a hall effect sensor that incorporates an amplifier inside the tiny module! It is very unique in that approach. The gold box Holley system uses a more conventional externally-mounted amplifier. But the actual electrical operation of all three of those "systems" is identical.

A hall effect sensor is a totally different animal as compared to the more widely used "magnetic trigger"-type of electronic pickup. Magnetic triggers are the heart of the Ford duraspark, chrysler electronic, and delco hei systems, though all three systems must also use an amplifier of some design in their total configuration unless they are big used to directly trigger a cd box. The magnetic trigger system has now become the standard of the aftermarket performance ignition industry, no matter who the manufacturer of the actual system/components is. The hall effect trigger simply does not function well at all at higher distributor rotation rpm.

All the popular capacitive discharge ignition boxes on the market have a direct input connection for a magnetic trigger. And...they all have the input circuit for a "breaker point" signal. They can be wired either way depending upon which sensor the distributor design has installed, but you never use both wiring scenarios on the same distributor/engine.

A hall effect distributor (Holley gold box, prestolite idn, or any distributor converted to incorporate a pertronix sensor instead of breaker points), uses the points trigger with a msd six series box. The magnetic trigger input (green and purple pair for msd) should be taped out of the way and not used for anything! The wiring for the msd box is the same as what is shown in the msd instructions (page 23) for the pertronix distributor connection except for the wire color callouts.

In the case of your prestolite idn sparker...you have three wires exiting the grommet. The white wire is used only for a signal to another emissions device which you are probably not using (the dtm module). That wire connector can be left disconnected.

So...regarding the prestolite idn unit, the red wire is "positive" and the brown wire is "negative". Compare that wiring color to the pertronix conversion which has the red wire as "positive" and the black wire as "negative". Then simply follow the diagram on page 23 of your msd instruction set.

My explanation here uses industry-standard (both oem and aftermarket) terminology and is in accordance with the information provided by mallory, msd, and all other manufacturers of the aftermarket-type capacitive discharge ignition boxes.
 
Last edited:
Thanks eric andmike.
Dang, what a mouthful. ???what gives no picture????
Just kidding.
More specificlly I was wondering if the was a timing curve advantage because I am deleting the egr. But, since there isn't readily available kits I won't worry with it. My sii run good and I drive it daily. As always just looking to improve 30 yr. Old tech. Hense the msd stuff.
.035 plug gap on ngk 3332 plugs ok? Mm I thought I read somewhere you recommend .045 ???
 
Any cd box (including msd) can support a 0.45" plug gap, but no greater if using conventional tip plugs. Any wider gap is asking for the ground electrode to break off when in use. Heat range for the plugs remains unchanged, the ignition system has nothing to do with that. Yes, I run 0.045" plug gap with all my cd ignition systems.

Since you are "optimizing" your ignition system for off-highway use only, once you have this system operational and the best base timing spec determined for your setup, I'd play with simply leaving the vacuum advance disconnected and go for a test drive sequence. You might be surprised!
 

Attachments

  • IDN 4000 Mechanical Advance.jpg
    IDN 4000 Mechanical Advance.jpg
    90.9 KB · Views: 2,080
Last edited:
Need pics?

Here's a shot of the idn 4000 mechanical advance assembly with the shaft removed from the distributor for rebuilding.
 
Last edited:
This shot is the "breaker plate" assembly for the idn 4000. The hall effect trigger is shown mounted on top, and the black potted amplifier is mounted under the plate.

If the amplifier fails, you simply replace this entire assembly.

Also, these distributors were used in both clockwise and counterclockwise rotation applications. So the mount positions for the vacuum advance link are marked accordingly. The ihc-produced I-4 and sv engines when used in motor vehicles are a clockwise distributor rotation when view from the rotor position.
 

Attachments

  • IDN 4000Breaker Plate Assly.jpg
    IDN 4000Breaker Plate Assly.jpg
    99.1 KB · Views: 2,269
When I first got the truck the mech. Advance was frozen. I pulled the dist. And with alittle snake oil got them ffreed up. Popped in a new vac. Adv. From Jeff and wala! Contact. New cap and rotor and msd wires she's been cadillac'n ever since. But got called to work and haven't had the time to go back and check end play and really go thru the dizzy. Hopefully, next weekend I'll get time.
1. Remote starter upgrade
2. Bulkhead repair/upgrade
3. Dizzy repair
4. Msd ignition upgrade
5. Ammeter delete/voltmeter install.
6. Relay install/ for headlights
 
Thanks for the pics. Mines not trhat clean. Lol! When I go back together is the an adjustment between the pick-up and the reluxctor wheel? When I had it apart before I put it back where the dirt line was(witness Mark)
 
This pic shows a couple of failed idn 4000 modules(amplifiers). Both of these are "intermittent" failures, that means the system works perfectly for about 30 minutes, and then begins to occasionally misfire at random, then the misfire becomes very consistent (dropping random cylinders kinda like a rev limiter), then it looses all sparkability completely until the entire engine cools down and it comes back to life. That is the typical failure mode for the prestolite distributor and the same occurs for the Holley gold box amplifier.

The potting on the amplifier is a simple "dip" process which looks like a dog turd! But it encapsulated the entire circuit board. When these fail due to a heat situation, the potting becomes soft and pliable and a big air bubble develops internally. In some cases the potting material appears to have actually charred with an open flame.

I think these distributors are super-nice in design and engineering and never exhibit the kind of wear I see in Holley or delco units. And since the vacuum advance can on these can be partially disassembled, the "return" spring for the diaphragm internally can be diddled with regarding vacuum advance operation...and we can have these vacuum units remanufactured when needed.

However, when the electronics do take a shit, it's much more economical to simply convert the distributor to a pertronix and that does not use the failed "amplifier" at all. You simply leave the failed item inside and mount the p-tron!
 

Attachments

  • IDN 4000 modules failed.jpg
    IDN 4000 modules failed.jpg
    64.4 KB · Views: 2,165
The reluctor (trigger wheel) air gap on all of these type electronic distributors is 0.008" as measured at the reluctor tip.

With a true mag trigger, that should be measured with a brass thickness gauge made for that purpose. For the hall effect reluctor that is not absolutely necessary but is also general practice. A steel thickness gauge will not create any electrical issue as many of the great untrained masses proclaim, it simply makes it more difficult to get a "feel" for the air gap.

The reluctor air gap is what creates the dwell value on these type triggers, exactly the same situation as we have with breaker points and the "point gap". The nominal dwell on these distributors for the sv engine is 26-32*. That can be read on a conventional dwell meter or scope. Do not attempt to read "dwell" on an instrument if using the msd box connected into the system however, that will not work!

The overall thing to keep in mind when incorporating a cd ignition box into any system not oem-equipped is...you are totally making over an "inductive"-design ignition system into a "capacitive discharge" ignition system. Major differences in operational theory. And that fact has nothing to do with the type trigger you use to signal the box. The trigger can be electro-mechanical points (single point only no dual point signal at all!!!), it can be a variation of a light-trigger (infrared or led), a hall effect trigger, or a magnetic trigger. All those type distributors/triggers can be used with a cd box.
 
Thanks Mike.
So in summary I hook up the msd as instuction say for pertronics. Use 0.045 plug gap. Check end play on dizzy. Clean up mech. Avd. Weights and pivots. Reset base timing and see where we stand. Play with vac. Adv. Connected and disconnected. :d
 
thanks Mike.
So in summary I hook up the msd as instuction say for pertronics. Use 0.045 plug gap. Check end play on dizzy. Clean up mech. Avd. Weights and pivots. Reset base timing and see where we stand. Play with vac. Adv. Connected and disconnected. :d

Yes to all....and good luck!
 
I've been chasing this intermittent issue for a year. It started with the ignition cutting out and back in while going down the road. Hit and miss. And then seem fine for miles and then start back in. Gradually getting worse and more frequent over time.

First, I thought it was loose connections, dirty connections. So I cleaned and tightened everything. But the problems persisted.

Then I got into the wiring deeper and found a bunch of spliced/crimped connectors, so I cut those out, soldered and heat-shrink covered all the splices. But the problems persisted.

Coil was brand new practically, and when I was getting spark, it was always good strong spark. For pity's sake the truck just passed CA smog in the past couple of months, how could it be that bad?

Ran a jumper directly to the coil from a known source of reliable 12v power and the issues still persisted. Usually, it would start and run fine until the engine warmed up. Over time, the length of time it ran before problems started decreased, and the number of times it happened, increased. Finally it stranded me at a local park about a mile from home with my dog. After 2.5 hours it cooled down and would start again.

Well, the day of reckoning has finally arrived and I am facing the unwanted realization that it is the distributor/electronic ignition that is the problem. Didn't want to go there because that's potentially a whole new can of worms.

So I pulled the distributor and in checking things out, I came across this thread. Yup, my dizzy is a prestolite and has the grey hocky puck/donut. It is squishy (apparently blistered internally) so I'm guessing that means it has gone bad. This is exactly as michael mayben describes above and it is the only accurate description of my problem that I have found online - tip o' the hat to mr. Mayben!

So seeing as how oem parts are thin on the ground and likely to develop the same issue over time, I ordered the new pertronix unit. Unfortunately, I discovered that the vacuum advance is bad also, and it will be 2-3 weeks to get a replacement for that.

While waiting on the advance, I'm putting the time to good use by doing a bit of tidy-up on the old unit. Phase one is to take it apart. Following the manual, that's a fairly straightforward proposition with one exception. If you have not taken a distributor apart before (I haven't) when you go to disassemble the top end to get to the centrifugal advance weights to remove them for cleaning and lubrication the manual says "remove trigger wheel assembly retainer from distributor shaft using hooked extractor tool". Well, I'm not sure if the IH garage had a part 100345-IH which was something they called a "hooked extractor tool" or what - but that description didn't tell me much - even the pic in the manual is highly ambiguous. Does that retainer unscrew, and the tool is to unscrew it? Does it latch on, and you have to flip a latch of some kind? I was pretty underwhelmed with the description, and of course looking down inside a 38 year old chunk of pipe and trying to identify what you are seeing, when it's all the same color (rust) is a tall order. Especially unnerving when you know that if you guess wrong and screw it up, you're looking at a new distributor - ka-ching.

So I took a gamble and thankfully I made a lucky guess.

So for anyone facing a similar situation let me see if I can help clarify for you.

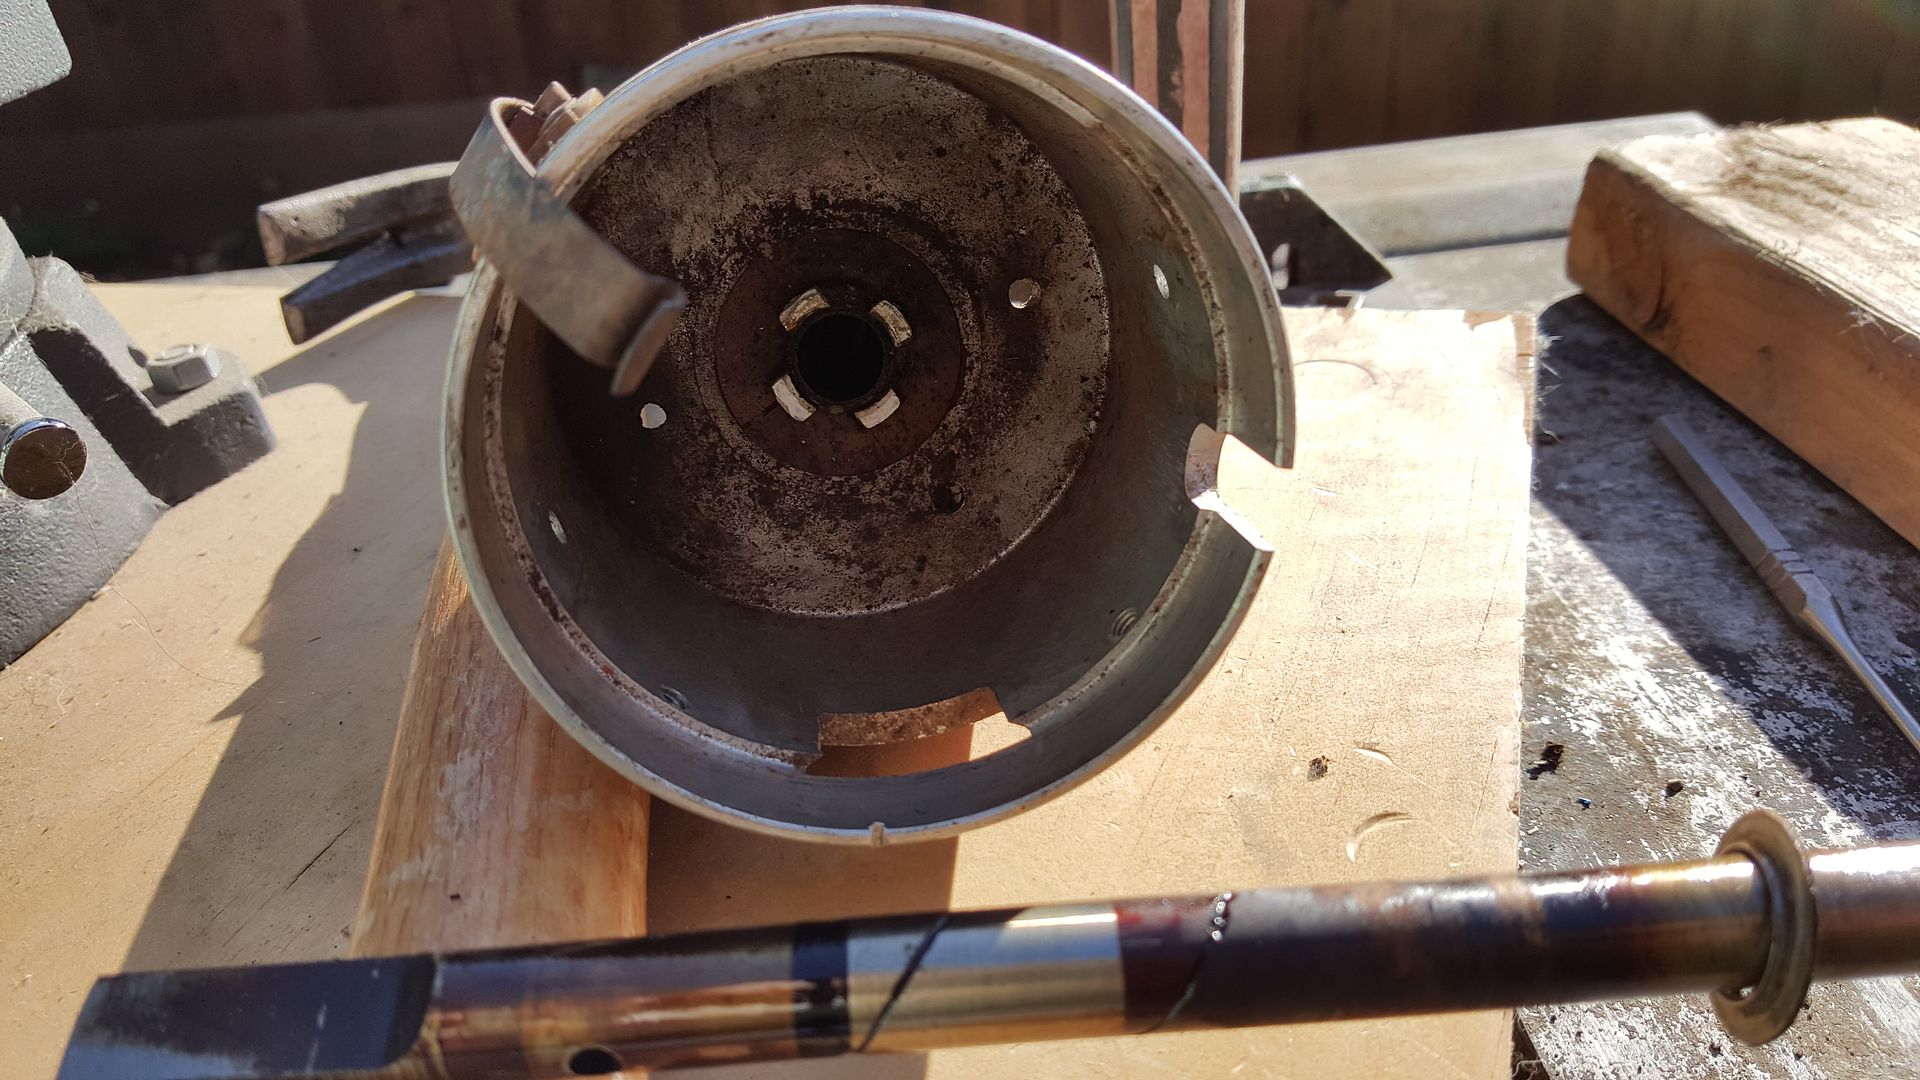
The top of the distributor shaft is like a knob... There's a groove cut into it around the shaft, and the end of the shaft is beveled. The "retainer" is a 3-pronged clip that snaps over the end of the shaft, with the ends of the prongs snapping into the groove. You need something very horizontally short, but not bendable, to go down inside the pipe, hook onto that clip, and pull it off the end of the shaft. Once you have the tool, you're golden, it's a piece of cake. But where to get the tool?

I went to harbor freight and for a couple of bucks picked up an assortment of picks. There was a 90 degree bend one. I had to put it on the grinding wheel to shorten it and narrow the tip. There are probably other ways of devising such an implement but this was the route I took and it worked. I'm not sure baling wire or coat hanger would work, you might try it, but those seem awfully bendy and my clip was on pretty tight. Don't lose the clip! As I said, mine was on tight so I had fingers covering the end of the tube as I pulled... When it gave way at last, everything was contained in the pipe. If you lose that clip, good bloody luck ever finding something to replace it.

Here is a photo of the clip and the "tool" I made to get it out.

20160221_1116370_zpsbdsafpdh.jpg


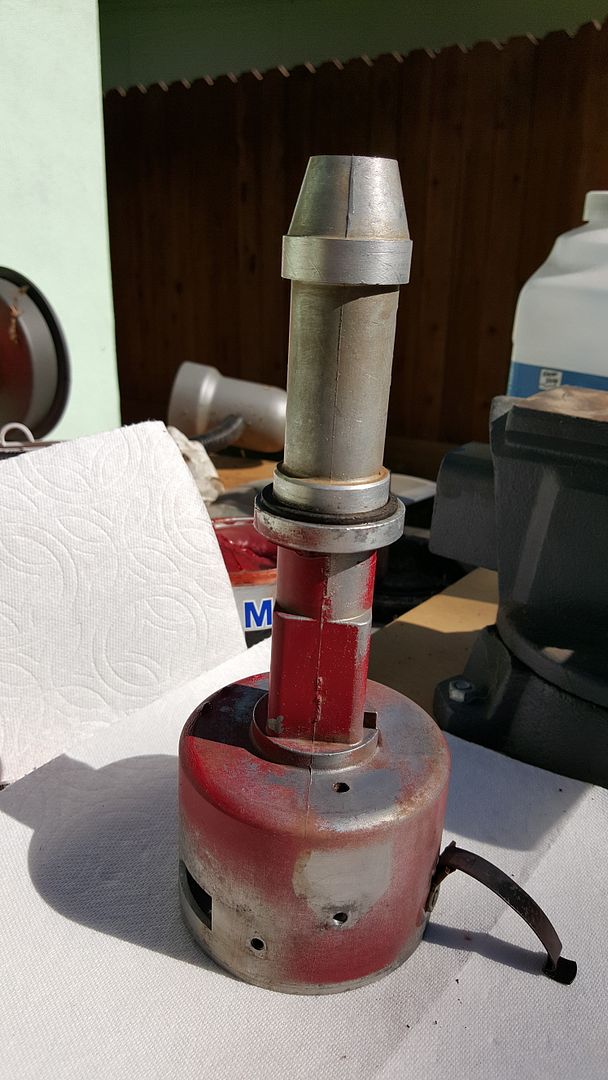
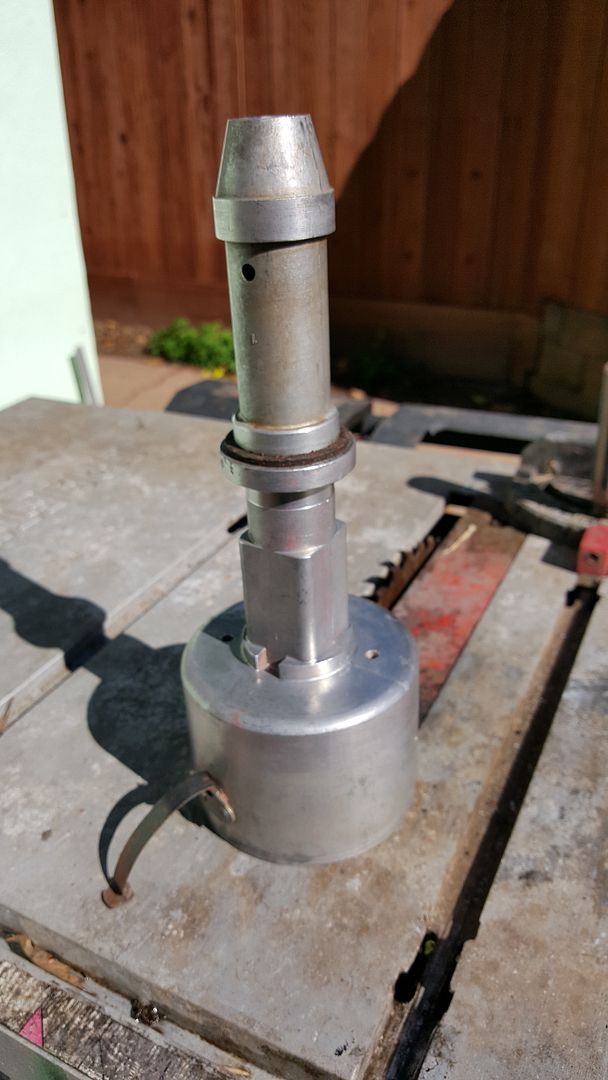
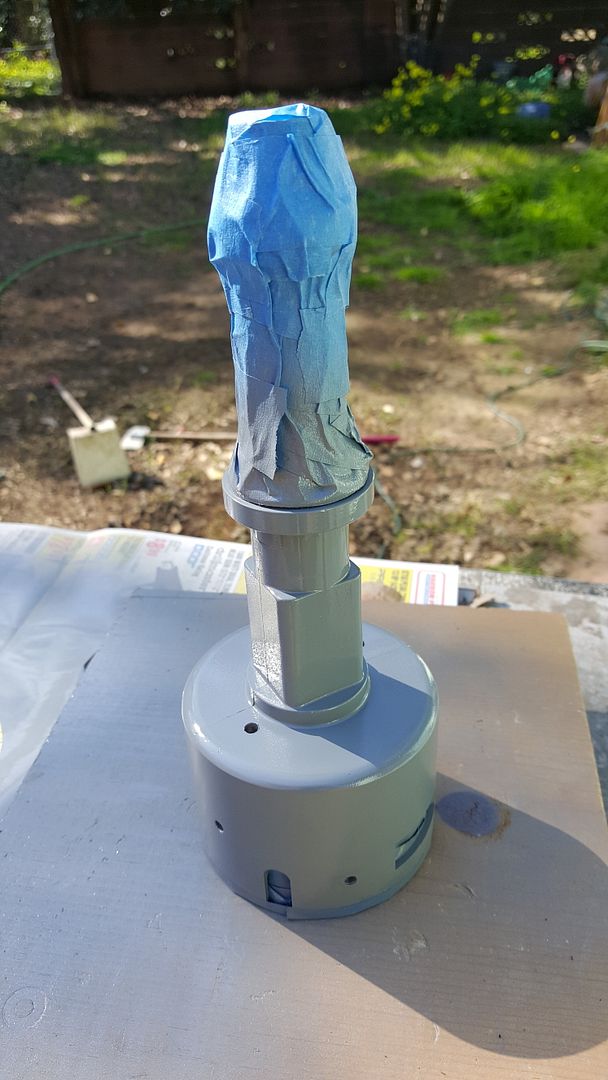
Here are some pics of the distributor and the various stages of disassembly. I'm waiting on the vacuum so I am taking my time getting it cleaned up and all back together. I will follow up with the assembly after it's all done.

20160220_163247_zpsyxoml4lz.jpg


20160220_163301_zpsuelcqunt.jpg


20160221_092027_zps2ccebfen.jpg


20160221_092136_zpshbtobqeo.jpg


20160221_104551_001_zpszrbymsmi.jpg


20160221_104611_zpsumsa8o1i.jpg


But this is the source of the trouble, right here... This is the solid-state electronic signal amplifier. For the prestolite distributor, the electronics are all contained internally inside the distributor.

20160220_163507_zpsjwyc0v8o.jpg


20160220_163519_zpskfc26lmv.jpg


That is a circuit board that has been dipped in a grey epoxy for proofing from the elements. I suppose it did alright in that regard, having gotten it by the past 38 years. It's not supposed to have any "squish" in it, but you can definitely squeeze it and feel the blistering inside. Yup, it's shot. This entire mass gets replaced by this single item below, courtesy of pertronics:

20160220_163736_zpspg6q4voj.jpg


Neat. Sweet. Petite.
 
Last edited:
More photos of the disassembly and cleanup:

in the top pic here, in the center surrounding the shaft hole, is a plastic ring that is snapped into a groove. This plastic ring serves as a cover for four wicked oil reserves that feed a porous bronze bearing that the shaft rides within. In my case those wicks were as dry as dandelion fluff and blew right out when I went to clean out the inside of the distributor with compressed air. They can be replaced with a bit of cotton ball and saturated with motor oil (I used mobil 1 5-30). Be careful lifting up the plastic ring as it is apt to be brittle and also stuck. I broke mine but was able to get the pieces back in and secured the loose bit with some heat & ac aluminum tape. It's just a cover on the oil reserve so it should be ok. Very glad I dug down this deep, otherwise that bronze bearing May not have lasted much longer without any lubrication.

20160221_092037_zpsxvgmshgz.jpg

20160221_114515_zps4hdhr7ug.jpg

20160221_131208_zpsldso1cmm.jpg

20160221_104551_001_zpsyrqcu7j2.jpg

20160221_111513_zpsg6fglr6n.jpg

20160221_134635_zpsrb0bt8iv.jpg


Didn't intend to get quite so deep into this thing, but as I addressed the thing that was plainly wrong (bad e-module) it became apparent that there'd never be a better time to address all the other things. I'd have never checked those wicks, and that bronze bearing would have likely been shot in a few more thousand miles... It really was on borrowed time. As it turned out, I think I rescued it in the nick of time. And discovered the vacuum advance was bad, which for some reason, I'd never previously thought to check.
 
Last edited:
Got it all back together. Here's the finished product.

20160424_153344_zpslb1tfvk5.jpg


20160424_153353_001_zps3ytmyixp.jpg


20160424_154810_zps6k7ou9or.jpg


20160424_154819_zpshyo3hryv.jpg


Back in its native habitat....

20160424_165910_zpscqtfr59k.jpg


Fired up and ran on the first try.... Wasn't really expecting that but I'll take it! The beast is back on the road again. Spunky too! The old girl really has some get up and go in her now.

On the vacuum advance there are two fittings, one screws into the other. I discovered that both were leaking air around the threads. This was addressed using yellow teflon tape such as is used for sealing natural gas lines. It worked very much to my satisfaction, though on these small fittings a bit of trimming was required. The tape provided a perfect air-tight seal.

Some May call this "polishing a turd" but as I don't have thousands to sink into a total body-off restoration at the moment, I'm trying to do every little fix-it or improvement to the best of my ability. Just to look at it, it's hard to believe it's not a new one. I'm definitely glad for the opportunity to get deeper into a distributor than I've ever been before. It makes me feel connected and more "in tune" with the vehicle to really understand at a gut level how each part of it works, what's really deep down inside. I hope this is as deep as I have to go for a while though! Two months to rebuild the distributor, and that's without having to replace bronze bearings or shim it. I'm seriously thinking of having an entire spare distributor vacuum sealed in mylar inside the gun safe, so it's ready to go in case I ever need to swap out what I've got on short notice. Would be nice to have an alternator there too. Those are the only vaguely electronic parts on this truck, and they are pretty easy to swap out with simple tools in short order. One little "gotcha" that in my mind makes this an even more worthy ambition is that there is a known issue with the pertronix ignitor where if the ignition is left on with the engine not running, it can literally melt down the coil and module. They solved that issue for the ignitor II and iii but apparently there is not a version of either of those available for the IH Scout. I'm going to tape a note to the dash so that anyone who uses the vehicle (I'm thinking here about when it's in the shop for something, etc) they will know not to leave the key turned on. Having a spare distributor and coil handy would be nice to have to avoid any lengthy downtime sourcing parts.

This rebuild cost me roughly $200 - around $100 for the pertronix module and a little under $100 for the rebuilt vacuum advance. A totally new distributor would have been about $300 with $100 back if you trade in the old "core". For the same $200 basically I could have swapped out this old core for a whole new unit and saved some time and effort... Honestly, I'm glad to have had the experience and it was worth it to me to be able to say "I've done it". Now, a spare would be nice so I don't have to "do it" in the future when I don't have the luxury of time and availability of parts.

As for the paint, well if you're going to spend two months working on something, it's nice to have something that actually looks like it was worked on, in the end. Makes me smile, anyway. The 3 coats of industrial gray will probably never be looked at by anyone ever again, but I'll know it's there and take satisfaction in it. Same with the 4 stainless screws and washers - necessary? No, but I know they're there and will always look and work just like they do now.

The fact that the vacuum advance is now working, and a sizeable vacuum leak has been stopped, means that I will have to go through and completely re-calibrate/re-tune the engine - the idle rpm is too high and unfortunately it's not a single screw adjustment like on some of my previous vehicles. Not my favorite chore but it's been what, five years or so? Give me another chance to spend some time with the old gal under the hood on a quiet evening.
 
The right thing to put in there, if there isn't something available from IHPA is some wicking felt which is available from mcmaster carr.
 
Back
Top